
Looking for a way to elevate your baked beans game and ditch the store-bought cans? This homemade recipe for better than Bush’s baked beans is just what you need. Canning your own beans not only gives you control over the ingredients but also allows you to enjoy a healthier, more flavorful version of this beloved classic. In this guide, we’ll walk you through everything—from the ingredients to the step-by-step process, as well as tips, tricks, and nutritional insights. Let’s dive in!
Why Make Home Canned Baked Beans?
Making your own baked beans offers several benefits:
- Healthier Option: By controlling what goes into your beans, you can reduce the amount of added sugars, sodium, and preservatives often found in store-bought varieties like Bush’s Baked Beans.
- Cost-Effective: Canning beans in bulk can save you money in the long run. One big batch can last you months!
- Customization: Want more sweetness? Prefer a smoky kick? Homemade beans allow you to tweak the recipe to match your taste perfectly.
- Convenience: Once canned, your homemade beans can be stored for up to a year, providing a quick and easy side dish whenever needed.
Ingredients for Home Canned Better Than Bush’s Baked Beans
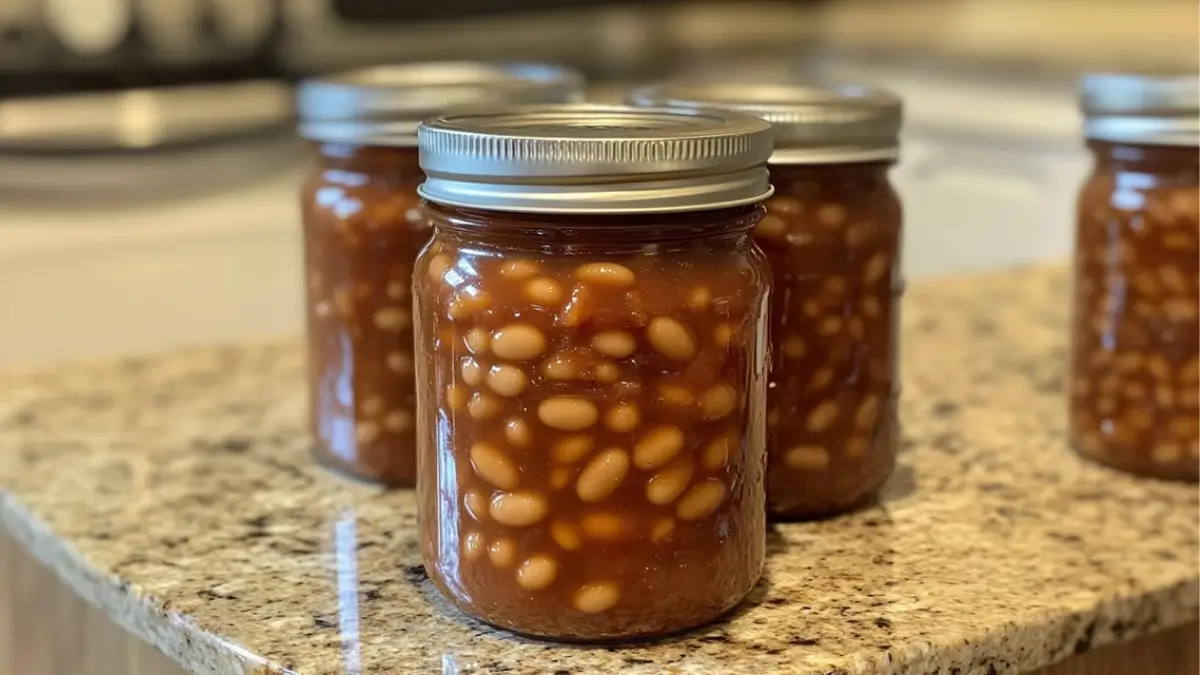
Here’s everything you need to get started. This recipe yields around 7 quarts of canned baked beans, perfect for meal prep or storing for future use.
- 4 pounds navy beans, rinsed and sorted
- 2 quarts tomato juice
- 1 quart tomato sauce
- 1 cup chopped onion
- 2 cups brown sugar (not packed)
- 1/2 cup molasses
- 2 tbsp apple cider vinegar
- 1 tsp allspice
- 2 tsp ground mustard
- 1 tsp salt
- 2 tsp black pepper
Why Navy Beans?
Navy beans are small, mild-flavored, and perfect for soaking up all the delicious flavors in the sauce. Plus, they have a creamy texture once cooked, making them ideal for baked beans. If you want to try something different, pinto beans or great northern beans can be used as well.
Step-by-Step Directions
1. Preheat & Prepare the Beans
Before you can enjoy these delicious baked beans, the navy beans need some prep.
- Start by rinsing your navy beans thoroughly, removing any debris.
- Cover the beans with water in a large pot and bring to a boil.
- Once boiling, remove the pot from heat, cover it, and let the beans sit for 1 hour. This helps soften the beans for the cooking process.
- After an hour, drain and rinse the beans again. Refill the pot with fresh water and simmer the beans for 20 to 30 minutes until they’re partially cooked. You want them to be tender but not mushy since they’ll cook more during the canning process.
2. Prepare the Sauce
The sauce is where all the magic happens! This rich, flavorful sauce brings out the best in the beans, creating that iconic baked bean flavor.
- In a large pot, combine tomato juice, tomato sauce, chopped onion, brown sugar, molasses, apple cider vinegar, allspice, ground mustard, salt, and black pepper.
- Simmer the sauce over medium heat for about 5 minutes, stirring occasionally to make sure everything is well combined. This will allow the flavors to meld together.
3. Fill & Prepare the Jars
Now it’s time to start filling your jars. Make sure your jars are clean and sterilized to avoid any contamination.
- Fill each quart jar with 1 ½ cups of partially cooked beans.
- Pour the simmered sauce over the beans, making sure to leave a 1-inch headspace to allow for proper sealing.
- Remove air bubbles by gently tapping the jars or using a spatula.
- If needed, top off with more sauce to maintain the headspace. Wipe the rims of the jars clean to ensure a good seal.
4. Seal & Process in the Canner
The final step is canning your jars to make sure they’re preserved and safe to store.
- Place the lids on the jars and screw the rings on securely, but don’t overtighten them.
- Process the jars in a pressure canner at 10 pounds of pressure. This ensures that all bacteria, including Clostridium botulinum, is killed during the canning process.
- For quart jars, process for 90 minutes.
- For pint jars, process for 75 minutes.
5. Cool & Store
After processing, allow the jars to cool completely. Once cooled, check that the lids have sealed properly by pressing on the center of each lid—there should be no give. Store your home-canned better than Bush’s baked beans in a cool, dark place for up to a year.
Notes and Tips for Perfect Home Canned Baked Beans
- Adjust Sweetness: If you prefer your beans on the sweeter side, add a little more brown sugar or molasses. For a more savory dish, reduce the sugar.
- Smoky Flavor: Want to add some smoky depth to your beans? Consider adding a teaspoon of smoked paprika or a splash of liquid smoke to the sauce.
- Meat Option: You can also add bacon, ham, or sausage to your beans for a heartier dish. Just make sure to cook the meat before adding it to the jars.
- Check Seals: Always double-check the seals on your jars after processing. If a jar hasn’t sealed properly, refrigerate it and consume within a few days.
Nutritional Information & Health Benefits of Home Canned Baked Beans
Baked beans aren’t just delicious—they’re also packed with nutrients that can benefit your health. When made at home, they tend to be lower in sodium and sugar than store-bought options, making them a healthier choice.
Health Benefits:
- High in Fiber: Navy beans are an excellent source of fiber, which helps regulate digestion and keep you feeling full longer.
- Rich in Protein: Beans provide a plant-based protein source, perfect for those looking to reduce their meat intake.
- Vitamins and Minerals: With the addition of tomato sauce, onions, and molasses, this recipe delivers a good dose of vitamin A, vitamin C, iron, and calcium.
- Low in Fat: This recipe is naturally low in fat, making it a heart-healthy choice.
Nutritional Details (per serving):
- Calories: ~260
- Carbohydrates: 50g
- Protein: 10g
- Fat: 1g
- Saturated Fat: 0g
- Cholesterol: 0mg
- Sodium: 400mg (depending on added salt)
- Fiber: 12g
- Sugar: 18g
- Vitamin A: 15%
- Vitamin C: 20%
- Calcium: 8%
- Iron: 15%
FAQs About Home Canned Baked Beans
If properly sealed and stored in a cool, dark place, your canned baked beans should last up to a year. Always check the seal before consuming.
Absolutely! While navy beans are the traditional choice, you can also use pinto beans, great northern beans, or even black beans. Just be mindful that different beans may have slightly different cooking times.
No, skipping the pressure canning step is not safe. Low-acid foods like beans require pressure canning to eliminate the risk of botulism, a serious foodborne illness. Water bath canning is not sufficient for this recipe.
If you don’t have molasses on hand, you can substitute it with maple syrup, honey, or even more brown sugar. However, this may alter the flavor slightly, so adjust to taste.
Yes! Bacon, ham, or even sausage can be added for a heartier dish. Just ensure that the meat is fully cooked before adding it to the jars for canning.
By following this guide, you’ll soon have your own stock of delicious, homemade better than Bush’s baked beans that you can enjoy anytime. They’re healthier, tastier, and more customizable than anything you’ll find at the store. Plus, there’s nothing quite like the satisfaction of making something from scratch that you can enjoy for months!
More Relevant Recipes
- Caramel Apple Jam
- Caramel Apple Baked Oatmeal
- Loaded Baked Potato with Steak Recipe
- Pumpkin Roll Recipe
Better Than Bush’s Baked Beans
- Total Time: 3 hours
- Yield: 7 quarts (approximately 28 servings)
- Diet: Vegetarian
Description
This homemade version of Better Than Bush’s Baked Beans offers a rich, sweet, and tangy flavor that beats store-bought beans. Perfect for canning, it’s a great side dish for BBQs or family dinners.
Ingredients
- 4 pounds navy beans, rinsed and sorted
- 2 quarts tomato juice
- 1 quart tomato sauce
- 1 cup chopped onion
- 2 cups brown sugar (not packed)
- 1/2 cup molasses
- 2 tbsp apple cider vinegar
- 1 tsp allspice
- 2 tsp ground mustard
- 1 tsp salt
- 2 tsp black pepper
Instructions
Preheat & Prepare the Beans:
Before you can enjoy these delicious baked beans, the navy beans need some prep.
- Start by rinsing your navy beans thoroughly, removing any debris.
- Cover the beans with water in a large pot and bring to a boil.
- Once boiling, remove the pot from heat, cover it, and let the beans sit for 1 hour. This helps soften the beans for the cooking process.
- After an hour, drain and rinse the beans again. Refill the pot with fresh water and simmer the beans for 20 to 30 minutes until they’re partially cooked. You want them to be tender but not mushy since they’ll cook more during the canning process.
Prepare the Sauce:
- The sauce is where all the magic happens! This rich, flavorful sauce brings out the best in the beans, creating that iconic baked bean flavor.
- In a large pot, combine tomato juice, tomato sauce, chopped onion, brown sugar, molasses, apple cider vinegar, allspice, ground mustard, salt, and black pepper.
- Simmer the sauce over medium heat for about 5 minutes, stirring occasionally to make sure everything is well combined. This will allow the flavors to meld together.
Fill & Prepare the Jars:
Now it’s time to start filling your jars. Make sure your jars are clean and sterilized to avoid any contamination.
- Fill each quart jar with 1 ½ cups of partially cooked beans.
- Pour the simmered sauce over the beans, making sure to leave a 1-inch headspace to allow for proper sealing.
- Remove air bubbles by gently tapping the jars or using a spatula.
- If needed, top off with more sauce to maintain the headspace. Wipe the rims of the jars clean to ensure a good seal.
Seal & Process in the Canner:
The final step is canning your jars to make sure they’re preserved and safe to store.
- Place the lids on the jars and screw the rings on securely, but don’t overtighten them.
- Process the jars in a pressure canner at 10 pounds of pressure. This ensures that all bacteria, including Clostridium botulinum, is killed during the canning process.
- For quart jars, process for 90 minutes.
- For pint jars, process for 75 minutes.
Cool & Store:
After processing, allow the jars to cool completely. Once cooled, check that the lids have sealed properly by pressing on the center of each lid—there should be no give. Store your home-canned better than Bush’s baked beans in a cool, dark place for up to a year.
Notes
- Bean Consistency: If you prefer firmer beans, reduce the simmering time in step one. For softer beans, simmer a little longer before adding them to the jars.
- Customize the Flavor: Love a smoky taste? Add a teaspoon of smoked paprika or a dash of liquid smoke to your sauce. Or, for a little heat, toss in some crushed red pepper flakes.
- Storage: Once processed and sealed, these beans can last up to a year when stored in a cool, dry place. Just make sure to label them with the date!
- Serving Suggestions: These beans are perfect as a side dish for BBQs, or even served over toast for a hearty breakfast.
- Prep Time: 1 hour 30 minutes (includes bean soaking)
- Cook Time: 90 minutes (pressure canning)
- Category: Side Dish
- Method: Pressure Canning
- Cuisine: American
Nutrition
- Serving Size: 1/4 quart
- Calories: 260 kcal
- Sugar: 18g
- Sodium: 400mg
- Fat: 1g
- Saturated Fat: 0g
- Unsaturated Fat: 1g
- Trans Fat: 0g
- Carbohydrates: 50g
- Fiber: 12g
- Protein: 10g
- Cholesterol: 0mg