
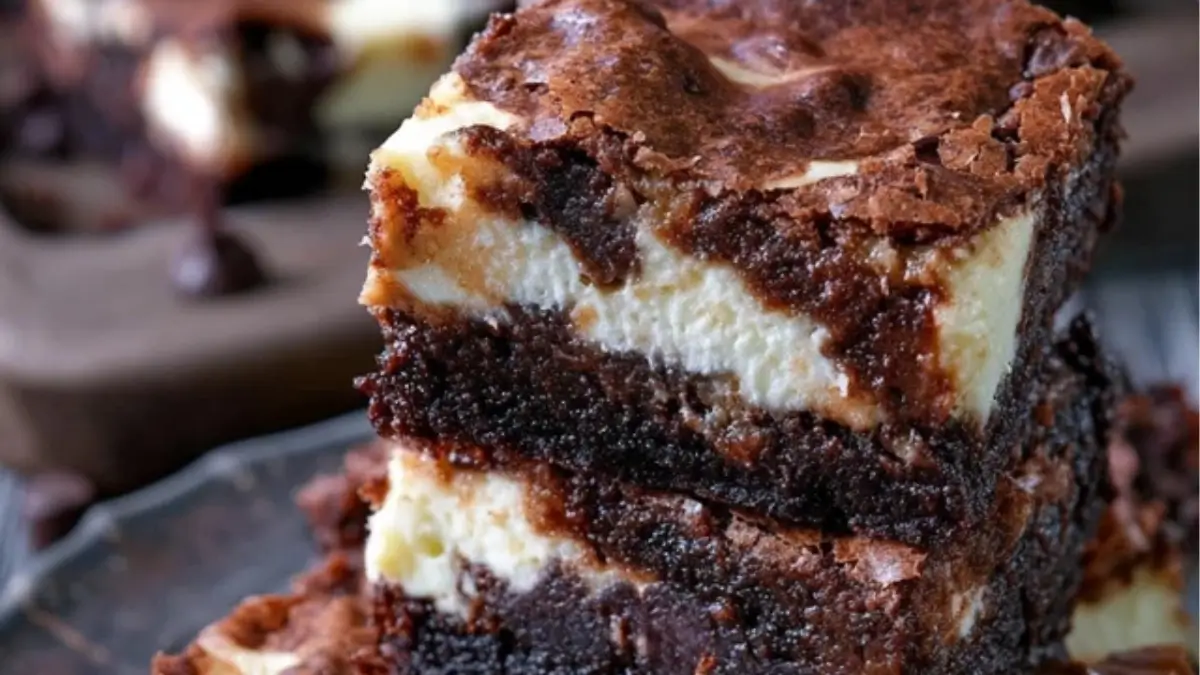
I still remember the first time I made cheesecake brownies. I was in my tiny apartment kitchen, armed with a single mixing bowl, a whisk, and a whole lot of enthusiasm. I wasn’t an expert baker by any means, but something about the swirl of rich chocolate and creamy cheesecake called to me. One hour later, I pulled a pan of marbled magic out of the oven—and instantly fell in love.
Cheesecake brownies are perfect for beginner bakers. They combine two classic favorites in a way that feels impressive but is actually very simple to create. Plus, these brownies offer a wonderful balance: rich chocolate flavor, tangy creaminess, and a dense, satisfying bite. They are time-efficient, easy to assemble, and make a delightful treat that feels a little fancy without any stress.

Why This Recipe is Special
Cheesecake brownies are not just delicious—they are a true beginner’s dream. You don’t need a lot of fancy equipment, and the process is forgiving if you’re still learning your way around a mixer. The combination of brownie batter and cheesecake topping creates beautiful swirls that look artisan-level with very little effort. It’s also a flexible recipe: you can dress it up for a dinner party or enjoy a square with coffee on a quiet afternoon. Plus, with a few ingredient swaps, it can be adapted to suit different dietary needs without losing that irresistible texture and flavor.
Ingredients and Preparation
Brownie Base
- Chocolate (brings deep, rich flavor and fudgy texture)
- Butter (adds moisture and richness to the batter)
- Sugar (sweetens and helps create the crackly top)
- Eggs (bind everything together and add chewiness)
- Vanilla extract (enhances the chocolate flavor)
- All-purpose flour (provides structure without making the brownies too cakey)
- Cocoa powder (intensifies the chocolate flavor)
Cheesecake Swirl
- Cream cheese (offers creamy, tangy contrast to the chocolate)
- Sugar (balances the tartness of the cream cheese)
- Egg (creates a smooth and rich cheesecake layer)
- Vanilla extract (adds warmth and rounds out the flavor)
Alternative Ingredient Suggestions
- Substitute dark chocolate for semi-sweet if you prefer a less sweet brownie.
- Use coconut oil instead of butter for a slight tropical note.
- Swap in Greek yogurt for some of the cream cheese to lighten the cheesecake layer.
- For a gluten-free version, replace all-purpose flour with almond flour or a gluten-free baking blend.
Step-by-Step Instructions
Step 1 Preheat your oven to 350°F and line an 8×8-inch baking pan with parchment paper, leaving an overhang on the sides for easy removal later.
Step 2 Melt the butter and chocolate together in a microwave-safe bowl, heating in short bursts and stirring until smooth. Set aside to cool slightly.
Step 3 In a separate bowl, whisk together the sugar, eggs, and vanilla extract until the mixture looks pale and slightly thickened. This helps to create that signature brownie texture.
Step 4 Pour the melted chocolate mixture into the egg mixture, stirring gently to combine without deflating the air you’ve whipped in.
Step 5 Sift the flour and cocoa powder over the wet ingredients, then fold everything together until just combined. Be careful not to overmix, which can make the brownies tough.
Step 6 In another bowl, beat the cream cheese, sugar, egg, and vanilla extract until completely smooth and creamy. This will be your cheesecake layer.
Step 7 Spread about two-thirds of the brownie batter into the prepared pan. Dollop the cheesecake mixture over the top, then spoon the remaining brownie batter in patches over that.
Step 8 Use a knife or skewer to gently swirl the layers together, creating a marbled effect. Don’t overdo it—you want distinct swirls.
Step 9 Bake for 35-40 minutes, or until the center is just set and a toothpick inserted into a non-cheesecake part comes out with a few moist crumbs.
Step 10 Let the brownies cool completely in the pan before lifting them out using the parchment paper. Chill in the refrigerator for at least an hour for cleaner slices.
Beginner Tips and Notes
If your cream cheese isn’t fully softened, it can create lumps in the cheesecake layer. Let it sit out at room temperature for at least 30 minutes before starting.
If you notice the top browning too quickly during baking, loosely cover the pan with aluminum foil halfway through.
To speed up prep, melt the butter and chocolate while measuring out your other ingredients. Using a stand mixer or hand mixer will make the cheesecake layer extra smooth, but a whisk and strong arms will do the trick too.
If you don’t have parchment paper, butter the pan thoroughly and dust it with cocoa powder to help prevent sticking.
Serving Suggestions
Cheesecake brownies are rich enough to serve on their own, but you can make them even more special by adding a dollop of whipped cream or a scoop of vanilla ice cream.
For a fresh touch, sprinkle fresh berries like raspberries or strawberries on top before serving.
Leftovers can be stored in an airtight container in the refrigerator for up to 5 days. They also freeze beautifully; just wrap individual squares tightly in plastic wrap and store in a freezer bag for up to 2 months.
Conclusion
There’s something truly magical about mastering an easy sheet pan dessert like these cheesecake brownies. They’re a celebration of rich chocolate, creamy cheesecake, and simple joy—all in one pan. I hope you give this lemon herb chicken recipe, I mean these cheesecake brownies, a try in your kitchen soon. Don’t forget to leave a comment and let me know how they turn out for you. Happy baking, friends!
FAQ About Cheesecake Brownies
Cheesecake brownies are done when the edges are set and a toothpick inserted into the brownie part (not the cheesecake swirl) comes out with a few moist crumbs. The center should no longer jiggle excessively when you gently shake the pan.
Yes, you can use a boxed brownie mix for convenience. Prepare the mix according to package instructions, pour two-thirds into the pan, and then follow the cheesecake swirl steps.
Store cheesecake brownies in an airtight container in the refrigerator for up to 5 days. For longer storage, freeze individual squares tightly wrapped for up to 2 months.
If the cream cheese wasn’t fully softened before mixing, it can cause lumps. To fix this next time, let the cream cheese sit at room temperature for at least 30 minutes before beating.
More Relevant Recipes
Print
Cheesecake Brownies
- Total Time: 55 minutes
- Yield: 16 brownies
- Diet: Vegetarian
Description
Rich, fudgy cheesecake brownies swirled with creamy cheesecake, perfect for beginner bakers looking for an easy, impressive dessert.
Ingredients
- Chocolate
- Butter
- Sugar
- Eggs
- Vanilla extract
- All-purpose flour
- Cocoa powder
- Cream cheese
- Sugar (for cheesecake layer)
- Egg (for cheesecake layer)
- Vanilla extract (for cheesecake layer)
Instructions
- Preheat oven to 350°F and line an 8×8-inch pan with parchment paper.
- Melt butter and chocolate together, stirring until smooth. Set aside to cool slightly.
- Whisk sugar, eggs, and vanilla extract until pale and slightly thickened.
- Stir the melted chocolate mixture into the egg mixture gently.
- Sift flour and cocoa powder over the wet ingredients and fold until just combined.
- In a separate bowl, beat cream cheese, sugar, egg, and vanilla extract until smooth and creamy.
- Spread two-thirds of brownie batter into the pan, dollop cheesecake mixture on top, and spoon the remaining brownie batter in patches over it.
- Swirl the layers together with a knife or skewer to create a marbled effect.
- Bake for 35–40 minutes until the center is set and a toothpick comes out with a few moist crumbs.
- Let cool completely, chill for cleaner slices, then serve.
Notes
- Ensure cream cheese is softened to avoid lumps.
- If the top browns too quickly, cover loosely with foil.
- Don’t overmix the batter to maintain a fudgy texture.
- Chill the brownies before slicing for cleaner cuts.
- Brownies can be frozen individually wrapped for up to 2 months.
- Prep Time: 15 minutes
- Cook Time: 35–40 minutes
- Category: Dessert
- Method: Baking
- Cuisine: American
Nutrition
- Serving Size: 1 brownie
- Calories: 220
- Sugar: 18g
- Sodium: 90mg
- Fat: 14g
- Saturated Fat: 8g
- Unsaturated Fat: 5g
- Trans Fat: 0g
- Carbohydrates: 24g
- Fiber: 1g
- Protein: 3g
- Cholesterol: 45mg