
There is something undeniably comforting about a cheesy, crispy wrap filled with juicy chicken and creamy garlic sauce. The first time I made these Cheesy Garlic Chicken Wraps, I was looking for a quick meal after a long day. I wanted something flavorful but effortless—something that didn’t require hours in the kitchen. The result was a restaurant-quality meal in under 30 minutes, and my family was hooked. If you are new to cooking, this recipe is perfect because it is simple, requires basic ingredients, and is almost impossible to mess up.

Why This Recipe is Special
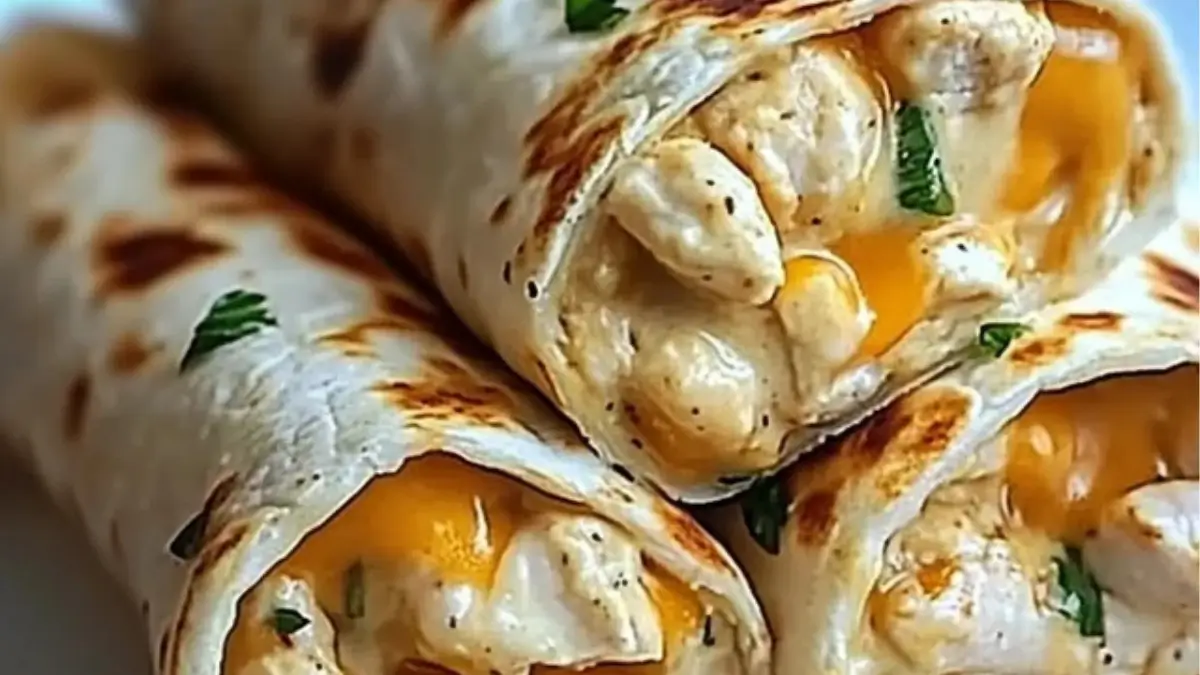
These Cheesy Garlic Chicken Wraps stand out because they combine simple ingredients with bold flavors. The seasoned chicken is juicy and tender, the cheese melts beautifully, and the crispy tortilla gives the wrap a satisfying crunch. The creamy garlic sauce ties everything together, making each bite irresistible. This recipe is also highly customizable—add veggies, swap cheeses, or even use pre-cooked chicken to make it even easier. Whether you are cooking for yourself, your family, or even meal prepping for the week, this recipe delivers on taste, texture, and convenience.
Ingredients and Their Role
- Chicken breast: The protein base of the dish. Chicken breast is lean, cooks quickly, and absorbs flavors well. You can substitute it with rotisserie chicken or even tofu for a vegetarian option.
- Flour tortillas: The wrap holds everything together. Choose fresh, pliable tortillas for the best texture. Whole wheat or low-carb tortillas work as alternatives.
- Cheese blend (cheddar and mozzarella): Cheddar adds sharpness, while mozzarella gives the gooey melt. Pepper jack can be used for a spicier twist.
- Garlic powder: Provides a balanced garlic flavor without the risk of burning fresh garlic.
- Seasonings (onion powder, paprika, salt, and pepper): These enhance the chicken’s flavor, making it more robust. You can experiment with Cajun seasoning or taco seasoning for a different flavor profile.
- Creamy garlic sauce: Adds moisture and richness. Ranch dressing or chipotle mayo can be used as substitutes.
- Olive oil: Helps the seasoning stick to the chicken and ensures a golden sear.
Step-by-Step Instructions
Step 1: Prepare the Chicken. Dice the chicken into small, bite-sized pieces. In a bowl, toss them with olive oil, garlic powder, onion powder, paprika, salt, and pepper. Make sure each piece is well coated. Let it sit for 5 minutes to absorb the flavors while you prepare the tortillas and cheese.
Step 2: Cook the Chicken. Heat a pan over medium heat until hot. Add the seasoned chicken in a single layer. Cook for about 3 minutes per side, letting the chicken develop a golden crust before flipping. Once fully cooked, remove from heat and set aside.
Step 3: Assemble the Wraps. Warm the tortillas slightly to make them more flexible. Spread a layer of creamy garlic sauce on each tortilla, leaving some space around the edges. Evenly distribute the cooked chicken in the center of each tortilla and sprinkle with the cheese blend.
Step 4: Fold the Wraps. Fold the bottom of the tortilla over the filling, then tuck in the sides. Roll it up tightly, ensuring the filling stays inside.
Step 5: Crisp the Wraps. Return the wraps to the pan over medium-low heat. Press gently with a spatula and cook for about 2-3 minutes per side, until the tortillas are golden brown and crispy, and the cheese is melted inside.
Step 6: Serve and Enjoy. Remove the wraps from the pan, slice in half, and serve immediately. Garnish with fresh parsley if desired.
Beginner Tips and Notes
- Don’t overcrowd the pan: Cooking the chicken in batches ensures even browning and prevents steaming.
- Warm the tortillas before assembling: This makes them easier to roll and prevents cracking.
- Make it your own: Add sautéed onions and bell peppers for extra flavor, or use a spicy mayo for a heat boost.
- How to check if the chicken is done: Cut a piece in half; it should be white and opaque inside, with no pink. If using a thermometer, it should read 165°F (75°C).
Serving Suggestions
- Pair with a fresh salad: A simple cucumber or coleslaw salad balances the richness of the wrap.
- Add a side of sweet potato fries: The slight sweetness contrasts beautifully with the savory wrap.
- Dipping sauces: Serve with extra garlic sauce, ranch, or a smoky chipotle dip for added flavor.
Storing and Reheating
- Refrigeration: Store leftover wraps in an airtight container for up to 3 days.
- Reheating: Warm in a pan over medium heat for 2-3 minutes per side to maintain crispiness. Avoid microwaving, as it can make the tortillas soggy.
- Freezing: While possible, it’s best to enjoy fresh. If freezing, wrap individually in foil and reheat in a pan when ready to eat.
Try It and Share Your Experience
These Cheesy Garlic Chicken Wraps are a must-try for beginner cooks looking for an easy, satisfying meal. They are quick to make, customizable, and packed with flavor. If you give this recipe a try, let me know in the comments how it turned out. Did you add your own twist? I’d love to hear about your variations and tips. Happy cooking!
FAQ About Cheesy Garlic Chicken Wraps
Yes, using rotisserie chicken is a great time-saving option. Simply shred the chicken and warm it in a pan with the seasonings before assembling the wraps.
Warming the tortillas for a few seconds in a dry pan or microwave makes them more pliable, preventing cracks when rolling.
Cook the wrapped tortillas in a lightly greased pan over medium-low heat, pressing gently with a spatula. This ensures even browning and crispiness.
Yes, you can prepare the components ahead of time and store them separately. Assemble and crisp them in a pan just before serving for the best texture.
More Relevant Recipes
Print
Cheesy Garlic Chicken Wraps
- Total Time: 25 minutes
- Yield: 4 wraps
Description
These Cheesy Garlic Chicken Wraps are the perfect balance of crispy, cheesy, and garlicky goodness. Ready in just 25 minutes, this easy-to-make dish features juicy seasoned chicken wrapped in a warm tortilla with melted cheese and creamy garlic sauce. Perfect for a quick lunch, busy weeknight dinner, or meal prep option, this beginner-friendly recipe delivers restaurant-quality flavor in every bite.
Ingredients
Main Ingredients
- 2 large chicken breasts, diced
- 4 large flour tortillas
Seasonings & Oil
- 1 tablespoon olive oil
- 2 teaspoons garlic powder
- 1 teaspoon onion powder
- 1 teaspoon paprika
- Salt and pepper, to taste
Cheese & Sauce
- 1 cup shredded cheddar cheese
- ½ cup shredded mozzarella cheese
- ½ cup creamy garlic sauce
Garnish
- Fresh parsley, chopped (optional)
Instructions
- Prepare the Chicken: Dice the chicken into small, bite-sized pieces. In a bowl, mix the chicken with olive oil, garlic powder, onion powder, paprika, salt, and pepper, ensuring each piece is well-coated. Let it rest for 5 minutes to absorb the flavors.
- Cook the Chicken: Heat a pan over medium heat. Add the seasoned chicken in a single layer and let it cook undisturbed for about 3 minutes to develop a golden crust. Stir and continue cooking for another 3–4 minutes until the chicken is fully cooked through and no longer pink in the center. Remove from heat and set aside.
- Prepare the Tortillas: Warm the tortillas in a dry pan or microwave for a few seconds to make them more flexible. Spread a layer of creamy garlic sauce on each tortilla, leaving a small border around the edges.
- Assemble the Wraps: Evenly distribute the cooked chicken in the center of each tortilla, then sprinkle with shredded cheddar and mozzarella cheese.
- Fold the Wraps: Fold the bottom of the tortilla over the filling, then tuck in the sides before rolling tightly to secure everything inside.
- Crisp the Wraps: Heat a pan over medium-low heat. Place the wraps seam-side down and press gently with a spatula. Cook for 2–3 minutes per side until the tortillas are golden brown and crispy, and the cheese is fully melted inside.
- Serve and Enjoy: Remove from the pan, slice in half, and serve immediately. Garnish with fresh parsley if desired.
Notes
- For a spicier version, add red pepper flakes or swap cheddar for pepper jack cheese.
- Add sautéed onions and bell peppers for extra flavor and texture.
- If using pre-cooked chicken, warm it with the seasonings in a pan before assembling the wraps.
- Store leftover wraps in an airtight container in the fridge for up to 3 days and reheat in a pan to maintain crispiness.
- Prep Time: 10 minutes
- Cook Time: 15 minutes
- Category: Main Course
- Method: Stovetop
- Cuisine: American, Tex-Mex
Nutrition
- Serving Size: 1 wrap
- Calories: 400
- Sugar: 2g
- Sodium: 580mg
- Fat: 18g
- Saturated Fat: 8g
- Unsaturated Fat: 9g
- Trans Fat: 0g
- Carbohydrates: 30g
- Fiber: 2g
- Protein: 30g
- Cholesterol: 85mg