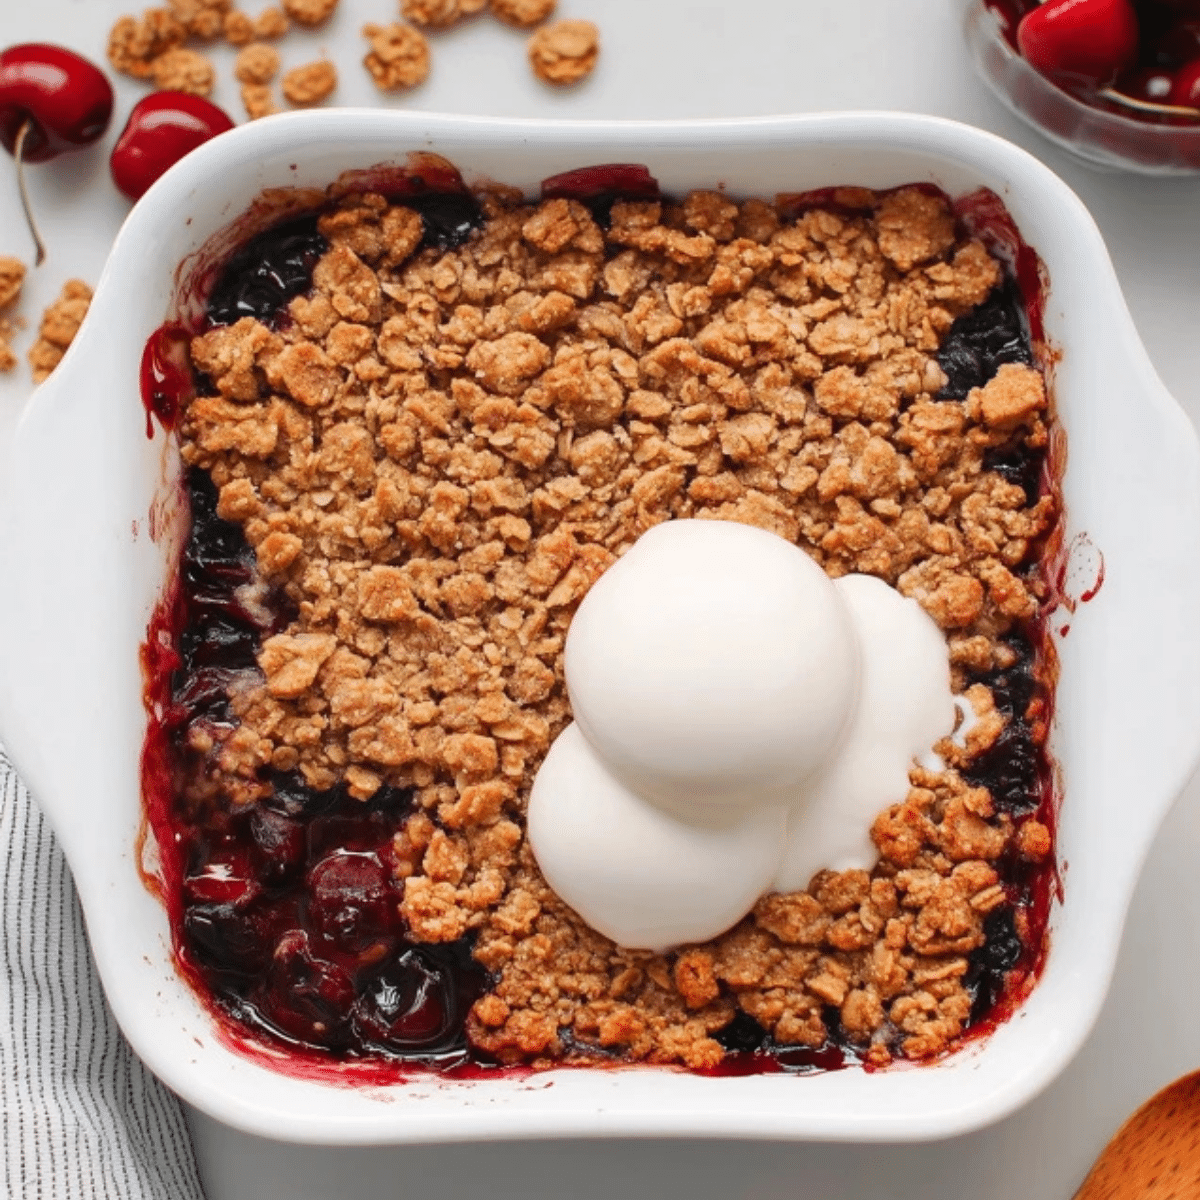
A warm, bubbly cherry crisp straight from the oven is the kind of comforting dessert that never goes out of style. This recipe delivers all the cozy charm of cherry pie without the fuss of making a crust. With its juicy cherry filling and golden oat topping, it’s a breeze to make and perfect for last-minute guests, family gatherings, or a spontaneous treat. Whether using fresh, frozen, or canned cherries, this cherry crisp comes together quickly, offering a rich burst of flavor, balanced sweetness, and a delightful crunch in every bite.
Table of Contents
Why This Cherry Crisp Will Be Your Go-To Dessert
This cherry crisp recipe is loved for its simplicity and versatility. It skips the pie crust but retains that crave-worthy balance of sweet fruit and buttery topping. Here’s what makes it stand out:
- Quick & Easy: One bowl, no mixers, and minimal prep time.
- Customizable: Works with fresh, frozen, or canned cherries.
- Family-Friendly: Loved by kids and adults alike.
- Perfect Texture: A crisp golden topping with a juicy, bubbling cherry base.
- All-Season Favorite: Enjoy it in summer with fresh cherries or in winter with pie filling.
Whether you’re hosting a dinner party or simply want a quick weeknight treat, this cherry crisp is a guaranteed crowd-pleaser.
Cherry Crisp Ingredients and Their Delicious Roles
- Flour: Provides structure to the crisp topping and helps it hold its crumbly shape.
- Old-Fashioned Oats: Add hearty texture and a classic crisp feel.
- Brown Sugar: Deepens the flavor with a rich molasses note.
- Cinnamon: Brings a warm spice that complements the cherries perfectly.
- Nutmeg (optional): Enhances complexity with a subtle earthy kick.
- Baking Soda: Adds a slight lift to the topping.
- Salt: Balances sweetness and enhances all other flavors.
- Cold Unsalted Butter: Ensures a crisp and flaky crumble topping.
- Cherry Pie Filling or Fresh/Frozen Cherries: The sweet-tart heart of the dish, providing juicy bursts of flavor in every spoonful.
Ingredient Swaps and Substitutions
- Gluten-Free Option: Use a 1:1 gluten-free flour blend and certified gluten-free oats.
- Vegan Version: Substitute with vegan butter and check your cherry filling for animal products.
- Natural Sweeteners: Coconut sugar or maple sugar can replace brown sugar for a less refined option.
- Fresh Cherry Alternative: Mix fresh or thawed cherries with sugar, cornstarch, vanilla, and orange juice for homemade filling.
- Add a Crunch: Throw in chopped almonds or pecans to the topping for extra texture and nuttiness.
Step-by-Step Instructions for the Best Cherry Crisp
- Prep the Bakeware
Line a sheet pan with parchment paper. Lightly grease a 9×9-inch baking dish. Preheat oven to 350°F (175°C). - Mix the Crisp Topping
In a large mixing bowl, combine flour, oats, brown sugar, cinnamon, nutmeg (if using), baking soda, and salt. Add the cold, cubed butter and coat it in the dry mix. Use a pastry cutter or your fingertips to cut the butter into the dry ingredients until the mixture becomes crumbly. If the mixture gets warm, chill it for 15–20 minutes before topping. - Prepare the Cherry Filling
If using canned cherry pie filling, spread it evenly in the prepared dish.
If using fresh or frozen cherries:- Mix 4½ cups halved cherries with ⅔ cup sugar, ¼ cup cornstarch, 1 tsp vanilla extract, ⅛ tsp almond extract (optional), and 2 tbsp fresh orange juice.
- Gently toss and pour into the dish.
- Assemble
Sprinkle the crisp topping evenly over the cherries. Do not press the topping down—this ensures it stays light and crisp. - Bake
Place the dish on the prepared sheet pan. Bake for 40–50 minutes until the topping is golden and the filling bubbles at the edges. If the topping begins to brown too quickly, loosely tent with foil during the last 10–15 minutes. - Cool and Serve
Let the cherry crisp cool for 15–20 minutes before serving. This allows the filling to thicken slightly. Serve warm with a scoop of vanilla ice cream or a generous dollop of whipped cream.
Pro Tips to Perfect Your Cherry Crisp
- Always Use Cold Butter: Warm butter blends too much into the dry ingredients, resulting in a greasy rather than crumbly topping.
- Don’t Pack the Topping: Simply sprinkle it over the fruit. Pressing it down results in a dense crust instead of a crisp.
- Bake on a Sheet Pan: Cherry filling may bubble over—this saves your oven from sticky messes.
- Don’t Skip the Cooling Time: Cooling for 15–20 minutes helps set the filling and enhances flavor.
- Fresh vs. Canned: Fresh cherries offer the best flavor, but canned pie filling is the fastest option and still delivers great taste.
Pairing Suggestions and Flavor Variations
- Serve With:
- Vanilla bean ice cream
- Fresh whipped cream
- Greek yogurt for a healthier touch
- Add-Ins & Twists:
- A splash of bourbon or almond extract in the cherry filling for depth
- Crushed almonds or walnuts in the topping
- A handful of blueberries or raspberries for a mixed berry crisp
- Lemon zest added to the topping for brightness
- Make it Gluten-Free: Swap in a certified gluten-free flour and oats.
- Make it Vegan: Use plant-based butter and ensure your cherry filling is free of dairy or animal byproducts.
- Mini Servings: Bake in ramekins for elegant, individual desserts.
Seasonal Appeal and Storage Tips
Cherry crisp shines in every season—thanks to the ability to use canned or frozen cherries, it’s just as perfect in December as it is in July.
- Refrigerate: Store leftovers covered in the fridge for up to 3 days. Reheat uncovered in a 350°F oven for 10–15 minutes to revive the crisp texture.
- Freeze (Unbaked): Assemble the crisp, cover tightly, and freeze for up to 3 months. Bake directly from frozen, adding 10–15 extra minutes to the baking time.
- Freeze (Baked): Cool completely, wrap tightly, and freeze. Thaw in the fridge overnight, then reheat in the oven to crisp the topping again.
Whether you’re satisfying a weeknight sweet tooth or capping off a holiday meal, this cherry crisp recipe brings effortless elegance and unbeatable flavor to the table—every time.
Wrapping It Up: The Only Cherry Crisp Recipe You’ll Ever Need
This cherry crisp recipe brings the comforting flavors of a traditional fruit dessert to your table with minimal effort and maximum reward. Whether you’re baking with fresh cherries at the height of summer or using pantry staples in the off-season, this recipe adapts beautifully. The crisp oat topping paired with the luscious cherry filling is nostalgic, soul-satisfying, and always a hit with guests and family alike.
Serve it warm with ice cream, prep it ahead for holiday dinners, or freeze it for future cravings — this cherry crisp is your reliable go-to for a no-fuss, all-flavor dessert. Once you try it, it’s bound to become a regular in your baking rotation.
Frequently Asked Questions About Cherry Crisp
1. Can I use canned cherry pie filling instead of fresh cherries?
Absolutely. Using canned cherry pie filling is the quickest option and ideal when fresh cherries aren’t in season. It saves time and still gives you that sweet-tart cherry flavor. However, fresh cherries will give a slightly brighter, more natural taste and texture.
2. How do I make cherry crisp gluten-free?
To make this recipe gluten-free, simply replace the all-purpose flour with a certified gluten-free flour blend and use gluten-free rolled oats. The texture and flavor will still be rich and satisfying. Make sure your cherry pie filling or other add-ins are gluten-free as well.
3. Why is my cherry crisp topping soggy?
A soggy topping usually happens when:
You use melted or soft butter instead of cold, cubed butter.
The topping is packed down instead of loosely sprinkled.
The crisp was covered while cooling, trapping steam and softening the crumble.
For best results, use cold butter, avoid overmixing, and allow the crisp to cool uncovered to maintain that perfect crunch.
More Relevant Recipes
- Apple Crumble with Brown Butter Pecan Topping: This cozy dessert features tender spiced apples topped with a rich brown butter pecan crumble. It offers a similar warm, buttery crunch and fruity filling as the cherry crisp, making it a perfect seasonal alternative.
- Salted Caramel Apple Pie Cheesecake: Combining the flavors of apple pie and creamy cheesecake, this indulgent dessert is layered with sweet apples, a graham crust, and a drizzle of salted caramel. It’s ideal for fans of fruit-forward, rich bakes like cherry crisp.
- Apple Cider Cheesecake: With the tang of cheesecake and the spiced sweetness of apple cider, this dessert captures the essence of fall in every bite. A smooth and creamy option that pairs beautifully with the rustic appeal of crisps and cobblers.

Cherry Crisp
- Total Time: 1 hour 5 minutes
- Yield: 6 servings
- Diet: Vegetarian
Description
This Cherry Crisp recipe is an easy, crowd-pleasing dessert made with sweet cherries and topped with a golden, buttery oat crumble. Serve it warm with a scoop of vanilla ice cream for the ultimate treat — perfect for any season, whether you’re using fresh, frozen, or canned cherries.
Ingredients
- 1 cup all-purpose flour
- 1 cup old-fashioned oats
- 1 cup light brown sugar, lightly packed
- 1 teaspoon ground cinnamon
- 1/4 teaspoon ground nutmeg (optional)
- 1/2 teaspoon baking soda
- 1 teaspoon salt
- 12 tablespoons unsalted butter, cold and cubed
- 2 (21-ounce) cans cherry pie filling
- OR: 4 1/2 cups pitted cherries, halved
- 2/3 cup granulated sugar (for fresh/frozen cherries)
- 1/4 cup cornstarch (for fresh/frozen cherries)
- 1 teaspoon vanilla extract (for fresh/frozen cherries)
- 1/8 teaspoon almond extract (optional, for fresh/frozen cherries)
- 2 tablespoons fresh orange juice (for fresh/frozen cherries)
Instructions
- Preheat oven to 350°F (175°C). Lightly grease a 9×9-inch baking dish and line a sheet pan with parchment paper.
- In a large bowl, mix flour, oats, brown sugar, cinnamon, nutmeg (if using), baking soda, and salt.
- Add the cold, cubed butter and cut it into the dry ingredients using a pastry cutter or fingertips until the mixture resembles coarse crumbs. Chill if needed.
- If using cherry pie filling, spread it evenly in the baking dish. If using fresh or frozen cherries, combine them with sugar, cornstarch, vanilla, almond extract (optional), and orange juice before adding to the dish.
- Sprinkle the oat topping evenly over the cherry filling without pressing it down.
- Place the baking dish on the prepared sheet pan. Bake for 40–50 minutes until golden and bubbly. Tent with foil if browning too quickly.
- Let the crisp cool for 15–20 minutes before serving.
- Serve warm with vanilla ice cream or whipped cream.
Notes
- Use cold butter for the crispiest topping.
- Don’t press the topping—sprinkle it loosely to keep it airy.
- Baking on a sheet pan prevents messy spills.
- Best enjoyed fresh, but leftovers can be stored for up to 3 days.
- Reheat uncovered in the oven to re-crisp the topping.
- You can freeze it unbaked and bake from frozen with 10–15 extra minutes.
- Prep Time: 20 minutes
- Cook Time: 45 minutes
- Category: Dessert
- Method: Baking
- Cuisine: American
Nutrition
- Serving Size: 1 serving
- Calories: 708
- Sugar: 36g
- Sodium: 716mg
- Fat: 25g
- Saturated Fat: 15g
- Unsaturated Fat: 8g
- Trans Fat: 1g
- Carbohydrates: 117g
- Fiber: 3g
- Protein: 5g
- Cholesterol: 64mg

