
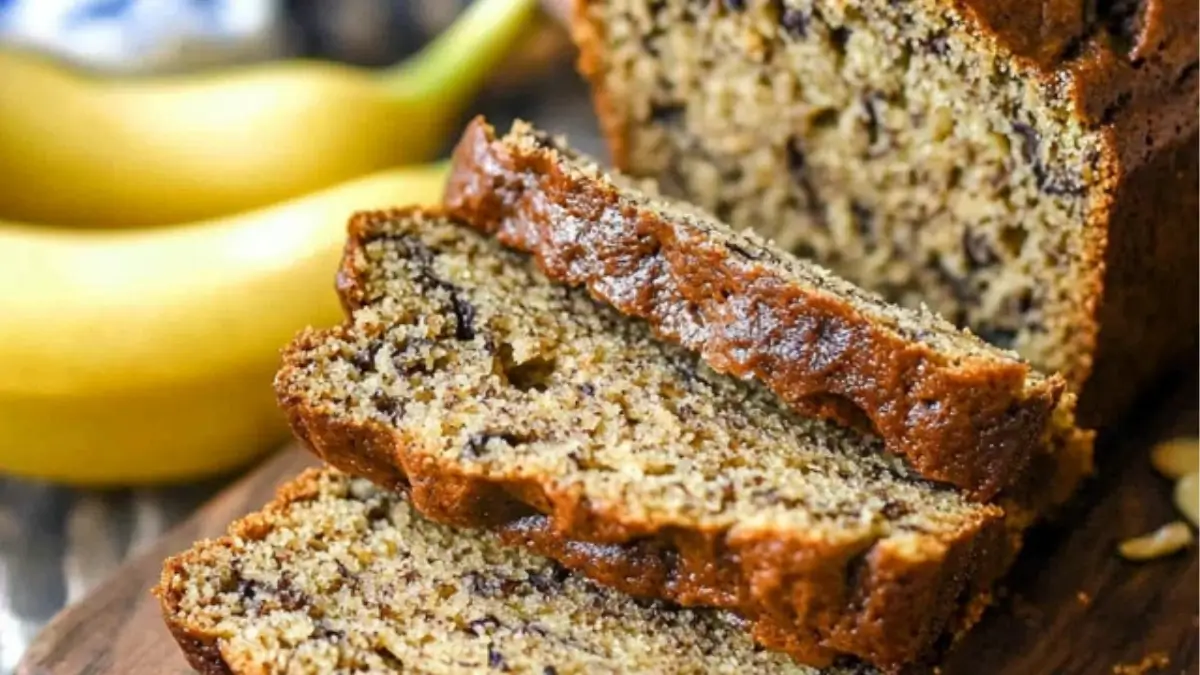
Growing up, the smell of banana bread baking in the oven was a surefire way to bring the family together. My grandmother had a knack for turning overripe bananas into the most comforting, moist loaf of banana nut bread. She always said, “Waste not, want not,” and this recipe was her way of ensuring every banana found a delicious purpose.
If you’ve never made banana nut bread before, this is the perfect place to start. It’s a no-fuss, one-bowl recipe that requires minimal effort but delivers maximum flavor. Whether you’re looking for a quick breakfast, a cozy afternoon snack, or a thoughtful homemade gift, this recipe has you covered.

Why This Recipe is Special
Banana nut bread is more than just a way to use up overripe bananas—it’s a warm, nutty, and slightly sweet treat that fits any occasion. What makes this version stand out?
- Beginner-Friendly – No fancy techniques, just simple mixing and baking.
- Super Moist – Thanks to the perfect ratio of butter and bananas.
- Rich in Flavor – Warm spices like cinnamon and nutmeg add depth.
- Customizable – Swap out nuts, add chocolate chips, or make it gluten-free.
- Better with Time – The flavors deepen and the bread gets even more tender after a day.
Ingredients and Their Role
Each ingredient in this recipe plays an important part in creating the perfect loaf.
- Overripe Bananas – The star ingredient, providing natural sweetness and moisture. The darker the banana, the sweeter and more flavorful your bread will be.
- Butter – Adds richness and helps create a soft, tender texture. You can substitute it with vegetable oil for a slightly different texture.
- Sugar – Provides sweetness, balancing the bananas’ natural flavor. You can reduce the sugar slightly or swap it for honey or maple syrup for a different sweetness profile.
- Egg – Helps bind everything together, ensuring a fluffy, well-structured loaf.
- Vanilla Extract – Enhances the flavor with a hint of warmth.
- All-Purpose Flour – The base of the batter. You can swap half of it with whole wheat flour for a nuttier taste.
- Baking Soda – The key leavening agent that gives the bread its rise.
- Salt – Enhances all the flavors and keeps the sweetness balanced.
- Cinnamon & Nutmeg – Provide a warm, slightly spiced note that complements the bananas beautifully.
- Chopped Walnuts – Add crunch and a rich nutty flavor. You can replace them with pecans, almonds, or even leave them out for a nut-free version.
Step-by-Step Instructions
Step 1: Preheat your oven to 350°F (175°C) and grease a loaf pan with butter or non-stick spray. This prevents the bread from sticking and makes for easy removal.
Step 2: In a large mixing bowl, mash the bananas with a fork until mostly smooth. A few small lumps are okay—they add texture to the bread.
Step 3: Add the melted butter, sugar, egg, and vanilla extract to the bananas. Stir until everything is well combined.
Step 4: In a separate bowl, whisk together the flour, baking soda, salt, cinnamon, and nutmeg. This helps distribute the leavening agents evenly for a consistent rise.
Step 5: Gradually add the dry ingredients to the wet ingredients, stirring gently with a wooden spoon or spatula. Mix just until no dry streaks remain—over-mixing can lead to a dense loaf.
Step 6: Fold in the chopped walnuts, ensuring they are evenly distributed throughout the batter.
Step 7: Pour the batter into the prepared loaf pan and smooth the top with a spatula.
Step 8: Bake for 50-60 minutes, or until a toothpick inserted into the center comes out clean. If the top starts browning too quickly, tent it with foil.
Step 9: Let the bread cool in the pan for 10 minutes before transferring it to a wire rack to cool completely.
Beginner Tips and Notes
- Check for Ripeness: The best bananas for banana bread are dark, soft, and speckled. If your bananas aren’t ripe enough, you can ripen them quickly by baking them in the oven at 300°F for 15-20 minutes.
- Don’t Over-Mix: Stirring too much can make the bread tough. Mix just until combined for a tender texture.
- Use the Right Pan: A light-colored loaf pan works best. Dark pans can cause the edges to brown too quickly.
- Storage Tip: Wrap the cooled bread in plastic wrap and store at room temperature for up to three days or in the fridge for up to a week. It can also be frozen for up to three months.
Serving Suggestions
- Classic and Simple: Enjoy a warm slice with a pat of butter.
- Nut Butter Delight: Spread almond or peanut butter on top for extra richness.
- Sweet Indulgence: Drizzle with honey or maple syrup for a naturally sweet treat.
- Coffee Pairing: Perfect alongside a cup of coffee or tea.
- Dessert Twist: Toast a slice and serve with a scoop of vanilla ice cream.
Conclusion
Banana nut bread is one of those classic, foolproof recipes that every beginner cook should have in their collection. It’s easy, forgiving, and always a crowd-pleaser. Whether you make it for breakfast, as a snack, or as a homemade gift, this recipe is sure to become a favorite.
Have you tried this banana nut bread recipe? Let me know in the comments how it turned out and if you made any fun variations. Happy baking!
FAQ About Banana Nut Bread
Yes, you can omit the nuts entirely or replace them with chocolate chips, dried fruit, or shredded coconut for a different texture and flavor.
Insert a toothpick into the center of the loaf. If it comes out clean or with a few dry crumbs, the bread is done. If there’s wet batter on the toothpick, bake for a few more minutes and check again.
Yes, but make sure to thaw them first and drain any excess liquid. Frozen bananas tend to release more moisture, which can affect the texture of the bread.
You can substitute baking soda with baking powder, but you’ll need to use three times the amount. However, this may slightly alter the texture of the bread.
More Relevant Recipes
- The Ultimate Beginner’s Guide to Easy Banana Bread
- Easy Banana Bread Recipe
- Chocolate Chip Banana Bread
Classic Banana Nut Bread
- Total Time: 1 hour 5 minutes
- Yield: 12 slices
Description
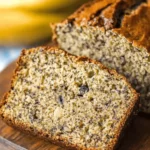
This moist and flavorful banana nut bread is a classic, easy-to-make treat packed with ripe bananas and crunchy walnuts. Perfect for breakfast, snacks, or dessert, this simple homemade loaf stays soft and delicious for days.
Ingredients
- 1 ½ cups all-purpose flour
- 1 teaspoon baking soda
- ¼ teaspoon salt
- Pinch of cinnamon
- Pinch of nutmeg
- 1 ½ cups mashed bananas (about 3 large bananas)
- 6 tablespoons melted butter, slightly cooled
- ¾ cup sugar
- 1 large egg
- 1 teaspoon vanilla extract
- 1 cup chopped walnuts
Instructions
- Preheat the oven and prepare the pan: Set your oven to 350°F (175°C) and grease an 8½ x 4½-inch loaf pan with butter or non-stick spray to prevent sticking.
- Mix the dry ingredients: In a medium-sized bowl, whisk together the flour, baking soda, salt, cinnamon, and nutmeg to evenly distribute the leavening agent and spices.
- Combine the wet ingredients: In a separate large mixing bowl, mash the ripe bananas until mostly smooth, then whisk in the melted butter, sugar, egg, and vanilla extract until fully combined.
- Incorporate the dry into the wet: Gradually add the flour mixture to the banana mixture, stirring gently with a spatula or wooden spoon just until no dry streaks remain. Avoid over-mixing to keep the bread tender.
- Fold in the walnuts: Gently stir in the chopped walnuts, ensuring they are evenly distributed throughout the batter for a crunchy texture in every bite.
- Transfer and bake: Pour the batter into the prepared loaf pan, smoothing the top with a spatula. Bake for 50-60 minutes, or until a toothpick inserted into the center comes out clean. If the top browns too quickly, tent it with aluminum foil during the last 10 minutes.
- Cool before serving: Let the bread cool in the pan for about 10 minutes before transferring it to a wire rack to cool completely. This helps it set properly and makes slicing easier.
Notes
- For extra moisture, add ¼ cup of sour cream or yogurt to the batter.
- Swap walnuts for pecans, almonds, or even sunflower seeds for a nut-free version.
- To make banana muffins, divide the batter into a muffin tin and bake at 350°F for 18-22 minutes.
- If using unsalted butter, increase the salt to ½ teaspoon for balanced flavor.
- Prep Time: 15 minutes
- Cook Time: 50 minutes
- Category: Bread, Breakfast
- Method: Baking
- Cuisine: American
Nutrition
- Serving Size: 1 slice
- Calories: 251
- Sugar: 16g
- Sodium: 192mg
- Fat: 13g
- Saturated Fat: 4g
- Unsaturated Fat: 9g
- Trans Fat: 0.2g
- Carbohydrates: 32g
- Fiber: 2g
- Protein: 4g
- Cholesterol: 31mg