
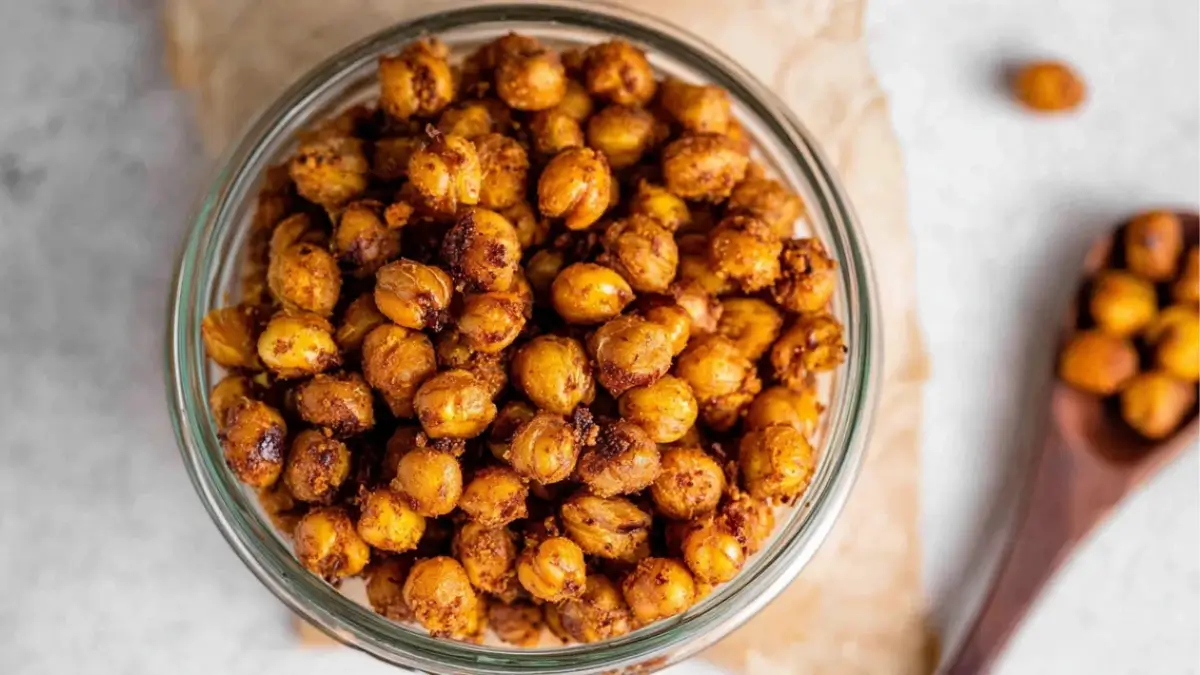
There’s something nostalgic about raiding the pantry for a satisfying snack, and for me, it all started with a bag of roasted chickpeas I once found while studying late into the night. It was crunchy, savory, and surprisingly filling. That bite planted a seed for one of my favorite homemade snacks today—crispy air fryer chickpeas. Whether you’re snacking between Zoom calls or looking for that perfect salad topping, this recipe is the healthy hero your snack game needs.
What makes this recipe shine isn’t just its incredible crunch. It’s the simplicity. With just a few pantry staples, one appliance, and less than 20 minutes, you’ll have a high-protein, fiber-rich snack that’s also vegan and gluten-free. Perfect for those seeking quick and healthy meals without complicated steps or long prep times.

Why This Recipe is Special
These crispy chickpeas are a beginner’s dream. With minimal ingredients and no special skills needed, they’re the perfect entry point into air fryer cooking. The air fryer gives them that irresistible crunch without needing excess oil, unlike oven methods that can turn out uneven or soggy. You can prep a batch while cooking dinner or watching a show, and store them for the whole week. They’re also incredibly versatile—snack, side, or crunchy topping, all in one.
Ingredients and Preparation
Chickpeas
The base of the recipe, chickpeas are packed with protein, fiber, and iron. Canned chickpeas are perfect for this recipe, making the prep quick and easy.
Olive Oil
Used to coat the chickpeas so the spices adhere and crisp up during cooking. Olive oil also adds heart-healthy fats and enhances the final flavor. Avocado oil is a great substitute for its high smoke point and mild taste.
Paprika
Adds a warm, smoky depth. Smoked or sweet paprika both work, and you can explore different varieties depending on your flavor preference.
Garlic Powder
Infuses a savory umami layer that elevates the chickpeas beyond basic.
Onion Powder
Contributes a subtle sweetness and rounds out the flavor profile.
Salt
Essential for bringing all the flavors together. Sea salt is best, but kosher or table salt will do in a pinch.
Optional: Add a pinch of cayenne for heat, or swap in curry powder, cumin, or Italian herbs to switch things up.
Step-by-Step Instructions
Step 1
Start by draining and rinsing a can of chickpeas. Spread them on a clean kitchen towel or paper towels and gently pat them dry. Don’t stress about getting them bone-dry—a quick blot is enough to avoid sogginess.
Step 2
Transfer the chickpeas to a mixing bowl. Add a drizzle of olive oil and sprinkle in your seasonings—paprika, garlic powder, onion powder, and salt. Stir or shake to evenly coat every chickpea.
Step 3
Preheat your air fryer to 400°F (200°C) for a few minutes. If your model doesn’t have a preheat function, just run it empty for 2–3 minutes.
Step 4
Pour the seasoned chickpeas into the air fryer basket. Be sure they’re in a single layer so they cook evenly. Set the timer for 15 minutes.
Step 5
Every 5 minutes, give the basket a good shake. This helps prevent burning and ensures all sides get crispy. At the end of 15 minutes, the chickpeas should be golden and crunchy. Taste one—if it’s not quite crispy, give it 2 more minutes.
Step 6
Let them cool completely before storing. This is crucial to maintaining their crispiness.
Beginner Tips and Notes
- Too Soft? If your chickpeas turn out soft, they likely needed to cook longer or weren’t dried enough. Just pop them back in the air fryer for a few minutes.
- Spices Burned? Be sure to shake the basket regularly. Spices can scorch if left sitting.
- Prep Hack: Open the can and rinse chickpeas earlier in the day to save time later. Dry them and store in the fridge until you’re ready to cook.
- No Air Fryer? You can bake them at 400°F for about 30–40 minutes, shaking halfway. But note, they may not turn out quite as crisp.
Serving Suggestions
These crispy chickpeas go far beyond snack duty.
- Toss them on a salad to replace croutons with a protein-packed crunch.
- Sprinkle over soups, especially creamy ones like butternut squash or tomato basil.
- Pair with a dip, like hummus, tzatziki, or even Greek yogurt seasoned with lemon and herbs.
Storage Tips: Once completely cooled, store them in an airtight jar or container in a cool, dry pantry. They stay crispy for about 5–7 days. If they lose crunch, just reheat in the air fryer for a few minutes.
Conclusion
If you’re looking to master quick and healthy meals with minimal effort, these crispy air fryer chickpeas are the way to go. They’re easy to make, highly customizable, and perfect for beginners learning their way around a kitchen or an air fryer. Try them out and let me know how yours turned out—your feedback could help another beginner feel a little more confident. Share your spice twists, serving ideas, or even kitchen fails in the comments. Let’s learn and crunch together.
FAQ About Crispy Air Fryer Chickpeas
1. Why are my air fryer chickpeas not crispy?
If your chickpeas aren’t crispy, they may still contain too much moisture. Be sure to dry them well before cooking and spread them in a single layer in the air fryer. Cooking for the full 15 minutes (or a few extra) also helps achieve that perfect crunch.
2. How do I keep crispy chickpeas crunchy after cooking?
Allow the chickpeas to cool completely before storing. Then, place them in an airtight container in a cool, dry place. Avoid refrigerating, as that introduces moisture and softens them.
3. Can I use dried chickpeas instead of canned?
Yes, but you’ll need to cook and soften the dried chickpeas first. Soak them overnight, boil until tender, then dry thoroughly before seasoning and air frying. This adds prep time but works well.
4. Are crispy chickpeas a healthy snack?
Absolutely! They’re high in protein and fiber, low in saturated fat, and completely plant-based. Using minimal oil makes them a healthier alternative to chips or crackers.
More Relevant Recipes
Print
Crispy Air Fryer Chickpeas
- Total Time: 20 minutes
- Yield: About 1 cup
- Diet: Vegan
Description
These crispy air fryer chickpeas are a quick, healthy, and beginner-friendly snack made with simple pantry ingredients in just 15 minutes.
Ingredients
- 1 x 400 gram can chickpeas
- 1 tablespoon olive oil
- 1/2 teaspoon paprika
- 1/2 teaspoon garlic powder
- 1/4 teaspoon onion powder
- 1/4 teaspoon sea salt
- Optional: pinch of cayenne pepper
Instructions
- Drain and rinse the canned chickpeas, then pat them dry using paper towels or a clean kitchen towel.
- Place the chickpeas in a mixing bowl, then add olive oil, paprika, garlic powder, onion powder, and salt. Mix well until evenly coated.
- Preheat your air fryer to 400°F (200°C) for 2–3 minutes, or according to your model’s instructions.
- Add the seasoned chickpeas to the air fryer basket in a single layer.
- Cook for 15 minutes, shaking the basket every 5 minutes to ensure even cooking and prevent burning.
- Once golden and crispy, remove the chickpeas and let them cool completely before storing.
Notes
- Ensure chickpeas are as dry as possible before air frying for maximum crispiness.
- Shaking the basket during cooking helps cook evenly and avoids burning spices.
- Store cooled chickpeas in an airtight container in a cool, dry place to retain crunch.
- You can swap or add spices like cumin, curry powder, or chili for variety.
- Prep Time: 5 minutes
- Cook Time: 15 minutes
- Category: Snack
- Method: Air Fryer
- Cuisine: Global
Nutrition
- Serving Size: 1/4 cup
- Calories: 34
- Sugar: 0.1g
- Sodium: 146mg
- Fat: 4g
- Saturated Fat: 0.5g
- Unsaturated Fat: 3.4g
- Trans Fat: 0g
- Carbohydrates: 1g
- Fiber: 0.2g
- Protein: 0.1g
- Cholesterol: 0mg