
There is something truly comforting about Chinese takeout, and sesame chicken is one of those dishes that always hits the spot. I remember the first time I tried it—it was at a small family-owned restaurant, and the combination of crispy chicken coated in a glossy, sweet-savory sauce instantly won me over. After that, I found myself ordering it every chance I got.
But what if I told you that you can make restaurant-quality sesame chicken right at home? The best part? It’s beginner-friendly, requires simple ingredients, and comes together in under an hour. This easy sesame chicken recipe will guide you step by step, ensuring that even first-time cooks can achieve a perfectly crispy and flavorful dish.

Why This Recipe is Special
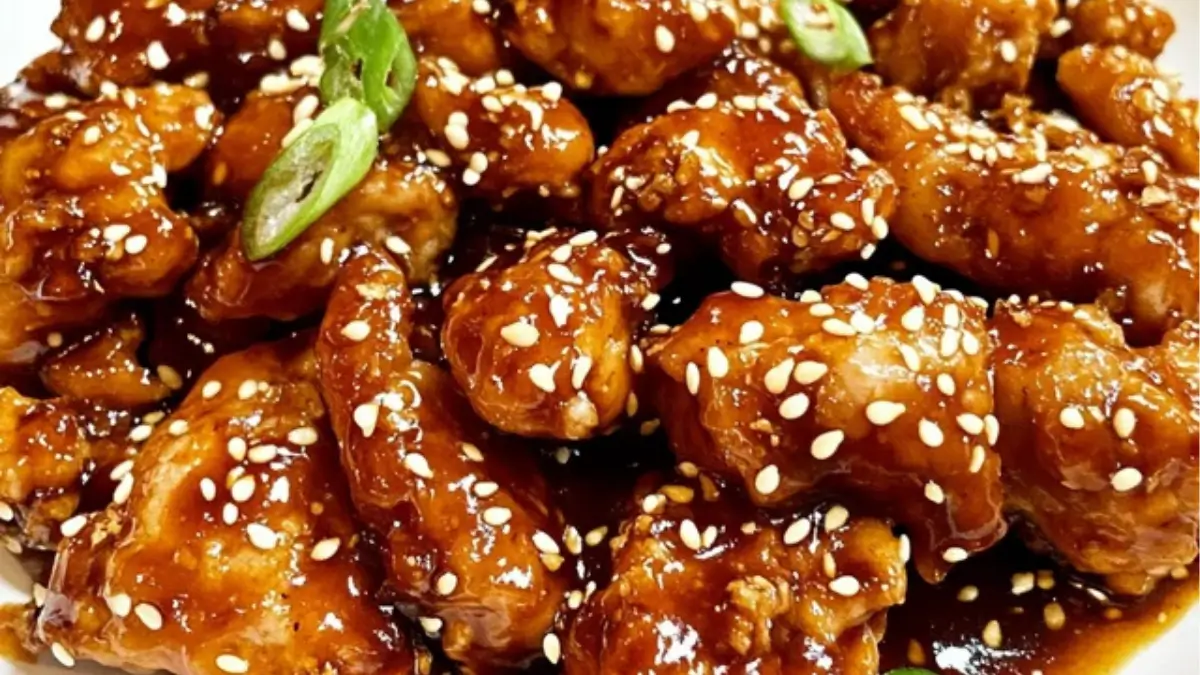
Sesame chicken is a staple in Chinese-American cuisine, often found at popular restaurants like Panda Express. It features crispy, golden-brown chicken pieces tossed in a rich sauce made with soy sauce, honey, and toasted sesame oil.
What makes this version stand out?
- Perfectly crispy texture – Thanks to a light cornstarch-based coating and a secret double-frying technique.
- A balanced sauce – Sweet, savory, and just the right amount of tang from rice vinegar.
- Beginner-friendly method – Simple, easy-to-follow steps that anyone can master.
- Customizable – Make it spicy, swap out the protein, or turn it into a vegetarian dish.
Ingredients and Preparation
Here’s a breakdown of the key ingredients and why they matter:
- Chicken – Thighs are the best choice for tenderness, but chicken breast works too. You can also swap for tofu, shrimp, or even thinly sliced beef.
- Cornstarch and flour – These create the crispy coating. Cornstarch keeps it light, while flour adds structure. If needed, use potato starch as a substitute.
- Egg white – Helps the batter stick and contributes to a crispier texture.
- Soy sauce – Provides umami depth to both the batter and the sauce.
- Honey & brown sugar – A mix of these two balances out the salty and tangy flavors. White sugar can work in a pinch.
- Ketchup & rice vinegar – Adds tanginess to brighten the sauce. Apple cider vinegar or white vinegar can replace rice vinegar if needed.
- Sesame oil & sesame seeds – The signature nutty aroma and toasty finish that make this dish stand out.
Alternative Ingredient Suggestions
- Gluten-free? Use all cornstarch instead of flour and opt for tamari instead of soy sauce.
- Vegetarian? Replace the chicken with extra-firm tofu, tempeh, or even cauliflower florets.
- Want it spicy? Add chili flakes, sriracha, or sambal to the sauce.
Step-by-Step Instructions
Step 1: Prepare the batter by mixing cornstarch, flour, soy sauce, egg white, and water in a bowl. Stir until you get a smooth, thick batter. If it’s too thick, add a splash of water.
Step 2: Add the chicken pieces to the batter, ensuring they’re evenly coated.
Step 3: Heat oil in a deep pan or wok to around 330-340°F. Fry the chicken in batches for 5-7 minutes, turning occasionally until golden and cooked through. Remove and drain on a wire rack.
Step 4 (Optional but Recommended): Heat the oil to 375°F and fry the chicken again for about 30 seconds to make it extra crispy. This double-frying method keeps it crunchy even after adding the sauce.
Step 5: In a small bowl, mix all the sauce ingredients—soy sauce, honey, brown sugar, ketchup, rice vinegar, Shaoxing wine, and grated garlic—until smooth.
Step 6: Pour the sauce into a large pan and bring to a boil over medium heat. Let it cook for about 1-2 minutes until it thickens slightly.
Step 7: Add the fried chicken to the sauce and toss gently until all pieces are well coated.
Step 8: Drizzle in sesame oil and sprinkle sesame seeds on top. Give it a final toss.
Step 9: Garnish with chopped green onions and serve immediately with rice or steamed vegetables.
Beginner Tips and Notes
- Keep the oil temperature steady – Too hot, and the chicken will burn; too low, and it will absorb excess oil and turn soggy.
- Don’t overcook the sauce – If boiled for too long, the sugars will caramelize too much, making the sauce too thick or even burnt. If this happens, add a splash of hot water to loosen it up.
- Add sesame oil at the end – Cooking it for too long can diminish its nutty flavor.
- Reheating tips – Keep the chicken and sauce separate when storing. Reheat the chicken in an air fryer or oven at 350°F for a few minutes to crisp it back up before tossing with the sauce.
Serving Suggestions
Sesame chicken pairs perfectly with:
- Steamed white or jasmine rice – A classic, fluffy base to soak up the delicious sauce.
- Fried rice – Try it with garlic fried rice or egg fried rice for extra flavor.
- Stir-fried vegetables – Broccoli, bell peppers, carrots, and zucchini add crunch and freshness.
- Noodles – Toss it with lo mein or serve over chow mein for a takeout-style experience.
For leftovers, store the chicken and sauce separately in airtight containers in the fridge for up to 5 days. Freezing is possible, but the texture of the coating may soften over time.
Try It and Share Your Thoughts
Making sesame chicken at home is easier than you think, and the results are just as satisfying as your favorite takeout spot. I’d love to hear how it turned out for you! Did you make any modifications? Let me know in the comments below, and don’t forget to share this recipe with friends and family who love quick and delicious meals.
FAQ About Sesame Chicken
Yes! Simply replace the soy sauce with tamari or coconut aminos and use all cornstarch instead of flour for the batter. The result will be just as crispy and flavorful.
The key is double-frying the chicken and only tossing it in the sauce right before serving. Avoid letting it sit in the sauce for too long, as the coating will absorb moisture and soften.
You can substitute Shaoxing wine with dry sherry, mirin (reduce the sugar in the sauce slightly), or even chicken broth if you prefer to avoid alcohol entirely.
Yes! You can fry the chicken ahead of time and store it separately from the sauce. Reheat the chicken in an oven or air fryer at 350°F for a few minutes to crisp it back up before tossing with the warmed sauce.
More Relevant Recipes
Print
Crispy Sesame Chicken
- Total Time: 35 minutes
- Yield: 4 servings
Description
Sesame chicken is a crispy, golden-brown Chinese-American favorite tossed in a rich, sweet, and savory sauce with nutty sesame flavor. Perfect for an easy weeknight meal, this beginner-friendly recipe delivers restaurant-quality results at home.
Ingredients
For the Chicken:
- 450g boneless, skinless chicken thighs (cut into bite-sized pieces)
- ½ cup cornstarch
- 2 tbsp all-purpose flour
- 1 egg white
- 1 tbsp soy sauce
- ¼ tsp white pepper
- ⅓ cup water
For the Sesame Sauce:
- 3 tbsp honey (adjust to taste)
- 2 tbsp soy sauce
- 1 ½ tbsp ketchup
- 1 ½ tbsp brown sugar
- 1 tbsp rice vinegar
- 1 tbsp Shaoxing wine
- 1 clove garlic (grated)
- For Frying & Garnish:
- Neutral oil (vegetable, canola, or peanut) for frying
- 1 ½ tbsp sesame oil
- 2 tsp sesame seeds
- 1 green onion (chopped)
Instructions
- Prepare the Batter: In a medium bowl, mix cornstarch, flour, soy sauce, egg white, white pepper, and water until smooth. The batter should have a thick but pourable consistency. If it’s too thick, add a small amount of water.
- Coat the Chicken: Add the chicken pieces to the batter and stir until evenly coated. Let it sit while you heat the oil.
- Heat the Oil: Pour enough oil into a deep pan or wok to submerge the chicken pieces. Heat to 330-340°F. To test if the oil is ready, drop a small amount of batter into the oil—it should sizzle immediately but not burn.
- Fry the Chicken: Carefully lower the coated chicken pieces into the hot oil in batches, avoiding overcrowding. Fry for about 5-7 minutes, turning occasionally, until golden brown and cooked through. Transfer to a wire rack to drain excess oil.
- Double Fry for Crispiness: Increase the oil temperature to 375°F. Return the fried chicken to the oil and fry for another 30-60 seconds until extra crispy. Remove and drain on a wire rack.
- Prepare the Sauce: In a separate bowl, whisk together honey, soy sauce, ketchup, brown sugar, rice vinegar, Shaoxing wine, and grated garlic until smooth.
- Cook the Sauce: Pour the sauce into a large pan or wok over medium heat. Bring to a gentle boil and let it cook for 1-2 minutes until slightly thickened. Stir frequently to prevent burning.
- Coat the Chicken: Add the crispy chicken to the sauce and toss quickly to coat. Be gentle to avoid breaking the crispy coating.
- Finish with Sesame Oil: Drizzle in sesame oil and sprinkle sesame seeds over the chicken. Toss briefly to combine.
- Garnish and Serve: Transfer to a serving dish, top with chopped green onions, and serve hot with rice or stir-fried vegetables.
Notes
- If the sauce thickens too much, add a splash of hot water to loosen it.
- For a spicier version, add 1-2 teaspoons of chili flakes or a dash of sriracha to the sauce.
- Store leftovers in an airtight container in the fridge for up to 5 days. Reheat the chicken in an air fryer or oven at 350°F for the best texture.
- Prep Time: 15 minutes
- Cook Time: 20 minutes
- Category: Main Course
- Method: Stir-Fry, Deep Fry
- Cuisine: Chinese-American
Nutrition
- Serving Size: 1 portion
- Calories: 460
- Sugar: 18g
- Sodium: 720mg
- Fat: 18g
- Saturated Fat: 3g
- Unsaturated Fat: 13g
- Trans Fat: 0g
- Carbohydrates: 45g
- Fiber: 1g
- Protein: 28g
- Cholesterol: 85mg