
Grilled cheese sandwiches are a timeless favorite, bringing warmth and nostalgia to every bite. But what if you could take that same comforting, cheesy goodness and turn it into a fun, bite-sized treat? That’s where grilled cheese roll-ups come in. They’re crispy, buttery, and perfect for dipping in tomato soup. Whether you’re making them for kids, game nights, or just a quick snack, these roll-ups are simple enough for beginners and delicious enough to impress.
This recipe is especially great for beginners because it requires minimal ingredients, takes just minutes to prepare, and is nearly foolproof. Plus, it’s highly customizable—so you can get creative with different cheeses, breads, and fillings.

Ingredients and Their Roles
- Bread – Soft, fluffy white bread works best for easy rolling, but you can use whole wheat, multigrain, or even homemade bread. Avoid dense bread as it won’t roll as well.
- Cheese – A mix of cheddar, Colby, and Monterey Jack gives a rich and melty texture. American cheese is a great option for extra gooeyness.
- Butter – Adds a crispy, golden-brown crust and enhances flavor. You can also use mayonnaise for a tangy twist.
- Ham (Optional) – Thinly sliced deli ham adds a savory, salty contrast to the melty cheese. You can also try turkey, crispy bacon, or pepperoni for variety.
Ingredient Substitutions
- Dairy-Free Option: Use plant-based butter and dairy-free cheese.
- Gluten-Free Alternative: Use gluten-free bread, but choose a soft variety for better rolling.
- Extra Flavor Boost: Sprinkle garlic powder or Italian seasoning on the buttered surface before toasting.
Step-by-Step Instructions
Step 1: Prep the Bread
Using a knife, trim the crusts off the bread. This helps the bread roll more easily and gives the roll-ups a smooth texture. Save the crusts to make homemade breadcrumbs or croutons.
Step 2: Flatten and Fill
Using a rolling pin, gently flatten each slice of bread until it’s thin and pliable. This step ensures the bread won’t break when rolled. Sprinkle a thin layer of shredded cheese over each slice, and if using ham, place a slice on top.
Step 3: Roll and Secure
Tightly roll up each slice from one end to the other, pressing gently to seal. If needed, use toothpicks to keep the roll-ups from unraveling while cooking.
Step 4: Toast the Roll-Ups
Melt butter in a skillet over medium-low heat. Place the roll-ups seam-side down in the pan. Cook for about 5-8 minutes, turning occasionally with tongs to ensure even browning. If using toothpicks, remove them halfway through cooking once the cheese has melted and sealed the rolls.
Step 5: Serve and Enjoy
Once golden brown and crispy, remove the roll-ups from the skillet. Slice them in half for a bite-sized snack or serve whole with a side of tomato soup or dipping sauce.
Beginner Tips and Notes
- Cheese Melting Tip: Use finely shredded cheese for faster melting. If using pre-sliced cheese, tear it into smaller pieces for even distribution.
- Crispy Crust Trick: If you prefer an extra crispy exterior, lightly brush the outside of the bread with melted butter before rolling.
- No Rolling Pin? Use a sturdy drinking glass or the back of a spoon to flatten the bread.
- Avoid Overcooking: Keep the heat on medium-low to prevent burning before the cheese melts fully.
Serving Suggestions
Grilled cheese roll-ups pair perfectly with:
- Tomato soup – A classic combination that enhances the cheesy richness.
- Marinara sauce – Great for a pizza-inspired twist.
- Ranch or honey mustard – Ideal for dipping if you like a tangy contrast.
- Side Salad – A fresh green salad balances the buttery richness of the roll-ups.
Storing Leftovers
Grilled cheese roll-ups are best enjoyed fresh, but if you have leftovers:
- Store in an airtight container in the fridge for up to 2 days.
- Reheat in a skillet or oven to restore crispiness. Avoid microwaving, as it can make them soggy.
Try It and Share Your Experience!
These easy grilled cheese roll-ups are a fun, beginner-friendly recipe that anyone can make. Whether you’re serving them as a snack, lunch, or party appetizer, they’re guaranteed to be a crowd-pleaser. Give them a try and let us know how they turned out in the comments. What cheese combinations did you use? Did you add any extra ingredients? We’d love to hear your creative twists on this classic dish!
FAQ About Grilled Cheese Roll-Ups
Yes, you can prepare them in advance and store them in an airtight container in the fridge. Reheat them in a skillet or oven to maintain crispiness.
Soft, fluffy bread like white or sandwich-style bread is ideal because it rolls easily. Avoid dense or artisan bread, as it may crack when rolled.
Absolutely! While cheddar, Colby, and Monterey Jack are great options, you can experiment with mozzarella, Swiss, or even pepper jack for a spicier twist.
Rolling the bread tightly and pressing firmly helps. If needed, use toothpicks to hold them together while cooking, then remove them once the cheese melts.
More Relevant Recipes
Print
Grilled Cheese Roll-Ups
- Total Time: 18 minutes
- Yield: 3 servings
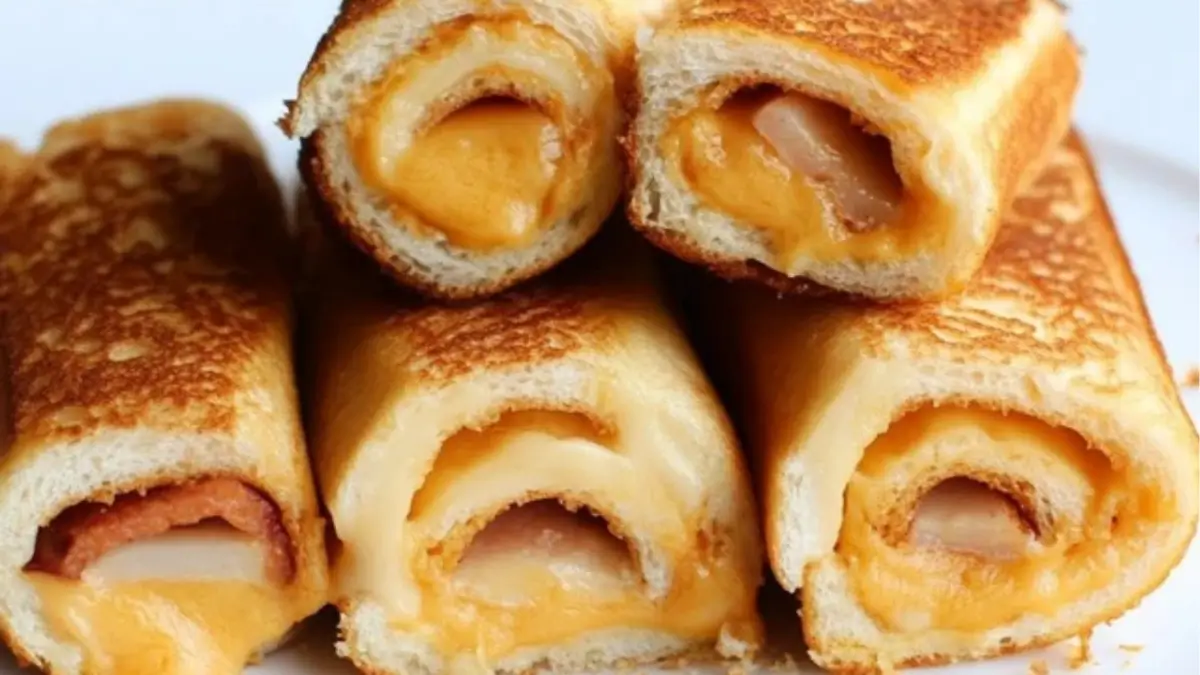
Description
Grilled cheese roll-ups are a fun and easy twist on the classic grilled cheese sandwich. They’re buttery, crispy, and filled with gooey melted cheese, making them a perfect snack, appetizer, or kid-friendly meal.
Ingredients
- 6 slices of soft white bread
- 1 cup shredded cheese (cheddar, Colby, or Monterey Jack)
- 6 thin slices of deli ham (optional)
- 2 tablespoons butter
Instructions
- Prepare the bread: Trim the crusts off each slice of bread and set the crusts aside for breadcrumbs or croutons. Using a rolling pin, flatten each slice until it becomes thin and pliable.
- Add the filling: Sprinkle shredded cheese evenly over each piece of flattened bread. If using ham, place a thin slice on top of the cheese.
- Roll and secure: Tightly roll each slice from one end to the other, pressing gently to seal. If the roll-up doesn’t hold, secure it with a toothpick.
- Melt the butter and cook: Heat a skillet over medium-low heat and melt the butter. Place the roll-ups seam-side down in the skillet, cooking for about 5-8 minutes. Turn them occasionally with tongs to ensure even browning.
- Finish and serve: Once golden brown and crispy, remove from the skillet. Let them cool slightly before serving. Enjoy them whole or slice them in half for bite-sized portions.
Notes
- For extra crispiness, brush the outside of the bread with melted butter before rolling.
- To make them healthier, use whole wheat bread and reduce the butter amount.
- These pair perfectly with tomato soup, marinara sauce, or ranch dressing for dipping.
- Prep Time: 10 minutes
- Cook Time: 8 minutes
- Category: Snack, Appetizer, Lunch
- Method: Pan-fried
- Cuisine: American
Nutrition
- Serving Size: 4 roll-ups (when cut in half)
- Calories: 321 kcal
- Sugar: 2g
- Sodium: 450mg
- Fat: 18g
- Saturated Fat: 10g
- Unsaturated Fat: 6g
- Trans Fat: 0g
- Carbohydrates: 28g
- Fiber: 2g
- Protein: 12g
- Cholesterol: 35mg