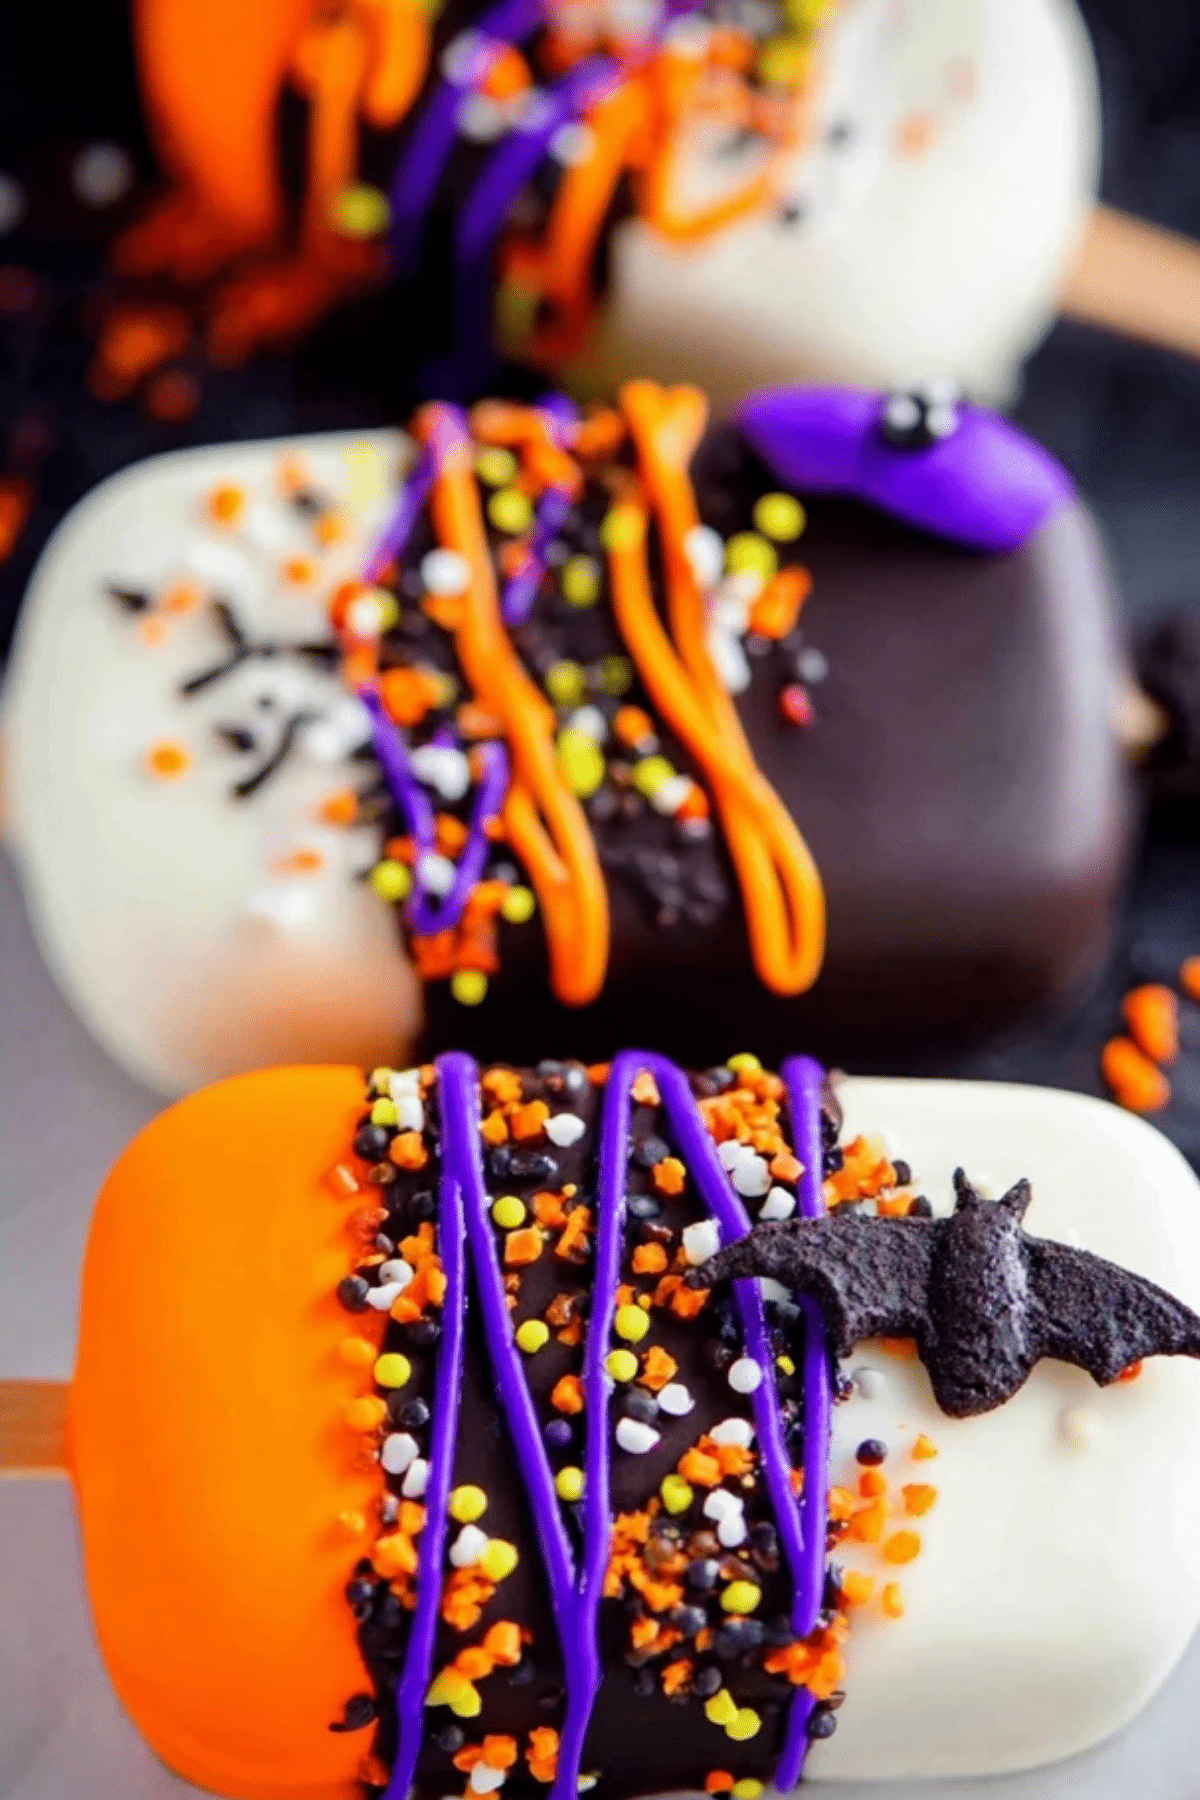
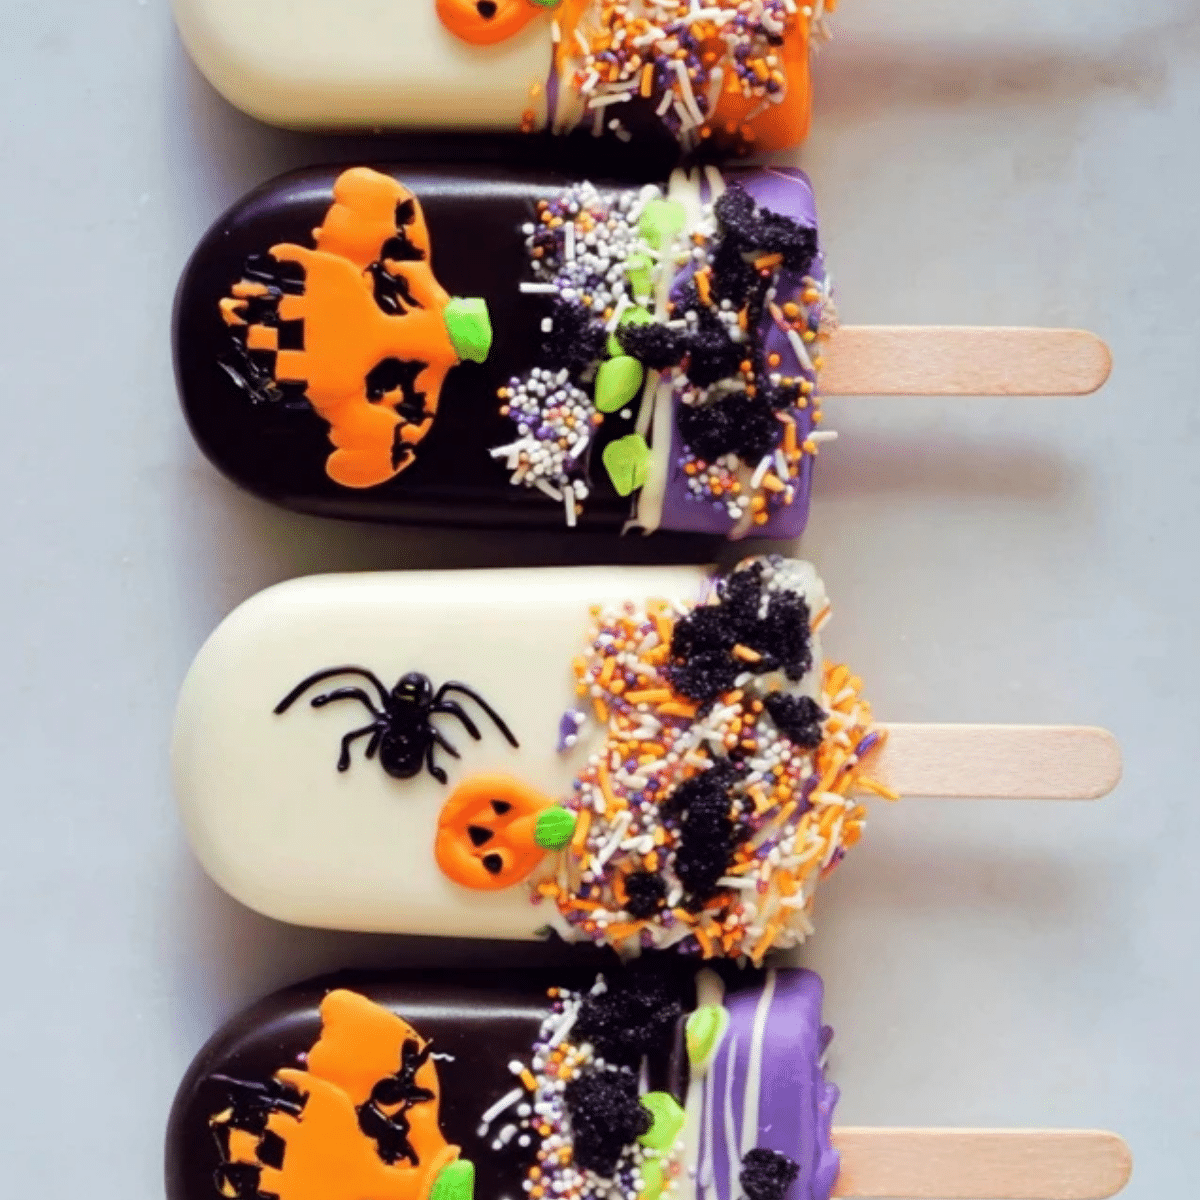
Halloween cakesicles are the ultimate treat for spooky season lovers! These fun, easy-to-make cakesicles are perfect for Halloween parties, kids’ activities, or simply satisfying your sweet tooth. Made with leftover cake or cupcakes, they combine the best of both worlds: delicious cake and creamy chocolate coating. Whether you’re making them with kids or as a fun baking project on your own, Halloween cakesicles are sure to add some magic to your celebrations.
Table of Contents
Why You’ll Love Halloween Cakesicles
Halloween cakesicles are not only a treat for the taste buds but also a visual delight. Easy to make and endlessly customizable, they are perfect for all ages. Whether you’re a baking pro or a beginner, these cakesicles offer a straightforward and fun project. The simple combination of cake and chocolate can be dressed up with festive sprinkles, fondant shapes, and vibrant candy colors to fit any Halloween theme.
Additionally, these cakesicles are an excellent way to use up leftover cake or cupcakes, making them an eco-friendly dessert. With a mold and a few essential ingredients, you can create a batch in no time, making them ideal for any last-minute Halloween event.
Ingredients for Halloween Cakesicles
Creating Halloween cakesicles is a simple process, but using the right ingredients is key to getting that perfect flavor and texture. Here’s what you’ll need:
• Cake or Cupcakes: The base of your cakesicles. Any flavor will do, but red velvet, chocolate, or vanilla are popular choices for their vibrant colors and rich taste.
• Frosting: Helps bind the cake mixture together while adding creaminess. Use a light amount of frosting—just enough to hold the cake together.
• Coating Chocolate or Candy Melts: This coats the cakesicle and gives it that delicious chocolatey exterior. Opt for high-quality chocolate, like Ghirardelli or candy melts, for the best taste and easy melting.
• Food Color: Use either oil-based candy colors or powdered food coloring to achieve the perfect Halloween hues—think orange, black, and white!
• Sprinkles: Add a festive touch to your cakesicles. Monster Mashup sprinkles, Halloween-themed sprinkles, or even fondant shapes like bats make the cakesicles more fun and spooky.
Alternative Ingredient Suggestions for Halloween Cakesicles
If you’re looking to customize your Halloween cakesicles or need alternatives due to dietary preferences, there are plenty of swaps you can try.
• Gluten-Free Cake: For a gluten-free version, use a gluten-free cake mix or your favorite homemade recipe to create the base.
• Dairy-Free Chocolate: Use dairy-free candy melts or chocolate chips if you need to make your cakesicles dairy-free.
• Vegan Frosting: If you’re looking for a vegan version, try using a plant-based frosting or make your own using vegan butter and powdered sugar.
How to Make Halloween Cakesicles: Step-by-Step Instructions
Making Halloween cakesicles is a fun and straightforward process. Here’s how you can create these festive treats:
- Prepare the Cake Mixture: Start by crumbling leftover cake or cupcakes into a large bowl. Add just enough frosting to bind the cake together, but avoid making it too wet. You want the mixture to hold together when pressed but not be soggy.
- Melt the Chocolate: In a microwave-safe bowl, melt your chocolate or candy melts in 30-second increments, stirring after each. Add your food coloring to the melted chocolate while it’s still warm to achieve the desired color.
- Coat the Molds: Using a clean pastry brush, paint a layer of the colored chocolate into your cakesicle molds. Pop the molds into the freezer for about two minutes to set the chocolate. Repeat this process until you have at least two layers of chocolate, three if you’re using lighter colors.
- Fill the Molds: Take your cake mixture and press it into the chocolate-coated molds. Insert a popsicle stick into each mold, ensuring it’s centered. Top with more chocolate to fully cover the cake. Use an offset spatula to scrape off any excess.
- Freeze and Remove: Place the molds in the freezer for 3-5 minutes, allowing the chocolate to harden. Carefully remove the cakesicles from the molds, ensuring the chocolate and stick remain intact.
- Decorate: Drizzle your cakesicles with more colored chocolate and add sprinkles or fondant decorations for a fun Halloween look.

Tips & Tricks for Perfect Halloween Cakesicles
To make your Halloween cakesicles even better, here are some tips to consider:
• Don’t Overdo the Frosting: Too much frosting can make your cakesicles soggy. Add just enough to make the mixture hold together without becoming wet.
• Layering Chocolate: If you’re using white chocolate or light colors, consider adding an extra layer to avoid any cake peeking through.
• Work Quickly: Once you’ve coated the molds with chocolate, work quickly to avoid the chocolate setting before you’re ready.
• Storage: Store your cakesicles in an airtight container in the fridge to keep them fresh. They should last up to a week.
Pairing Ideas and Variations for Halloween Cakesicles
Halloween cakesicles can easily be paired with other seasonal treats. Try these fun ideas:
• Halloween Party Platters: Serve cakesicles alongside Halloween cookies, cupcakes, or themed popcorn for a complete spooky spread.
• Add Different Toppings: Swap out Halloween sprinkles for other toppings like crushed candy, caramel drizzle, or mini marshmallows for a unique twist.
• Flavored Coatings: Experiment with different flavored chocolate coatings, such as caramel or peanut butter, to match your favorite cake flavors.
If you’re planning on making your cakesicles ahead of time, they can be stored in the fridge for up to a week. They also freeze well, so you can make them in advance for any Halloween event!
Why Halloween Cakesicles Are Perfect for All Ages
Halloween cakesicles are the perfect combination of fun and flavor. They’re easy to make, customizable to any dietary need, and most importantly, they bring the joy of Halloween right into your kitchen. Whether you’re making them with little ones or crafting them as a festive treat for a Halloween party, cakesicles are sure to be a hit with everyone. Enjoy this spooky treat, and make it a Halloween tradition!
Conclusion
Halloween cakesicles are a delightful and versatile treat that can bring fun to any Halloween celebration. These cakesicles combine cake, frosting, and a colorful chocolate coating into a unique and festive dessert perfect for parties, gatherings, or simply getting into the Halloween spirit. Whether you’re crafting these with little hands or making them as a fun dessert for yourself, they are sure to impress. With endless decoration possibilities and the ability to customize the flavor, Halloween cakesicles are a must-try for the spooky season. Enjoy these sweet treats, and let your creativity shine as you bring these spooky delights to life!
FAQ About Halloween Cakesicles
1. Can I use any type of cake for Halloween cakesicles?
Yes! You can use any leftover cake or cupcakes you have on hand, such as red velvet, chocolate, or vanilla. The cake’s flavor will pair beautifully with the sweet chocolate coating.
2. How do I prevent the chocolate from cracking when removing the cakesicle from the mold?
To avoid cracking, make sure to allow the chocolate to fully harden before removing the cakesicle from the mold. Also, ensure you’ve applied at least two layers of chocolate to create a sturdy coating.
3. Can I make Halloween cakesicles ahead of time?
Absolutely! You can make Halloween cakesicles up to a week in advance. Store them in an airtight container in the fridge or freeze them for longer storage.
4. Can I make Halloween cakesicles without a mold?
While a mold helps achieve the signature popsicle shape, you can also form the cakesicles by hand. Roll the cake mixture into cylindrical shapes and dip them in chocolate for a similar result.
More Relevant Recipes
- Halloween Bean Dip: A fun and festive dip perfect for Halloween parties, featuring beans and layers of delicious toppings. This recipe is easy to make and can be customized to suit your flavor preferences, making it a great savory snack to accompany your sweet Halloween cakesicles.
- Zombie Brain Cupcakes: These creepy yet delicious cupcakes are a spooky treat for Halloween. With a brain-inspired design and a rich cupcake base, these are a great dessert to pair with Halloween cakesicles for an all-around frighteningly tasty Halloween spread.
- Halloween Chocolate Chip Cookies: A classic Halloween treat with a twist. These chocolate chip cookies are perfect for the season, offering a delicious, chewy bite that pairs wonderfully with the fun and festive nature of cakesicles. Great for kids and adults alike!

Halloween Cakesicles
- Total Time: 20 minutes
- Yield: 8 cakesicles
- Diet: Vegetarian
Description
Halloween cakesicles are a fun and festive treat perfect for any Halloween celebration. Made with leftover cake and a colorful chocolate coating, these cakesicles are easy to make and offer endless decoration possibilities. Whether you’re crafting them with kids or preparing them for a party, these cakesicles will surely impress!
Ingredients
- Leftover cake or cupcakes (3-4 cupcakes)
- Frosting (a couple tablespoons, or enough to bind the cake)
- Coating chocolate or candy melts (about 12 oz, Ghirardelli preferred)
- Food coloring (orange and black powdered or oil-based)
- Halloween sprinkles (to taste)
- Popsicle sticks (8 sticks)
- Fondant (optional, for decorations such as bats)
Instructions
- Crumble the leftover cake or cupcakes into a large bowl. Add frosting until the mixture holds together when squeezed, but isn’t soggy.
- In a microwave-safe bowl, melt the coating chocolate or candy melts in 30-second increments. Stir well after each interval.
- Add food coloring to the melted chocolate while still warm. Stir until the color is evenly mixed.
- Using a clean pastry brush, paint a layer of the colored chocolate into the cakesicle molds. Freeze for 2 minutes to set.
- Apply a second layer of chocolate to the molds and freeze for another 2 minutes. If using light colors, like white, apply a third layer to ensure the cake doesn’t show through.
- Press a tablespoon of the cake mixture into each mold, leaving about 1/4 inch from the top for additional chocolate coating. Insert a popsicle stick into the center of each cakesicle.
- Top each cakesicle with more chocolate and smooth it out using an offset spatula. Freeze for 3-5 minutes until fully set.
- Carefully remove the cakesicles from the mold. Drizzle with additional colored chocolate and sprinkle with Halloween-themed decorations.
Notes
- Ensure the chocolate coating is thick enough to prevent the cake from showing through, especially with lighter colors.
- If the cake mixture is too wet, add a bit more frosting to firm it up.
- Use different sprinkles or fondant decorations to make each cakesicle unique.
- Store cakesicles in an airtight container in the fridge or freezer to maintain freshness.
- Prep Time: 15 minutes
- Cook Time: 5 minutes
- Category: Dessert
- Method: Freezing and coating
- Cuisine: American
Nutrition
- Serving Size: 1 cakesicle
- Calories: 180
- Sugar: 20g
- Sodium: 25mg
- Fat: 9g
- Saturated Fat: 5g
- Unsaturated Fat: 4g
- Trans Fat: 0g
- Carbohydrates: 26g
- Fiber: 1g
- Protein: 2g
- Cholesterol: 15mg

