
Some desserts are so irresistibly good that you’ll find yourself going back for seconds (or thirds). Heavenly Oreo Dessert is one of those recipes. The first time I made this, it was for a family gathering where I wanted something quick, delicious, and effortless. Within minutes of serving, the dish was practically gone—everyone was raving about its creamy, chocolatey goodness. If you’re looking for a no-bake dessert that’s beginner-friendly, requires minimal ingredients, and is guaranteed to impress, this is it.
This recipe is perfect for new cooks because it’s easy to follow, doesn’t require baking skills, and is made with simple, store-bought ingredients. Plus, it’s a crowd-pleaser, making it great for potlucks, birthdays, or just a sweet indulgence at home.

Why This Dessert is Special
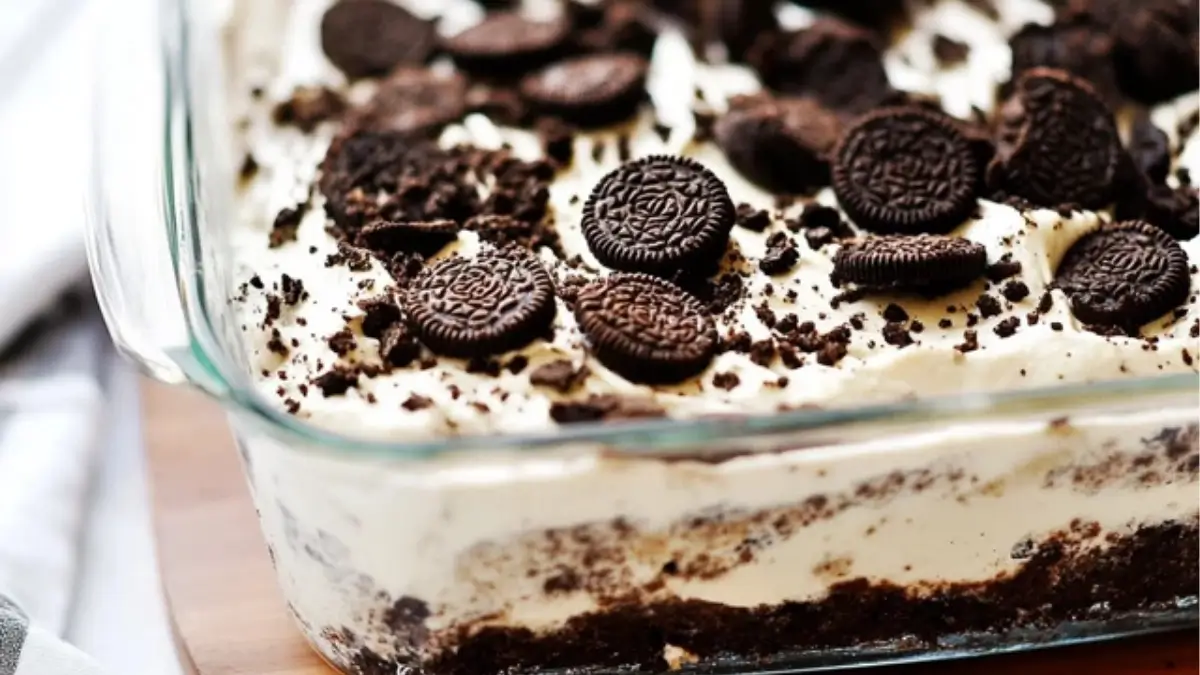
Heavenly Oreo Dessert is a dream for chocolate lovers. It layers crunchy Oreo cookie crumbs with creamy chocolate pudding, sweetened cream cheese, and fluffy Cool Whip for a light yet decadent treat. Unlike traditional baked desserts, this no-bake recipe saves you time and effort while still delivering a rich, layered texture. The balance of crunchy, creamy, and smooth layers makes every bite absolutely heavenly.
One of the best parts of this dessert is its versatility. You can swap ingredients based on what you have at home, making it an easy-to-customize treat. Whether you’re serving it at a party or making it as a weekend indulgence, this dessert is guaranteed to be a hit.
Ingredients and Preparation
Here’s what you’ll need to make this indulgent yet easy dessert:
- Oreo Cookies – The foundation of the dessert, providing crunch and a rich chocolate flavor. Using Double-Stuffed Oreos makes the crust even more decadent.
- Butter – Helps bind the cookie crumbs together to form a firm, buttery crust.
- Instant Chocolate Pudding Mix – Creates a luscious, velvety chocolate layer that adds richness to the dessert.
- Milk – Used to prepare the pudding, ensuring a creamy consistency.
- Cool Whip – Adds a light, airy texture that balances out the richness of the pudding and cream cheese.
- Cream Cheese – Provides a tangy contrast to the sweetness, making the dessert extra creamy.
- Powdered Sugar – Sweetens the cream cheese layer without making it too heavy.
Ingredient Substitutions:
- Oreos: Try using Golden Oreos for a vanilla twist or gluten-free Oreos if needed.
- Cool Whip: Swap with homemade whipped cream for a fresher taste.
- Pudding Mix: Use vanilla or white chocolate pudding for a different flavor.
- Milk: Substitute with almond or oat milk for a dairy-free version.
Step-by-Step Instructions
Step 1: Place all the Oreo cookies in a large zip-lock bag, seal it, and crush them using a rolling pin. Aim for small chunks rather than fine crumbs to maintain texture. Set aside one-third of the crushed cookies for the topping.
Step 2: Pour the remaining crushed Oreos into a 9×13 baking dish. Drizzle the melted butter over the crumbs and mix well until combined. Press the mixture firmly into the bottom of the pan to form the crust.
Step 3: In a mixing bowl, whisk together the instant chocolate pudding mix and cold milk. Cover the bowl and place it in the refrigerator to allow the pudding to set while you prepare the next layer.
Step 4: In another bowl, beat the softened cream cheese until smooth. Gradually add in the powdered sugar, mixing until fully incorporated. Gently fold in one container of Cool Whip to create a light and fluffy mixture. Spread this evenly over the Oreo crust.
Step 5: Once the pudding has set, spread it evenly over the cream cheese layer, ensuring full coverage.
Step 6: Spread the remaining container of Cool Whip over the pudding layer, creating a smooth, even top.
Step 7: Sprinkle the reserved Oreo crumbs over the top to add a final crunchy element. Cover the dessert and refrigerate for at least 2 hours before serving to allow the layers to set.
Beginner Tips and Notes
- Crushing Oreos Easily: If you have a food processor, pulse the Oreos a few times for quick and even crushing. If using a rolling pin, press firmly but not too hard to avoid turning them into dust.
- Layering Tip: Use a spatula to spread each layer smoothly, ensuring even coverage. This helps create distinct, appealing layers when you cut into the dessert.
- Chilling Time: Letting the dessert chill for at least 2 hours is crucial. For best results, leave it overnight for firmer layers and enhanced flavors.
- Serving Tip: Use a sharp knife to cut the dessert into squares. Wipe the knife clean between cuts for neat, defined slices.
Serving Suggestions
- With Extra Toppings: Drizzle with chocolate syrup, add mini chocolate chips, or top with whipped cream for extra indulgence.
- Paired with a Drink: Serve alongside a cold glass of milk, a hot cup of coffee, or even a scoop of vanilla ice cream for a perfect pairing.
- Leftover Storage: Store covered in the refrigerator for up to 3 days. Avoid freezing, as the pudding and whipped topping may lose their texture upon thawing.
Give It a Try!
Heavenly Oreo Dessert is a perfect treat for beginners—no baking, no complicated steps, just layers of pure deliciousness. Whether you’re making it for a family gathering, a potluck, or just because you’re craving something sweet, this dessert will be a guaranteed crowd-pleaser.
Try it out and let us know how it turned out! Did you add any unique twists? Share your experience in the comments below. Happy no-baking!
FAQ About Heavenly Oreo Dessert
Yes! In fact, it tastes even better when made a day in advance. The layers have more time to set, resulting in a firmer texture and richer flavor. Just be sure to cover it tightly and refrigerate until ready to serve.
Absolutely! If you prefer a homemade version, whip 2 cups of heavy cream with ¼ cup powdered sugar until stiff peaks form. This will give the dessert a fresher taste and a slightly lighter texture.
You can crush them using a food processor for a fine texture or place them in a zip-lock bag and use a rolling pin to crush them into small chunks. Keeping some larger pieces adds extra crunch.
Yes! While chocolate pudding is the classic choice, you can try vanilla, white chocolate, or even cookies and cream pudding for a fun variation.
More Relevant Recipes
Print
Heavenly Oreo Dessert
- Total Time: 2 hours 15 minutes
- Yield: 12 servings
Description
Heavenly Oreo Dessert is an easy, no-bake treat featuring layers of crushed Oreo cookies, creamy chocolate pudding, sweetened cream cheese, and fluffy whipped topping. Perfect for parties, potlucks, or a simple indulgence at home, this dessert is rich, chocolatey, and irresistibly creamy.
Ingredients
- 1 package (15.35 ounces) Double-Stuffed Oreo cookies
- ½ cup butter, melted
- 2 boxes (3.9 ounces each) instant chocolate pudding mix
- 3 ¼ cups cold milk
- 2 containers (8 ounces each) Cool Whip, thawed
- 1 block (8 ounces) cream cheese, softened
- 1 cup powdered sugar
Instructions
- Crush the Oreos: Place all the Oreo cookies in a large zip-lock bag and seal it. Use a rolling pin to crush them into small chunks. Avoid making fine crumbs, as some texture is ideal. Set aside one-third of the crushed cookies for the topping.
- Prepare the crust: Transfer the remaining crushed Oreos into a 9×13 baking dish. Drizzle the melted butter over them and stir until well combined. Press the mixture firmly into the bottom of the dish to form a solid crust.
- Make the pudding layer: In a medium mixing bowl, whisk together the instant chocolate pudding mix and cold milk until smooth. Cover and refrigerate for a few minutes until the pudding thickens.
- Prepare the cream cheese layer: In a separate bowl, beat the softened cream cheese until smooth and creamy. Gradually add the powdered sugar, mixing until fully combined. Gently fold in one container of Cool Whip, creating a light and fluffy mixture. Spread this evenly over the Oreo crust.
- Layer the pudding: Once the pudding has set, evenly spread it over the cream cheese layer, ensuring full coverage.
- Add the final layer: Spread the second container of Cool Whip over the pudding layer, smoothing it out for an even finish.
- Top and chill: Sprinkle the reserved Oreo crumbs over the top as a finishing touch. Cover the dish and refrigerate for at least 2 hours before serving to allow the layers to set properly.
Notes
- Make-Ahead Tip: This dessert is best when chilled overnight, allowing the flavors to blend and the texture to firm up.
- Pudding Variations: Try using white chocolate, vanilla, or cookies and cream pudding mix for a different flavor twist.
- Substitutes: If you don’t have Cool Whip, replace it with homemade whipped cream made from 2 cups of heavy cream and ¼ cup powdered sugar.
- Serving Suggestion: Drizzle with chocolate syrup or top with extra crushed Oreos for added decadence.
- Prep Time: 15 minutes
- Cook Time: 2 hours
- Category: Dessert
- Method: No-Bake
- Cuisine: American
Nutrition
- Serving Size: 1 slice
- Calories: 380
- Sugar: 30g
- Sodium: 290mg
- Fat: 18g
- Saturated Fat: 9g
- Unsaturated Fat: 7g
- Trans Fat: 0.5g
- Carbohydrates: 50g
- Fiber: 2g
- Protein: 4g
- Cholesterol: 25mg