
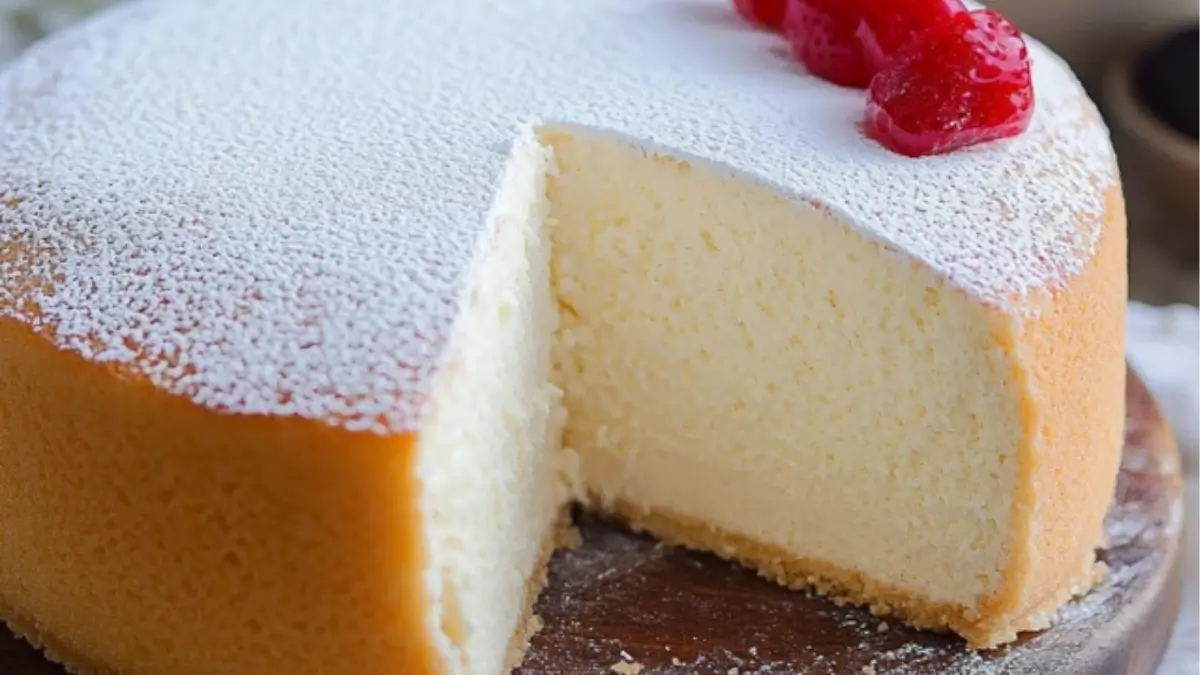
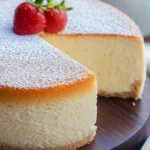
I still remember the first time I tried Japanese cotton cheesecake at a small bakery in Tokyo. The moment I took a bite, I was mesmerized by its light, airy texture—almost like biting into a cloud. Unlike the dense, rich New York-style cheesecake, this one was delicate, subtly sweet, and had a slight tang from the cream cheese and lemon zest. That experience inspired me to recreate this magical dessert at home.
This recipe is perfect for beginner bakers because it is forgiving, requires simple ingredients, and delivers an incredibly rewarding result. If you have ever struggled with making traditional cheesecakes, don’t worry—this version is much lighter and easier to perfect. Plus, it’s a fantastic option for those looking for a dessert that isn’t overwhelmingly sweet or heavy.

Why This Cheesecake is Special
Japanese cotton cheesecake is not your typical cheesecake. It’s a cross between a soufflé and a sponge cake, creating a melt-in-your-mouth experience. What makes it unique is its meringue-based batter, which gives it an airy structure while still maintaining the creamy, tangy flavor of classic cheesecake.
Some key highlights of this cheesecake:
- Light and Fluffy: Thanks to the meringue, this cheesecake is incredibly soft and jiggly.
- Healthier Option: It contains less sugar and fat than traditional cheesecakes.
- Versatile: You can enjoy it warm, at room temperature, or chilled for different textures.
- Beginner-Friendly: While it may look fancy, this recipe is quite simple if you follow the steps carefully.
Ingredients and Their Role
To make the perfect Japanese cotton cheesecake, you’ll need:
- Eggs: The star ingredient! The yolks add richness, while the whipped whites create the signature airy texture.
- Cream Cheese: Provides the classic tangy cheesecake flavor. Use full-fat for the best taste.
- Butter: Adds richness and moisture to the cake. Always use unsalted butter.
- Heavy Cream or Milk: Adds creaminess. If using milk, opt for full-fat for better texture.
- Cake Flour: Helps keep the cake light and tender. All-purpose flour can be used but will make the cake slightly denser.
- Lemon Zest: Enhances the flavor with a refreshing citrusy note.
- Vanilla Extract: Adds warmth and depth of flavor.
- Sugar: Sweetens the cake and helps stabilize the meringue. Use granulated or caster sugar.
- Lemon Juice: Helps stabilize the meringue, making it easier to fold into the batter.
- Optional Toppings: Powdered sugar, fresh berries, whipped cream, or a light fruit glaze can enhance the cake’s presentation and taste.
Substitutions:
- If you don’t have cake flour, use all-purpose flour mixed with a little cornstarch.
- If you prefer a dairy-free version, substitute cream cheese with a plant-based alternative and use coconut milk instead of heavy cream.
- To reduce sugar, use a natural sweetener like monk fruit or erythritol.
Step-by-Step Instructions
Step 1: Prepare the Ingredients and Equipment
Preheat your oven to 300°F (150°C). Line the bottom of an 8-inch round cake pan with parchment paper. You’ll also need a larger pan for a water bath, which helps the cheesecake bake gently.
Step 2: Make the Cheesecake Base
In a heatproof bowl, combine cream cheese, butter, and heavy cream. Place the bowl over a pot of simmering water (bain-marie) and whisk until smooth. Remove from heat and let it cool slightly.
Once cooled, whisk in egg yolks one at a time, then sift in the cake flour and mix until fully combined. Stir in lemon zest and vanilla extract. Set aside.
Step 3: Prepare the Meringue
In a clean, dry mixing bowl, beat egg whites on medium speed until foamy. Add lemon juice and gradually add sugar in three parts, continuing to whip until medium-soft peaks form. The meringue should hold a peak that curls slightly at the tip.
Step 4: Fold the Meringue into the Batter
Gently fold one-third of the meringue into the cheesecake base using a spatula. Repeat two more times, folding carefully to avoid deflating the batter.
Step 5: Bake the Cheesecake
Pour the batter into the prepared cake pan and tap it gently on the counter to release air bubbles. Place the cake pan into a larger pan and add hot water until it reaches about ⅓ of the way up the sides of the cake pan.
Bake for 80-90 minutes or until the top is golden brown and a skewer inserted into the center comes out clean.
Step 6: Cool and Serve
Turn off the oven and let the cheesecake sit inside with the door slightly open for 10-15 minutes to prevent sudden temperature changes. Then, remove it from the oven and allow it to cool in the pan.
Once completely cooled, remove from the pan and enjoy warm or chill it in the fridge for a few hours for a creamier texture.
Beginner Tips and Notes
- How to Prevent Deflating: The cheesecake will naturally shrink a little after baking, but if it collapses significantly, it could be due to under-whipped meringue or an undercooked center.
- Avoid Overmixing: When folding the meringue into the batter, use gentle motions to maintain the airy texture.
- Check for Doneness: A properly baked cheesecake will have a slight jiggle in the center but should not be runny.
- Prevent Cracking: Use a water bath and avoid over-whipping the meringue. If the top is browning too fast, cover it loosely with foil.
- Storage: Store in an airtight container in the fridge for up to 4 days. It can also be frozen for up to 2 months.
Serving Suggestions
Japanese cotton cheesecake is versatile and can be served in different ways:
- Classic: Dust with powdered sugar for a simple, elegant finish.
- Fruity: Serve with fresh berries or a light fruit compote.
- Creamy: Add a dollop of whipped cream or a drizzle of honey.
- Chocolate Twist: Pair with dark chocolate ganache for a richer treat.
If you have leftovers, store them in an airtight container in the refrigerator. For a fun twist, try freezing individual slices and eating them like an ice cream cake!
Ready to Bake? Share Your Experience!
Now that you have all the steps to create a perfect Japanese cotton cheesecake, give it a try and let us know how it turns out! Did you enjoy it warm or chilled? Have any tips to share? Drop a comment below and share your cheesecake journey with us! Happy baking!
FAQ About Japanese Cotton Cheesecake
Japanese cotton cheesecake naturally shrinks slightly as it cools, but if it collapses significantly, it could be due to under-whipped meringue, over-mixed batter, or an underbaked center. Ensuring the meringue reaches medium-soft peaks and using a water bath can help maintain its structure.
Cracks can form if the oven temperature is too high or if the cheesecake is over-whipped, causing excess air in the batter. Using a water bath, baking at a consistent low temperature, and not over-whipping the meringue will help prevent cracks.
The cheesecake should be lightly golden on top and slightly jiggly in the center when done. You can also insert a skewer into the middle; it should come out clean or with only a few moist crumbs.
A water bath is highly recommended as it ensures even baking and prevents cracks. However, if you cannot use one, placing a tray of hot water on the lower oven rack can help create a steamy environment.
More Relevant Recipes
- Cotton Candy Fudge: A Sweet Treat for Every Occasion
- Gooey Cinnamon Cream Cheese Muffins
- Cheesecake Pudding Recipe
Japanese Cotton Cheesecake
- Total Time: 1 hour 35 minutes
- Yield: 8 servings
Description
This Japanese cotton cheesecake is a light, airy, and jiggly take on classic cheesecake. It combines the creaminess of cheesecake with the delicate fluffiness of a soufflé. The subtle sweetness and tangy hint of lemon make it a perfect treat for any occasion.
Ingredients
- 6 large eggs, separated
- 8 ounces (225g) cream cheese, softened
- ¼ cup (60ml) heavy cream or full-fat milk
- 4 tablespoons (56g) unsalted butter, cut into small pieces
- ½ cup (60g) cake flour, sifted
- 1 tablespoon lemon zest (from about 1 lemon)
- 1½ teaspoons vanilla extract
- ⅓ cup (67g) granulated sugar
- 2 teaspoons lemon juice
- Powdered sugar, apricot jam, or fresh berries for topping (optional)
Instructions
- Prepare the oven and pan: Preheat the oven to 300°F (150°C). Line the bottom of an 8-inch round cake pan with parchment paper. Prepare a larger pan for a water bath and set aside.
- Make the cheesecake base: In a heatproof bowl, combine the cream cheese, butter, and heavy cream. Place the bowl over a pot of simmering water, whisking gently until smooth and fully melted. Remove from heat and let cool slightly.
- Incorporate the egg yolks: Once the mixture has cooled, whisk in the egg yolks one at a time. Sift in the cake flour and gently mix until no dry flour remains. Stir in the lemon zest and vanilla extract until combined. Set aside.
- Prepare the meringue: In a clean mixing bowl, beat the egg whites on medium speed until foamy. Add the lemon juice and gradually incorporate the sugar in three additions, whipping until medium-soft peaks form. The meringue should hold a peak that curls slightly at the tip.
- Fold the meringue into the batter: Gently fold one-third of the meringue into the cheesecake base to lighten the mixture. Repeat with the remaining meringue in two more additions, folding carefully to maintain the airy texture.
- Bake the cheesecake: Pour the batter into the prepared cake pan, tapping it lightly on the counter to remove large air bubbles. Place the cake pan into a larger pan and fill the outer pan with hot water until it reaches about one-third of the way up the sides. Bake for 80-90 minutes or until the top is golden brown and a skewer inserted into the center comes out clean.
- Cool the cheesecake: Turn off the oven and leave the cheesecake inside with the door slightly open for 10-15 minutes to prevent sudden temperature changes. Remove the cake from the oven and let it cool completely in the pan before transferring to a plate.
- Serve and enjoy: Enjoy the cheesecake warm for a jiggly texture or chill it in the refrigerator for at least an hour for a creamier consistency. Dust with powdered sugar, top with fresh berries, or brush with apricot jam for extra flavor.
Notes
- To prevent cracks, do not over-whip the meringue, and always use a water bath.
- If the top is browning too quickly, loosely cover with foil halfway through baking.
- Store leftovers in the refrigerator for up to 4 days or freeze for up to 2 months.
- This recipe can be halved to make a smaller 6-inch cheesecake.
- Prep Time: 15 minutes
- Cook Time: 1 hour 20 minutes
- Category: Dessert
- Method: Baking
- Cuisine: Japanese
Nutrition
- Serving Size: 1 slice
- Calories: 221.9 kcal
- Sugar: 10.4g
- Sodium: 255.4mg
- Fat: 12.4g
- Saturated Fat: 6.7g
- Unsaturated Fat: 4.7g
- Trans Fat: 0.2g
- Carbohydrates: 16.9g
- Fiber: 0.3g
- Protein: 10.4g
- Cholesterol: 166.4mg