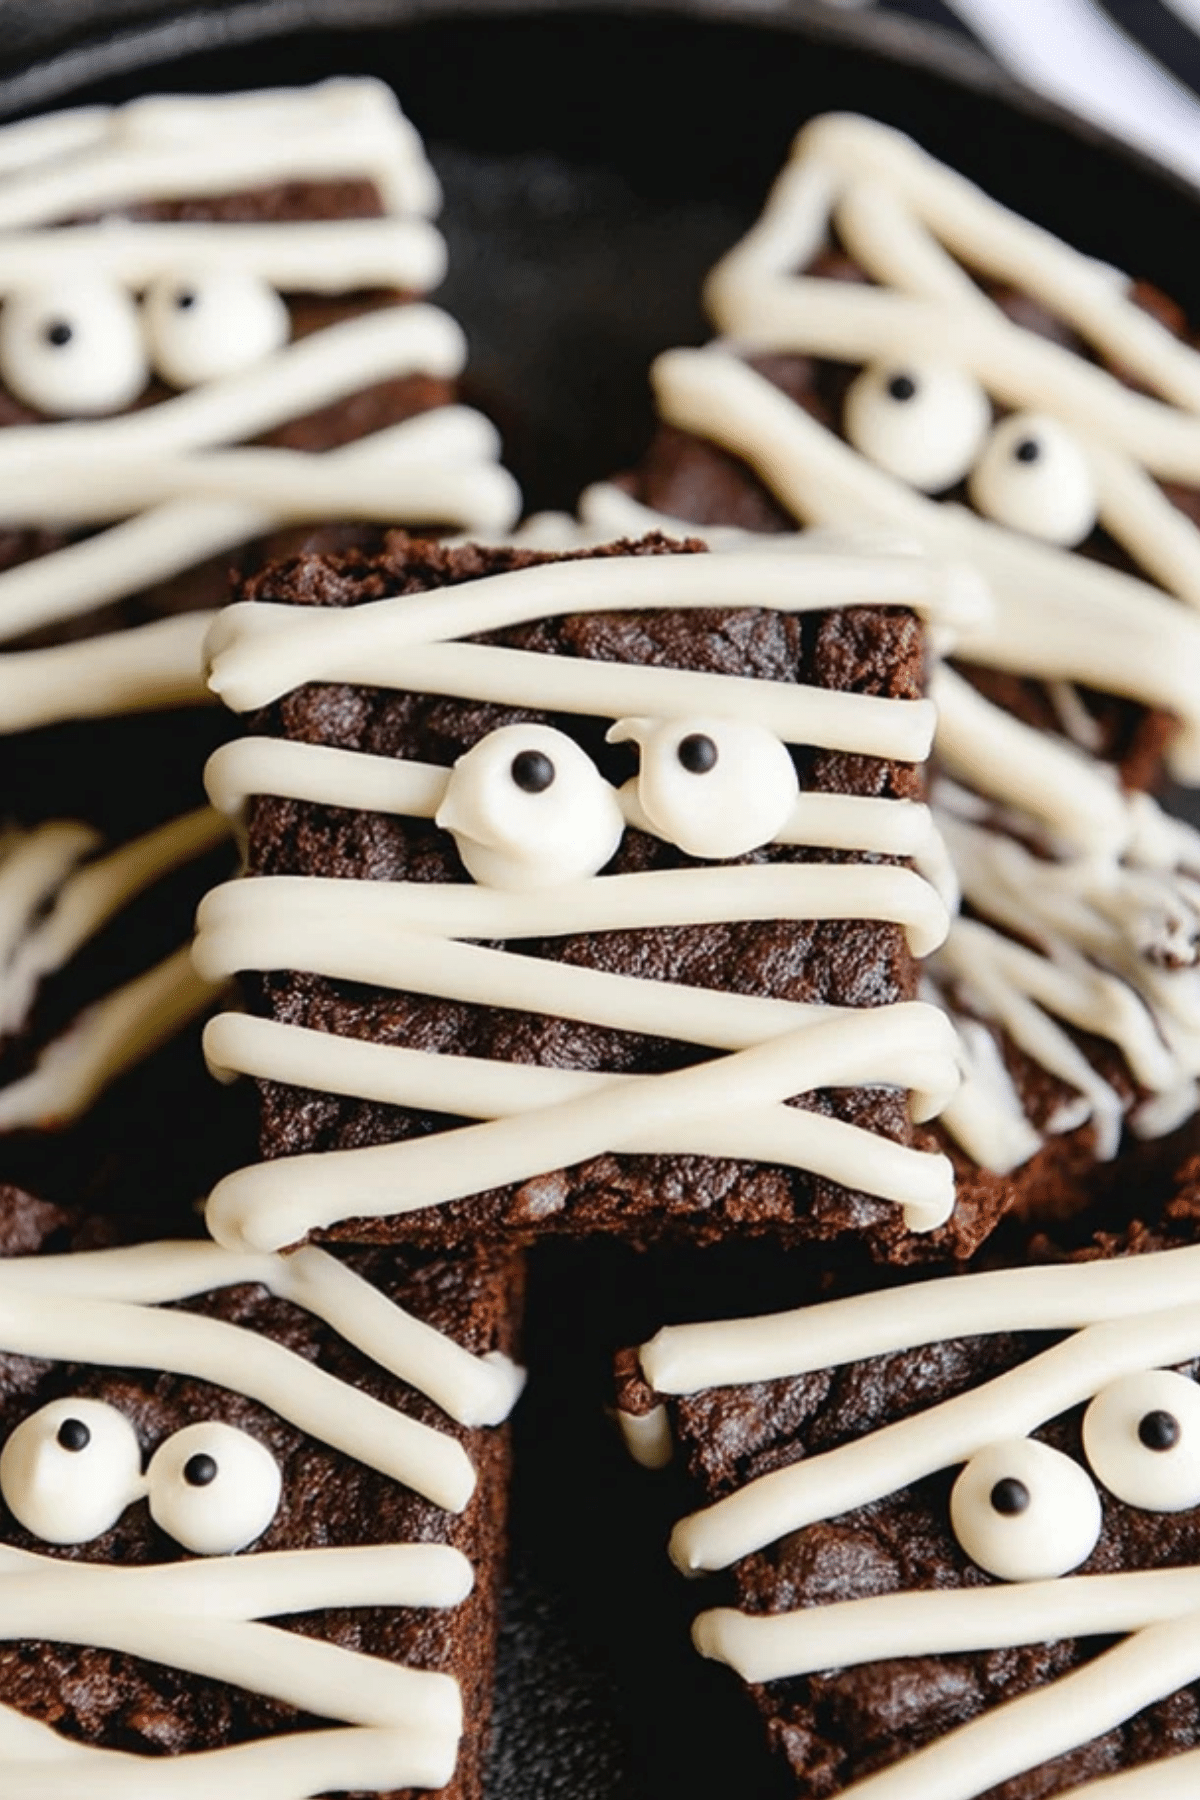
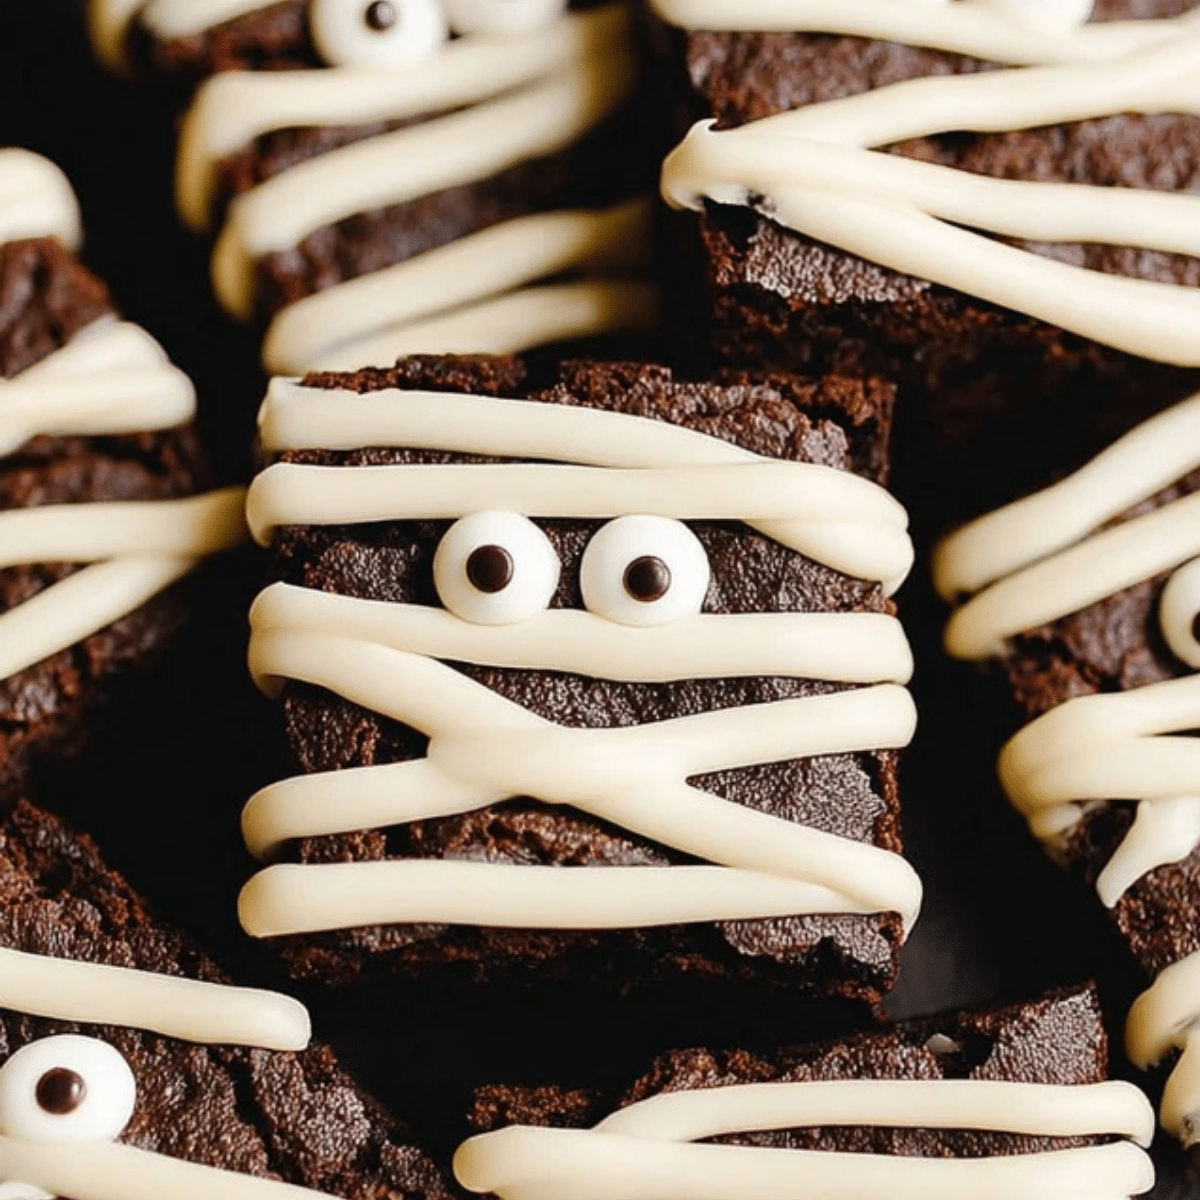
Halloween is around the corner, and what better way to get into the spooky spirit than with a batch of delicious Mummy Brownies? These brownies are not only rich and chocolatey but also super fun to make and decorate. Whether you’re baking for a Halloween party, family gathering, or just for fun, these Mummy Brownies will surely become a hit. With their cute candy eyeballs and mummy-inspired white chocolate drizzles, they combine a little spooky with a lot of sweet.
Table of Contents
Why You’ll Love These Mummy Brownies
These Mummy Brownies are the perfect Halloween dessert for all ages. They’re quick, easy, and require only a few simple ingredients. You won’t need any fancy baking skills to create these cute, spooky treats. The rich, fudgy brownies serve as the perfect base, and the white chocolate drizzle gives them that signature mummy look. Plus, the candy eyeballs add the perfect touch of whimsy. These brownies are ideal for kids and adults alike who are looking for a fun Halloween snack.
Ingredients
Here’s what you’ll need to make these spooky Mummy Brownies:
- Butter: Adds richness and moisture to the brownies.
- Semisweet Chocolate Chips: Provides a deep chocolate flavor for the brownies.
- Vanilla Extract: Enhances the overall flavor with a touch of sweetness.
- Eggs: Help bind the ingredients together and provide structure to the brownies.
- Flour: The base of the brownie batter.
- Sugar: Sweetens the brownies perfectly.
- Brown Sugar: Adds a hint of caramel flavor and moisture.
- Dutch Process Cocoa: Gives the brownies a rich, intense chocolate flavor.
- Salt: Balances the sweetness and enhances the chocolate flavor.
- White Chocolate Chips (or Candy Wafers): Used for creating the mummy’s bandages and securing the candy eyeballs.
- Candy Eyeballs: The fun, spooky detail that makes these brownies look like mummies!
Alternative Ingredient Suggestions
- Milk Chocolate Chips: If you prefer a sweeter, milk chocolate flavor, substitute the semisweet chocolate chips with milk chocolate.
- Regular Cocoa Powder: You can swap Dutch-process cocoa for regular cocoa powder if that’s what you have on hand.
- Melting Wafers: If you’re having trouble with white chocolate melting smoothly, try using white candy wafers, which melt easier and maintain a good consistency.
Step-by-Step Instructions
- Preheat the oven to 350°F (175°C). Line a 9×9-inch or 8×8-inch baking pan with parchment paper to ensure easy removal of the brownies once baked.
- Melt the butter and chocolate: In a microwave-safe bowl, melt the butter and semisweet chocolate chips in 30-second intervals. Stir well between intervals until fully melted and smooth.
- Combine dry ingredients: In a separate bowl, mix together the flour, sugar, brown sugar, cocoa powder, baking powder, and salt. Stir until fully combined.
- Add wet ingredients: Create a well in the center of the dry ingredients and add the eggs, vegetable oil, and vanilla extract. Mix gently until the batter is just combined—do not overmix.
- Bake the brownies: Pour the brownie batter into the prepared pan and spread it out evenly. Bake for 30-35 minutes or until a toothpick inserted into the center comes out clean. Let the brownies cool completely in the pan for at least 30 minutes.
- Cut the brownies: Once cooled, lift the brownies out of the pan using the parchment paper and cut them into 16 squares.
- Decorate with candy eyeballs: Place two candy eyeballs on top of each brownie.
- Create mummy bandages: In a microwave-safe bowl, melt the white chocolate in 30-second intervals, stirring until smooth. Transfer the melted white chocolate into a zip-loc bag and snip off a tiny corner. Drizzle the white chocolate over the brownies in a criss-cross pattern to resemble mummy bandages, making sure the chocolate touches the candy eyeballs to secure them in place.
- Let the chocolate set: Allow the white chocolate to cool and harden, about 10-15 minutes. Once set, your Mummy Brownies are ready to be served!

Tips & Tricks
- Avoid Overbaking: To ensure the perfect texture, do a toothpick test around the 30-minute mark. The brownies should be fudgy and moist, so don’t overbake.
- Use High-Quality Chocolate: For the best flavor, use high-quality semisweet and white chocolate. This will make your brownies richer and more decadent.
- Let the Brownies Cool Completely: Be sure to let your brownies cool for at least 30 minutes before cutting. This helps them set and makes them easier to slice.
- Add Some Extra Flavor: For an added twist, consider mixing in some crushed candy or Halloween-themed sprinkles into the brownie batter before baking.
Pairing Ideas and Variations
While these Mummy Brownies are great on their own, they can be paired with some fun Halloween treats to create a spooky dessert spread. Try serving them with:
- Pumpkin Spice Ice Cream: A cool and creamy contrast to the rich, fudgy brownies.
- Caramel Sauce: Drizzle over the brownies for an extra sweet treat.
- Spooky Hot Chocolate: Serve alongside a mug of hot chocolate topped with marshmallows for a festive touch.
Storage and Make-Ahead Tips
- Storing: Mummy Brownies should be stored in an airtight container at room temperature. They will stay fresh for up to a week.
- Freezing: You can also freeze these brownies! Place them in a sealed container or freezer bag, and they will keep for up to 3 months.
The Perfect Halloween Dessert
Mummy Brownies are not just about fun—they’re also about flavor. With a rich chocolate base and a sweet white chocolate drizzle, they’re a dessert that’s both visually fun and delicious. Whether you’re hosting a Halloween party or just treating yourself and your family, these Mummy Brownies are sure to make your Halloween a little sweeter.
Conclusion
These Mummy Brownies are the perfect blend of spooky and sweet, making them an ideal treat for Halloween. With a simple brownie recipe as the base and a creative, fun decoration using white chocolate and candy eyeballs, these brownies are a festive way to celebrate the season. Whether you’re hosting a Halloween party, baking with the kids, or surprising friends with a spooky snack, these Mummy Brownies will bring a touch of magic to your celebration. They’re easy to make, delightfully delicious, and sure to be a crowd favorite!
FAQ
1. Can I make Mummy Brownies ahead of time?
Absolutely! Mummy Brownies can be made in advance. In fact, they store beautifully. Just let them cool completely after baking, then keep them in an airtight container at room temperature for up to a week. You can also freeze them for up to three months, either before or after adding the mummy decorations.
2. Can I use milk chocolate instead of semisweet chocolate for the brownie base?
Yes, you can substitute milk chocolate chips for semisweet chocolate chips if you prefer a sweeter, less bitter flavor. Keep in mind that using milk chocolate will result in a milder chocolate flavor in the brownies, but they will still be delicious!
3. What can I use if I don’t have candy eyeballs?
If you can’t find candy eyeballs, you can easily use any small candy, such as M&M’s or chocolate chips, as eyes. Just make sure they are small enough to fit on each brownie square without covering too much of the surface.
4. How do I prevent the white chocolate from hardening too quickly when decorating?
If the white chocolate is hardening too quickly as you decorate, try adding a small amount of vegetable oil (about 1/2 teaspoon) to the melted chocolate. This will help it flow more smoothly and give you more time to create the mummy bandages.
More Relevant Recipes
- Halloween Bean Dip: This festive dip combines hearty beans with savory seasonings, perfect for serving at your Halloween party. It’s a fun, crowd-pleasing appetizer that pairs perfectly with the spooky Mummy Brownies.
- Zombie Brain Cupcakes: These cupcakes are a spooky and fun way to complement your Mummy Brownies. With their eerie frosting and creative decorations, they are sure to add some extra fright to your Halloween spread.
- Rice Krispies Brains: These Rice Krispies treats are molded into brain shapes and decorated for Halloween. They offer a delicious and easy-to-make treat that fits perfectly into a Halloween-themed dessert table alongside Mummy Brownies.

Mummy Brownies
- Total Time: 50-55 minutes
- Yield: 16 Brownies
- Diet: Vegetarian
Description
Mummy Brownies are a fun, spooky, and delicious Halloween treat. With a rich chocolate brownie base topped with creepy candy eyeballs and mummy-like white chocolate drizzles, these brownies are sure to be a hit at your Halloween party or family gathering. They’re easy to make and perfect for anyone who loves both sweets and a little spooky fun.
Ingredients
- ½ Cup Butter
- ¼ Cup Semisweet Chocolate Chips
- 2 teaspoons Vanilla Extract
- 2 Large Eggs
- ¾ Cup All-Purpose Flour
- ½ Cup Granulated Sugar
- ½ Cup Brown Sugar
- ⅓ Cup Dutch Process Cocoa Powder
- ¼ teaspoon Salt
- 32 Candy Eyeballs
- 1 Cup White Chocolate Chips (or Candy Wafers)
Instructions
- Preheat the oven to 350°F (175°C). Line a 9×9-inch or 8×8-inch baking pan with parchment paper.
- In a microwave-safe bowl, melt the butter and semisweet chocolate chips in 30-second intervals, stirring until smooth.
- In a separate bowl, mix the flour, granulated sugar, brown sugar, cocoa powder, baking powder, and salt until well combined.
- Create a well in the center of the dry ingredients and add eggs, vegetable oil, and vanilla extract. Mix until just combined.
- Pour the brownie batter into the prepared pan and bake for 30-35 minutes, checking with a toothpick to ensure it comes out clean.
- Let the brownies cool for at least 30 minutes before lifting them out of the pan using the parchment paper and cutting them into 16 squares.
- Place two candy eyeballs on top of each brownie.
- Melt the white chocolate chips in the microwave, stirring every 30 seconds until smooth. Transfer the melted chocolate to a zip-loc bag.
- Snip a small corner off the bag and drizzle the melted white chocolate over the brownies in a criss-cross pattern to create mummy bandages.
- Allow the chocolate to set for 10-15 minutes before serving.
Notes
- For best results, use high-quality chocolate chips for both the semisweet and white chocolate.
- If you prefer a milk chocolate flavor, substitute the semisweet chocolate chips with milk chocolate.
- For a smoother white chocolate drizzle, you can add a small amount of vegetable oil to the melted white chocolate if it’s too thick.
- These brownies can be made ahead of time and stored in an airtight container at room temperature for up to a week.
- For a fun twist, try adding Halloween-themed sprinkles or crushed candy into the batter.
- Prep Time: 15 minutes
- Cook Time: 30-35 minutes
- Category: Dessert
- Method: Baking
- Cuisine: American
Nutrition
- Serving Size: 1 Brownie
- Calories: 150 kcal
- Sugar: 15g
- Sodium: 99mg
- Fat: 7g
- Saturated Fat: 4g
- Unsaturated Fat: 3g
- Trans Fat: 1g
- Carbohydrates: 21g
- Fiber: 1g
- Protein: 2g
- Cholesterol: 36mg

