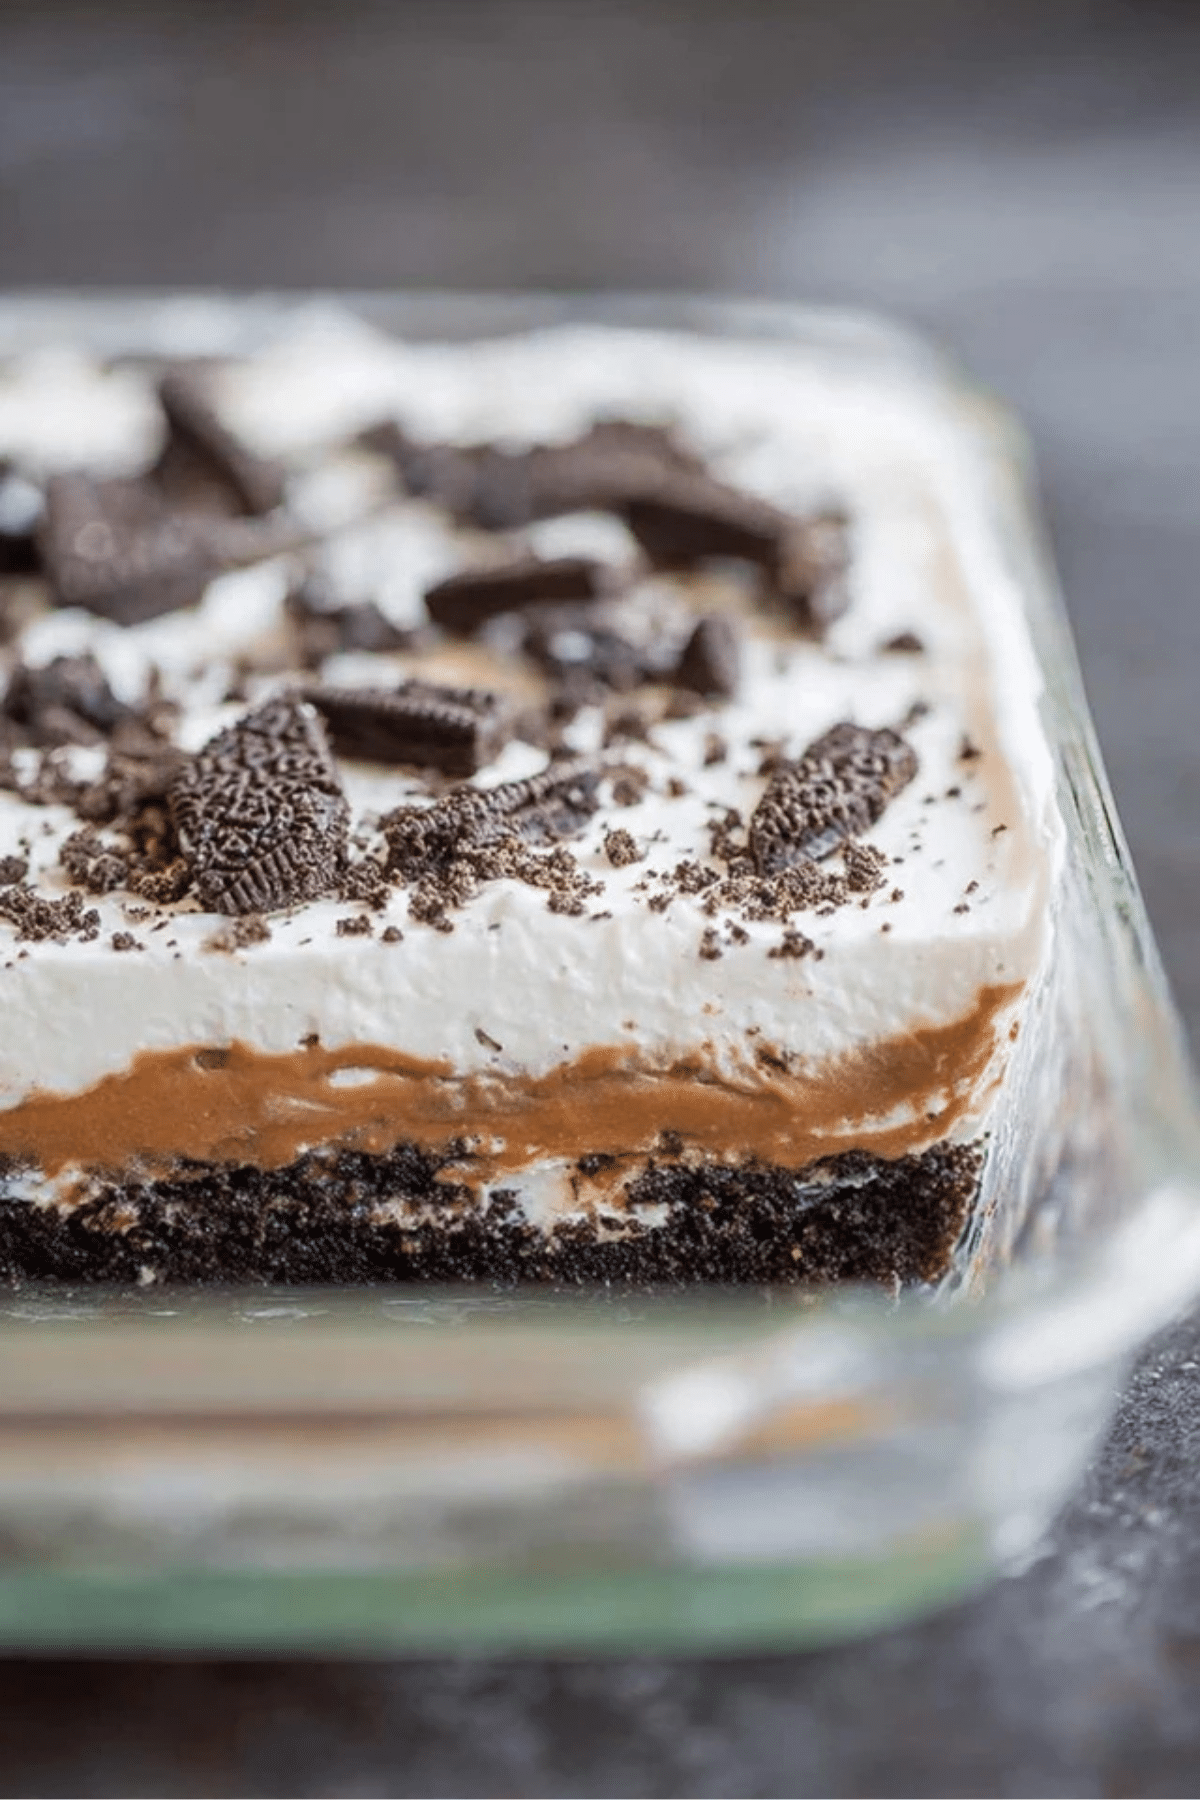
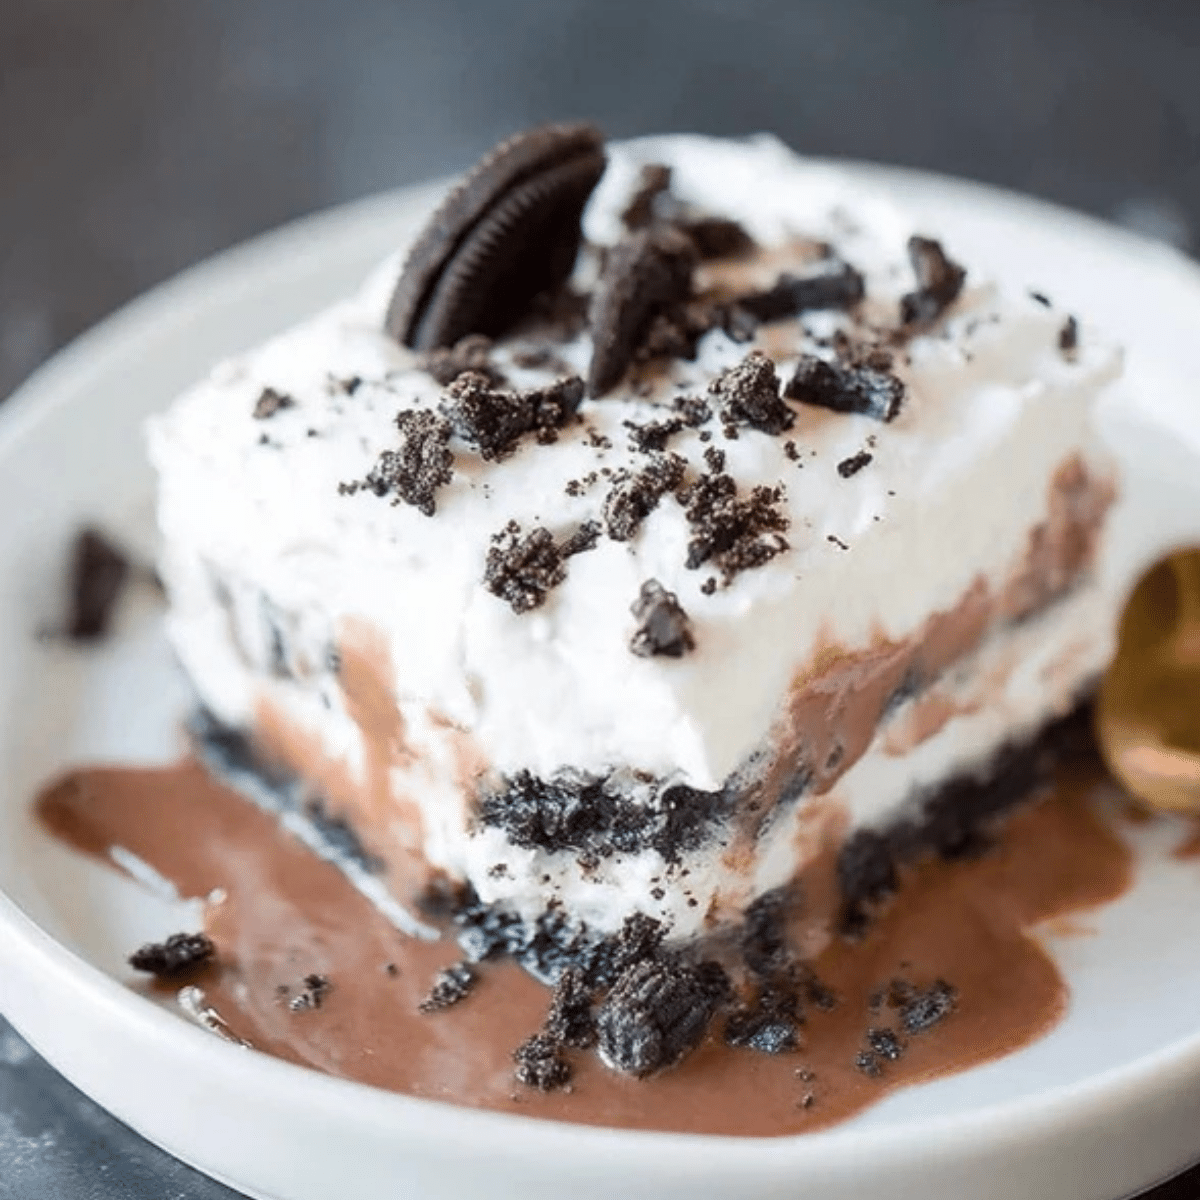
This No Bake Heavenly Oreo Dessert is the ultimate sweet treat for anyone craving a rich, indulgent, and easy-to-make dessert. With a crumbly Oreo crust, a creamy no-bake cheesecake layer, luscious chocolate pudding, and a whipped topping adorned with more crushed Oreos, this dessert delivers an irresistible combination of flavors and textures. Whether you’re entertaining guests or just need a simple, crowd-pleasing treat, this no-bake dessert is sure to impress.
Table of Contents
Why You’ll Love This No Bake Oreo Dessert
This No Bake Heavenly Oreo Dessert is everything you could want in a treat: it’s quick, easy, and perfect for any occasion. The no-bake method eliminates the need to turn on your oven, making it ideal for hot summer days or whenever you’re short on time. With layers of Oreo crust, cream cheese, chocolate pudding, and Cool Whip, this dessert is the perfect balance of sweetness and creaminess. It’s a family-friendly dessert everyone will love, and it’s incredibly simple to prepare with only a few basic ingredients.
Ingredients for the No Bake Oreo Dessert
Here’s what you’ll need to make this indulgent dessert:
- Oreo Cookies: These form the crunchy, delicious base and topping. I recommend Double Stuf Oreos for an extra creamy experience.
- Butter: Melted butter binds the Oreo crumbs together for a firm, flavorful crust.
- Cream Cheese: The cream cheese layer adds richness and smoothness to balance the sweetness of the pudding layer.
- Powdered Sugar: This sweetener makes the cream cheese layer extra smooth and sweet.
- Cool Whip: Used in both the cream cheese layer and as a topping, Cool Whip adds a light, airy texture to the dessert.
- Instant Chocolate Pudding Mix: The chocolate pudding layer gives this dessert its deep, chocolaty richness.
- Milk: The milk is combined with the pudding mix to create a thick, creamy layer.
Alternative Ingredient Suggestions
For a twist on the classic, you can swap some ingredients based on your dietary preferences or what you have on hand:
- Gluten-Free Oreos: If you’re looking for a gluten-free version of this dessert, simply use gluten-free Oreos.
- Sugar-Free Cool Whip: For a lighter version, use sugar-free Cool Whip to reduce the overall sugar content.
- Vanilla Pudding: If you prefer vanilla to chocolate, simply replace the chocolate pudding with vanilla pudding for a different flavor profile.
- Homemade Whipped Cream: If you want a fresher taste, try making homemade whipped cream to top the dessert instead of using Cool Whip.
Step-by-Step Instructions for No Bake Oreo Dessert
- Make the Oreo Crust: Start by placing the Oreo cookies in a large Ziploc bag and crushing them with a rolling pin until you have small, chunky crumbs. Reserve ½ cup of the crumbs for the topping. Combine the remaining crumbs with melted butter and press them into the bottom of a 9×13-inch pan. Refrigerate to set the crust.
- Prepare the Cream Cheese Layer: In a large bowl, beat the cream cheese until smooth and fluffy. Gradually add the powdered sugar and continue to beat until fully incorporated. Gently fold in the Cool Whip until well combined. Spread this cream cheese mixture evenly over the chilled Oreo crust.
- Make the Chocolate Pudding Layer: In a separate bowl, whisk together the instant chocolate pudding mix and milk for 2 minutes. Allow it to set for 5 minutes. Once set, spread the pudding evenly over the cream cheese layer.
- Add the Final Cool Whip Layer: Spread the remaining Cool Whip over the pudding layer, smoothing it out to cover the entire dessert.
- Top with Crushed Oreos: Sprinkle the reserved Oreo crumbs on top for added texture and flavor.
- Chill the Dessert: Cover the dessert and refrigerate for at least 4 hours, or overnight, for best results. The layers will firm up, making it easier to cut and serve.

Tips & Tricks for Perfect No Bake Oreo Dessert
- Chill Time: Be sure to refrigerate the dessert for at least 4 hours to allow the layers to set properly. For the best texture, let it chill overnight.
- Crust Consistency: If the crust isn’t firm enough, add a little more melted butter. It should hold together when pressed.
- Substitute Ingredients: If you’re missing some ingredients or need a dietary swap, don’t hesitate to adjust the recipe. For example, use dairy-free alternatives if needed.
Pairing Ideas and Variations
This No Bake Heavenly Oreo Dessert pairs wonderfully with a variety of drinks and additional toppings:
- Beverages: Serve it with a glass of chilled milk, a hot cup of coffee, or a refreshing iced tea.
- Toppings: Add fresh berries like raspberries or strawberries for a fresh contrast to the creamy, chocolatey layers.
- Gluten-Free Option: Simply swap the Oreos for gluten-free versions to make this dessert suitable for those with gluten sensitivities.
- Extra Chocolate: If you’re a chocolate lover, drizzle melted chocolate over the top or add chocolate shavings for an extra indulgent touch.
A Delicious Treat for Any Occasion
This No Bake Heavenly Oreo Dessert is perfect for any occasion—from casual family gatherings to special celebrations. With its creamy layers, rich chocolate, and crunch of Oreos, it’s sure to be a crowd-pleaser. Plus, the no-bake nature of the recipe makes it incredibly easy to prepare, allowing you to spend less time in the kitchen and more time enjoying the company of friends and family.
This dessert is not only visually appealing but also absolutely delicious. Whether you’re celebrating a holiday, a birthday, or just enjoying a weekend treat, this Oreo dessert is the perfect choice. Try it today and discover why it’s called “heavenly”!
Conclusion
In conclusion, this No Bake Heavenly Oreo Dessert is a must-try for anyone who enjoys indulgent, no-bake desserts. With its easy preparation, minimal ingredients, and irresistible layers, it’s perfect for any occasion, whether you’re hosting a gathering or simply craving something sweet. The combination of Oreo crust, cream cheese, chocolate pudding, and Cool Whip creates a dessert that’s both rich and refreshing. Plus, its versatility allows for swaps and variations to suit different tastes and dietary needs.
No matter how you choose to serve it, this dessert is sure to be a crowd-pleaser that will leave everyone asking for seconds. So why wait? Make this No Bake Heavenly Oreo Dessert today and enjoy the sweet, creamy goodness in every bite!
Frequently Asked Questions (FAQs)
Can I make the No Bake Heavenly Oreo Dessert ahead of time?
Yes! This dessert actually benefits from being made in advance. You can prepare it the day before and let it chill overnight in the fridge. The layers will set perfectly, and the dessert will be ready to serve when you need it.
Can I use regular Oreos instead of Double Stuf Oreos?
Absolutely! While Double Stuf Oreos give an extra creamy texture, you can use regular Oreos if preferred. The dessert will still taste just as delicious.
Can I substitute Cool Whip with homemade whipped cream?
Yes, homemade whipped cream can be used, but note that it may not hold up as well as Cool Whip, especially if you’re storing leftovers. Cool Whip has a firmer consistency that helps the layers stay intact.
How can I make this dessert gluten-free?
To make this dessert gluten-free, simply use gluten-free Oreos. Other ingredients in the recipe, such as the pudding mix and Cool Whip, are naturally gluten-free, but always check labels for any potential gluten content.
More Relevant Recipes
- No-Bake Lemon Eclair Cake: This refreshing no-bake dessert combines layers of graham crackers and lemon-flavored pudding, topped with a light whipped cream layer, offering a tart and creamy treat that pairs wonderfully with the richness of the No Bake Heavenly Oreo Dessert.
- No-Bake Chocolate Oat Bars: If you’re a fan of chocolate and a bit of crunch, these no-bake chocolate oat bars are a great choice. They combine the sweetness of chocolate with the hearty texture of oats, creating a satisfying snack or dessert similar to the Oreo dessert but with a different texture.
- Strawberry Cheesecake Ice Cream: For those who enjoy creamy, indulgent desserts, this no-churn strawberry cheesecake ice cream will hit the spot. It’s a frozen twist on the classic cheesecake and pairs well with the Oreo crust, delivering a creamy, fruity alternative.

No Bake Heavenly Oreo Dessert
- Total Time: 4 hours 30 minutes
- Yield: 12 servings
- Diet: Vegetarian
Description
This No Bake Heavenly Oreo Dessert is a perfect treat for Oreo lovers. With a crunchy Oreo crust, creamy layers of cheesecake and chocolate pudding, and topped with Cool Whip and crushed Oreos, it’s an indulgent, easy-to-make dessert that requires no baking at all.
Ingredients
- 15.35 oz Double Stuf Oreo Cookies
- 1/2 cup unsalted butter (melted)
- 8 oz cream cheese
- 1 cup powdered sugar
- 8 oz tub Cool Whip
- 1 (5.1 oz) box instant chocolate pudding
- 3 cups milk
- 8 oz tub Cool Whip (for topping)
Instructions
- Crush the Oreo cookies in a large Ziploc bag until chunky crumbs form. Set aside 1/2 cup of crumbs for the topping.
- Combine the crushed Oreos with melted butter and press into the bottom of a 9×13-inch pan to form the crust. Refrigerate while preparing the cream cheese layer.
- Beat the cream cheese on medium speed until smooth. Gradually add powdered sugar and continue beating. Fold in the Cool Whip until well mixed.
- Spread the cream cheese mixture evenly over the chilled Oreo crust.
- Whisk the chocolate pudding mix with milk for 2 minutes. Let it sit for 5 minutes to set, then spread it evenly over the cream cheese layer.
- Top with the remaining Cool Whip and sprinkle with reserved Oreo crumbs.
- Cover and refrigerate for at least 4 hours or overnight before serving.
Notes
- For best results, chill the dessert overnight to allow the layers to set properly.
- You can use regular Oreos instead of Double Stuf for a less creamy version.
- Feel free to swap the Cool Whip with homemade whipped cream, though it may not hold up as well.
- If you don’t have instant pudding, make sure to use a similar pudding mix for the dessert to set correctly.
- Prep Time: 30 minutes
- Cook Time: 0 minutes
- Category: Dessert
- Method: No-Bake
- Cuisine: American
Nutrition
- Serving Size: 1 piece
- Calories: 486 kcal
- Sugar: 43g
- Sodium: 458mg
- Fat: 25g
- Saturated Fat: 13g
- Unsaturated Fat: 10g
- Trans Fat: 0g
- Carbohydrates: 59g
- Fiber: 1g
- Protein: 6g
- Cholesterol: 54mg

