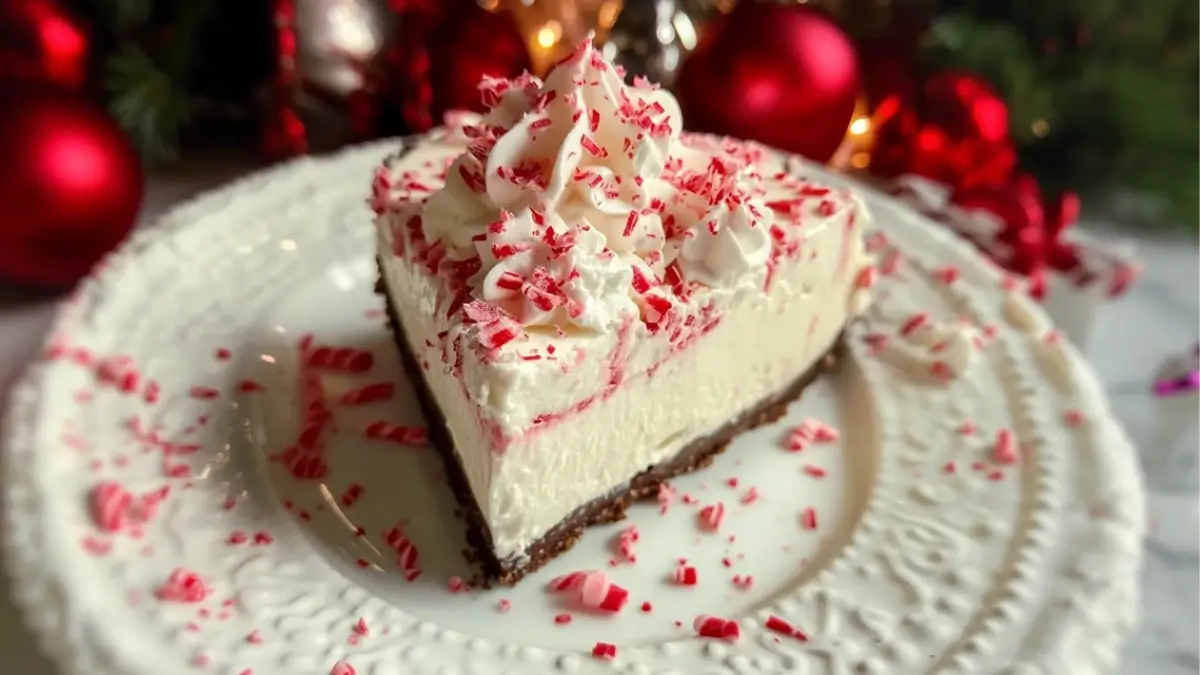
If you’re looking for a show-stopping holiday dessert that doesn’t require turning on the oven, then No-Bake Peppermint Cheesecake is the perfect choice. This cool, creamy dessert is a holiday favorite, blending the refreshing taste of peppermint with the rich creaminess of cheesecake. Not only does it taste fantastic, but it’s also incredibly simple to make!
In this article, we’ll break down everything you need to know to create this delightful treat, from ingredients to step-by-step directions, along with tips to ensure it turns out perfectly every time. Let’s dive in!
Why Choose a No-Bake Cheesecake?
No-Bake Cheesecakes are a go-to dessert for many reasons:
- No oven required: Perfect for when you need to save time or if your oven is already occupied with other holiday dishes.
- Quick preparation: With minimal ingredients and a few easy steps, you can have this dessert ready to chill in no time.
- Perfect for warm climates: If you’re in a warm environment and don’t want to heat your kitchen, a no-bake option is ideal.
This particular version, the No-Bake Peppermint Cheesecake, adds a festive twist with its cool minty flavor, making it a holiday favorite.
Ingredients You’ll Need
To make this delightful dessert, you’ll need two sets of ingredients: one for the crust and one for the cheesecake filling.
For the Crust:
- 2 cups chocolate cookie crumbs (Oreos work great!)
- 1/2 cup melted butter
For the Peppermint Cheesecake Filling:
- 16 oz cream cheese, softened
- 1 cup powdered sugar
- 1 1/2 cups heavy whipping cream
- 1 tsp peppermint extract
- 1/2 cup crushed candy canes (plus extra for garnish)
- A few drops of red food coloring (optional)
These simple ingredients come together to create an indulgent dessert that feels light yet rich—perfect for a holiday gathering!
Step-by-Step Directions
1. Prepare the Chocolate Cookie Crust
Start by making the base of your cheesecake. In a medium-sized bowl, combine the chocolate cookie crumbs with the melted butter. Stir until the mixture resembles wet sand, and then press it firmly into the bottom of a 9-inch springform pan. Make sure it’s even and compact to give your cheesecake a sturdy foundation. Once done, place the pan in the fridge while you prepare the filling.
2. Whip Up the Peppermint Filling
In a large bowl, beat the cream cheese and powdered sugar together until smooth and creamy. This step ensures that the base of your filling is lump-free and ready to hold the peppermint flavor.
In a separate bowl, whip the heavy cream until stiff peaks form. This whipped cream will give your cheesecake a light and airy texture. Gently fold the whipped cream into the cream cheese mixture, being careful not to deflate it. Add in the peppermint extract, crushed candy canes, and red food coloring (if using), then mix until just combined.
3. Assemble the Cheesecake
Remove the crust from the fridge and pour the peppermint filling on top, spreading it evenly. Once assembled, return the cheesecake to the fridge to chill for at least 4 hours, but overnight is even better. This step is crucial as it allows the cheesecake to set and firm up.
4. Garnish and Serve
Before serving, sprinkle extra crushed candy canes on top for a festive finish. Slice, serve, and enjoy the cool, creamy goodness!
Expert Tips for the Perfect No-Bake Cheesecake
Here are some pro tips to ensure your No-Bake Peppermint Cheesecake turns out perfectly every time:
- Soften your cream cheese: Make sure the cream cheese is at room temperature before mixing to avoid any lumps in your filling.
- Chill for the right amount of time: Don’t rush the chilling process! The cheesecake needs at least 4 hours in the fridge to set properly, but overnight is best for achieving the ideal texture.
- Adjust the peppermint flavor: If you’re a big fan of mint, feel free to add a little more peppermint extract. On the flip side, if you prefer a subtler flavor, start with half a teaspoon and taste before adding more.
- Experiment with the crust: While chocolate cookie crumbs are traditional, you can experiment with different types of crusts such as graham crackers, gingerbread cookies, or even pretzels for a sweet and salty twist.
Nutritional Information & Health Benefits
While this dessert is undeniably indulgent, it’s good to know what you’re getting with each slice. Here’s the breakdown of the nutrition for one serving of No-Bake Peppermint Cheesecake:
Nutritional Details (per serving):
- Calories: 420
- Carbohydrates: 36g
- Protein: 5g
- Fat: 30g
- Saturated Fat: 18g
- Cholesterol: 90mg
- Sodium: 250mg
- Fiber: 1g
- Sugar: 29g
- Vitamin A: 15% of the daily value
- Calcium: 6%
- Iron: 8%
While it’s a dessert, you can lighten it up by using reduced-fat cream cheese or by cutting back on the sugar. But honestly, holidays are for indulging—so enjoy every bite!
FAQs About No-Bake Peppermint Cheesecake
Yes, No-Bake Peppermint Cheesecake is a perfect make-ahead dessert! You can prepare it a day or even two days in advance, making it a convenient option for holiday parties. Just store it in the refrigerator, and it will hold up beautifully until you’re ready to serve.
Store any leftover cheesecake in an airtight container in the fridge. It will stay fresh for up to five days. You can also freeze the cheesecake, but it’s best to do so without the crushed candy cane garnish, as it may become sticky when thawed. To freeze, wrap the cheesecake tightly in plastic wrap and aluminum foil, then thaw in the fridge overnight before serving.
Absolutely! While chocolate cookie crumbs work wonderfully, you can experiment with other bases. Try graham crackers, gingerbread cookies, or even a combination of cookies and nuts for a unique twist. Each crust will bring a new flavor dimension to your cheesecake.
For a gluten-free version, simply substitute the chocolate cookie crumbs with gluten-free cookie alternatives. Most grocery stores offer gluten-free options, so you won’t have to miss out on this delicious dessert.
If you’re not a fan of peppermint, you can easily substitute the peppermint extract with vanilla extract for a more classic cheesecake flavor. Alternatively, you could experiment with almond extract or lemon extract to give the cheesecake a different but equally delicious taste.
With this easy-to-follow recipe, your No-Bake Peppermint Cheesecake will become a holiday staple that everyone will rave about. So why wait? Gather your ingredients and whip up this festive treat—it’s sure to be a hit at your next holiday gathering!
More Relevant Recipes
Print
No-Bake Peppermint Cheesecake
- Total Time: 4 hours 20 minutes (includes chilling time)
- Yield: 8-10 servings
- Diet: Vegetarian
Description
This No-Bake Peppermint Cheesecake is a creamy and refreshing holiday dessert that combines a rich peppermint-flavored cheesecake with a chocolate cookie crust. It’s the perfect festive treat, easy to make, and no oven required!
Ingredients
For the Crust:
- 2 cups chocolate cookie crumbs (like Oreo)
- 1/2 cup melted butter
For the Peppermint Filling:
- 16 oz cream cheese, softened
- 1 cup powdered sugar
- 1 1/2 cups heavy whipping cream
- 1 tsp peppermint extract
- 1/2 cup crushed candy canes (plus extra for garnish)
- A few drops of red food coloring (optional)
Instructions
- Prepare the Crust: First things first, let’s tackle the crust. In a medium-sized bowl, combine the chocolate cookie crumbs and the melted butter until everything is well mixed. It should have a texture like wet sand. Once mixed, press this mixture firmly into the bottom of a 9-inch springform pan. Make sure it’s evenly spread out for that perfect bite in each slice. Pop the pan into the fridge while we work on the filling.
- Make the Peppermint Filling: Now, onto the star of the show—the filling! In a large mixing bowl, beat the softened cream cheese and powdered sugar together until smooth and creamy. No one wants lumps in their cheesecake! In a separate bowl, whip the heavy cream until stiff peaks form—this will give the cheesecake its light, airy texture. Gently fold the whipped cream into the cream cheese mixture. Now, here’s where it gets festive: stir in the peppermint extract, crushed candy canes, and a few drops of red food coloring if you’re feeling fancy. Mix everything until it’s combined but don’t overdo it—nobody wants a runny filling.
- Assemble the Cheesecake: Take the crust out of the fridge and pour the peppermint filling on top, spreading it evenly. Once that’s done, refrigerate the cheesecake for at least 4 hours. The longer you leave it, the firmer it gets. So, if you can resist temptation, let it sit overnight.
- Garnish and Serve: Before serving, sprinkle some extra crushed candy canes over the top to give it that festive sparkle. Slice it up, and serve this cool, creamy peppermint delight. Each bite is like a winter wonderland in your mouth!
Notes
- For the perfect texture, make sure your cream cheese is at room temperature before mixing. This will make it easier to blend with the sugar, giving you that ultra-smooth filling.
- Want to amp up the flavor? Try adding some chocolate chips to the filling for a mint-chocolate twist.
- Don’t like food coloring? No problem! You can skip it and still have a delicious, pepperminty dessert.
- If you’re short on time, freeze the cheesecake for about an hour instead of refrigerating for 4 hours. This will set the filling much quicker, though the texture will be slightly firmer.
- Prep Time: 20 minutes
- Cook Time: None (No-bake)
- Category: Dessert
- Method: No-bake
- Cuisine: American
Nutrition
- Serving Size: 1 slice
- Calories: 420kcal
- Sugar: 29g
- Sodium: 250mg
- Fat: 30g
- Saturated Fat: 18g
- Unsaturated Fat: 10g
- Trans Fat: 0g
- Carbohydrates: 36g
- Fiber: 1g
- Protein: 5g
- Cholesterol: 90mg

