
There is something incredibly nostalgic about Oreo Dirt Cake. It’s the kind of dessert that instantly takes you back to childhood, when the simplest treats brought the most joy. Whether it was served at a birthday party or a summer barbecue, this dessert always stood out—not just for its delicious layers of chocolatey goodness but for its playful presentation that mimicked real dirt. If you’re a fan of easy, crowd-pleasing desserts, this Oreo Dirt Cake is a must-try.
What makes this recipe ideal for beginners is its simplicity. There’s no complicated baking technique required, and most of the ingredients are store-bought, making it a hassle-free dessert. Plus, it’s a no-bake treat that comes together quickly, making it perfect for last-minute gatherings or hot summer days when you don’t want to turn on the oven.

Why This Recipe is Special
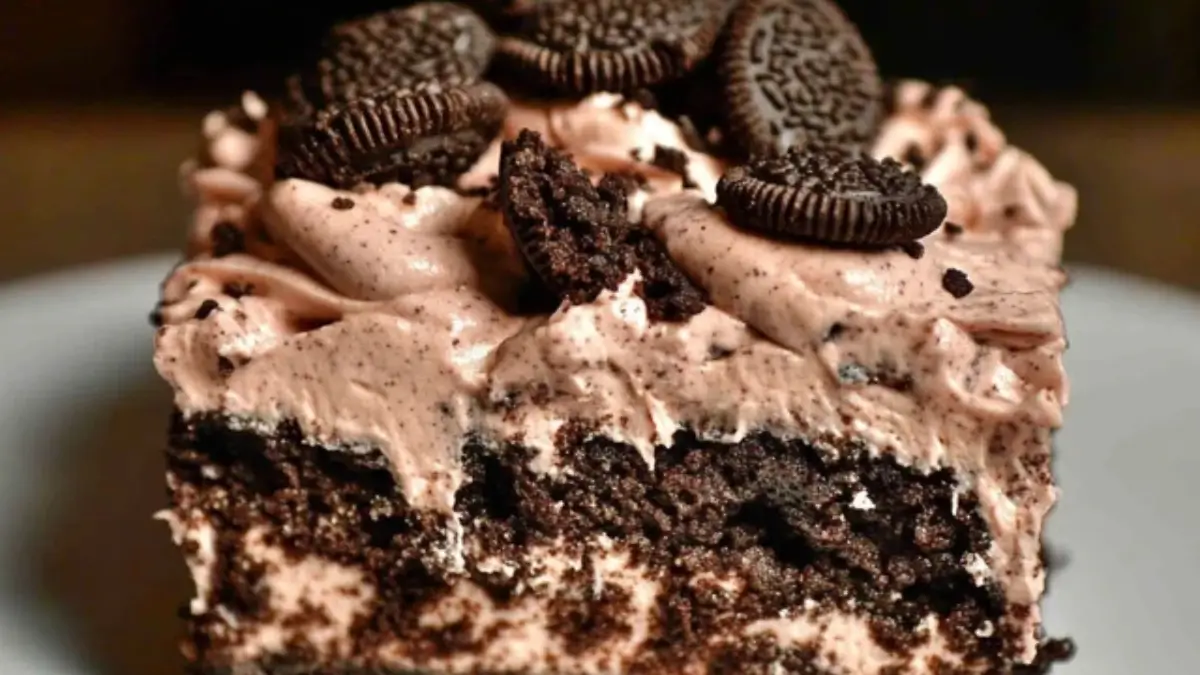
Oreo Dirt Cake is not just about taste; it’s about fun. This dessert is made by layering a rich chocolate cake base with smooth pudding, hot fudge, whipped topping, and crushed Oreos. The texture contrast between the creamy layers and the crunchy Oreo topping makes every bite irresistible. Here’s why you’ll love this recipe:
- Beginner-Friendly – No advanced baking skills required.
- Quick and Easy – Minimal prep time and no need for fancy equipment.
- Perfect for Any Occasion – Great for birthdays, holidays, and potlucks.
- Make-Ahead Friendly – Tastes even better when chilled overnight.
Ingredients and Their Roles
Each ingredient in this recipe plays a crucial role in creating the perfect texture and flavor:
- Chocolate Cake Mix – The base of the dessert. You can use a homemade chocolate cake if you prefer.
- Oreos – Adds crunch and enhances the chocolate flavor. They also mimic the “dirt” effect.
- Hot Fudge – A rich, gooey layer that intensifies the chocolate flavor.
- Chocolate Pudding – Provides a smooth and creamy texture that ties everything together.
- Milk – Used to prepare the pudding, giving it the right consistency.
- Cool Whip (Whipped Topping) – Makes the dessert light and fluffy, balancing out the richness.
Alternative Ingredient Ideas
- Cake Variations – Try using vanilla cake or brownie mix for a different twist.
- Oreo Options – Use Golden Oreos or flavored Oreos like mint or peanut butter.
- Healthier Swaps – Use Greek yogurt instead of Cool Whip or sugar-free pudding mix.
Step-by-Step Instructions
Step 1: Prepare the Cake
Prepare the chocolate cake according to the package instructions and bake it in a 9×13-inch pan. Once baked, allow it to cool for about 10 minutes. Using the back of a spoon or the handle of a wooden spoon, poke holes evenly throughout the cake.
Step 2: Add the Hot Fudge
Warm the hot fudge in the microwave until it reaches a pourable consistency. Slowly drizzle it over the cake, making sure it seeps into the holes. Let the cake cool completely before moving to the next step.
Step 3: Make the Pudding Layer
In a medium mixing bowl, whisk together one package of chocolate pudding mix with milk. Before it sets fully, pour the pudding over the cake, spreading it evenly. Place the cake in the refrigerator to chill for about 20 minutes.
Step 4: Prepare the Topping
In another bowl, mix the second package of pudding with milk. Let it set in the fridge for 10 minutes, then gently fold in the thawed Cool Whip. Stir in about three-quarters of the crushed Oreos.
Step 5: Assemble the Dessert
Spread the pudding-Cool Whip mixture evenly over the chilled cake. Sprinkle the remaining crushed Oreos on top, creating the final “dirt” effect. Refrigerate for at least 2 hours before serving for the best flavor.
Beginner Tips and Notes
- Crushing Oreos Without a Food Processor – Place them in a zip-top bag and crush them with a rolling pin.
- Avoid a Soggy Cake – Allow the pudding layer to set before adding the topping.
- Chill for Best Results – Letting the cake sit in the fridge for a few hours enhances the flavors.
- Make It Fun – Add gummy worms for a kid-friendly touch or swap hot fudge for caramel for a different flavor.
Serving Suggestions
Oreo Dirt Cake is delicious on its own, but you can take it up a notch with these serving ideas:
- Pair with Ice Cream – A scoop of vanilla ice cream complements the richness.
- Top with Extra Whipped Cream – Adds a fluffy, creamy finish.
- Drizzle with Chocolate Sauce – For an extra dose of chocolatey goodness.
Storage Tips
- Refrigerate – Store in an airtight container for up to 3 days.
- Freezing – While the full cake doesn’t freeze well, individual portions can be frozen and enjoyed like ice cream.
Try This Recipe and Share Your Thoughts
If you’re looking for an easy, chocolate-filled dessert that everyone will love, this Oreo Dirt Cake is the perfect choice. Give it a try and let us know how it turns out. Did you add your own twist? Share your experience in the comments!
FAQ About Oreo Dirt Cake
Yes, this dessert is perfect for making ahead. You can prepare it up to 24 hours in advance and store it in the refrigerator. Add the final Oreo topping just before serving for the best texture.
Place the Oreos in a zip-top bag and use a rolling pin to crush them into crumbs. This method works well and keeps cleanup minimal.
Absolutely. Whip 1 cup of heavy cream with 2 tablespoons of sugar until stiff peaks form, then use it as a substitute for Cool Whip.
You can switch the chocolate cake for vanilla or brownies, use flavored Oreos like mint or peanut butter, or even add caramel drizzle for extra richness.
More Relevant Recipes
Print
Oreo Dirt Cake
- Total Time: 55 minutes
- Yield: 16 servings
Description
Oreo Dirt Cake is a decadent, no-bake dessert featuring layers of rich chocolate cake, creamy pudding, hot fudge, and crushed Oreos. This easy-to-make treat is perfect for any occasion, from summer barbecues to birthday parties, and is guaranteed to satisfy any chocolate lover’s cravings.
Ingredients
- Chocolate cake mix (plus ingredients listed on the box)
- Oreos, crushed (about 30 cookies)
- Hot fudge (12.8 oz)
- Chocolate instant pudding mix (two 3.4 oz boxes)
- Milk (3 ½ cups total)
- Cool Whip, thawed (8 oz)
Instructions
- Prepare the Cake: Bake the chocolate cake according to the package instructions in a 9×13-inch pan. Once baked, let it cool for about 10 minutes. Use the back of a spoon or the handle of a wooden spoon to poke holes evenly throughout the cake.
- Add the Hot Fudge: Warm the hot fudge in the microwave until it becomes pourable. Evenly drizzle it over the cake, ensuring it seeps into the holes. Allow the cake to cool completely before proceeding.
- Make the Pudding Layer: In a medium bowl, whisk together one package of chocolate pudding mix with 1 ¾ cups of milk. Before it fully sets, pour it over the cooled cake, spreading it evenly. Refrigerate for about 20 minutes to allow it to firm up.
- Prepare the Topping: In another bowl, mix the second package of pudding with 1 ¾ cups of milk. Let it set in the refrigerator for 10 minutes. Gently fold in the thawed Cool Whip until fully combined, then stir in about three-quarters of the crushed Oreos.
- Assemble the Cake: Spread the pudding-Cool Whip mixture evenly over the chilled cake. Sprinkle the remaining crushed Oreos on top to create the final “dirt” effect. Refrigerate for at least 2 hours before serving for the best flavor and texture.
Notes
- Let the cake chill for at least 2 hours to enhance the flavors and texture.
- For a fun twist, add gummy worms on top to make it look more like a classic “dirt cake.”
- If you prefer a homemade touch, swap store-bought hot fudge with melted chocolate ganache.
- To make a gluten-free version, use a gluten-free chocolate cake mix and gluten-free Oreos.
- Prep Time: 30 minutes
- Cook Time: 25 minutes
- Category: Dessert
- Method: No-Bake (except for cake preparation)
- Cuisine: American
Nutrition
- Serving Size: 1 piece
- Calories: 382kcal
- Sugar: 36g
- Sodium: 679mg
- Fat: 9g
- Saturated Fat: 3g
- Unsaturated Fat: 4g
- Trans Fat: 0g
- Carbohydrates: 70g
- Fiber: 1g
- Protein: 6g
- Cholesterol: 8mg