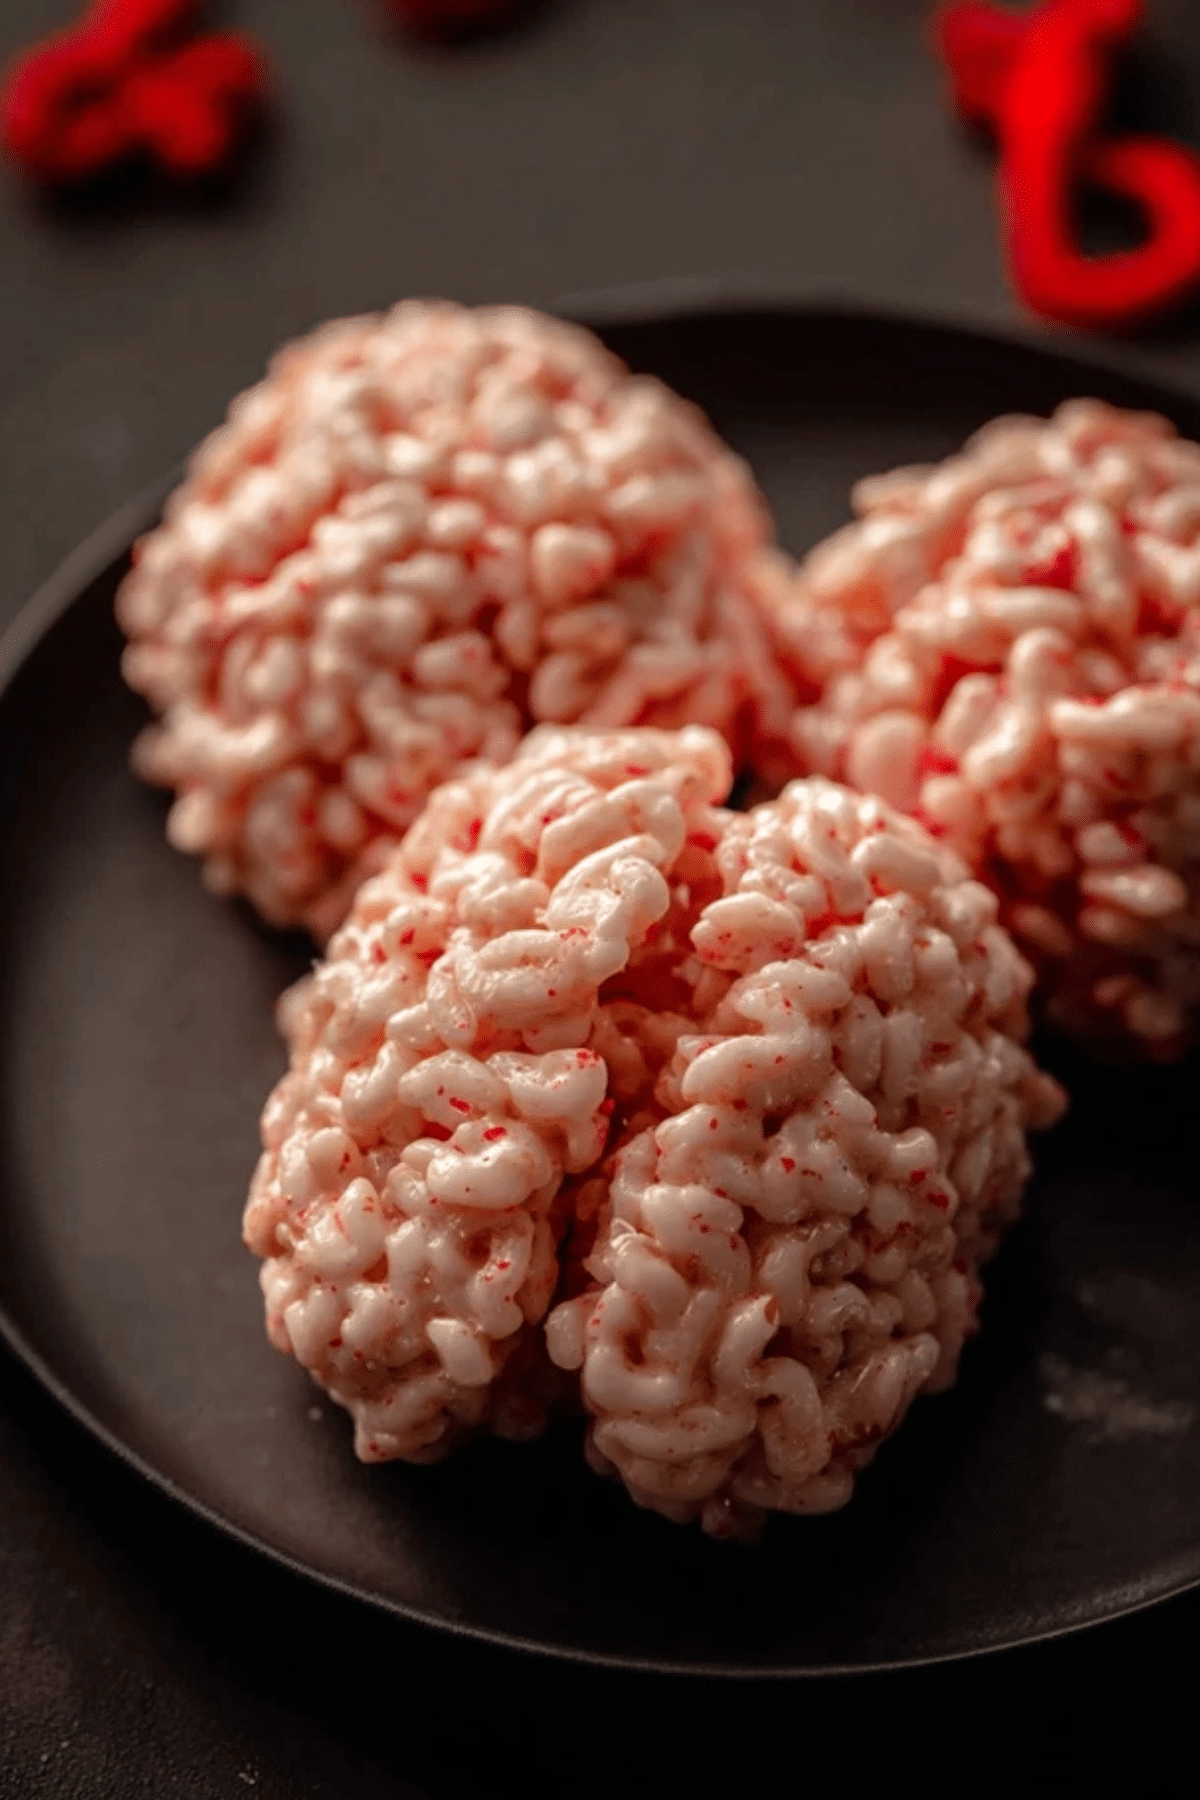
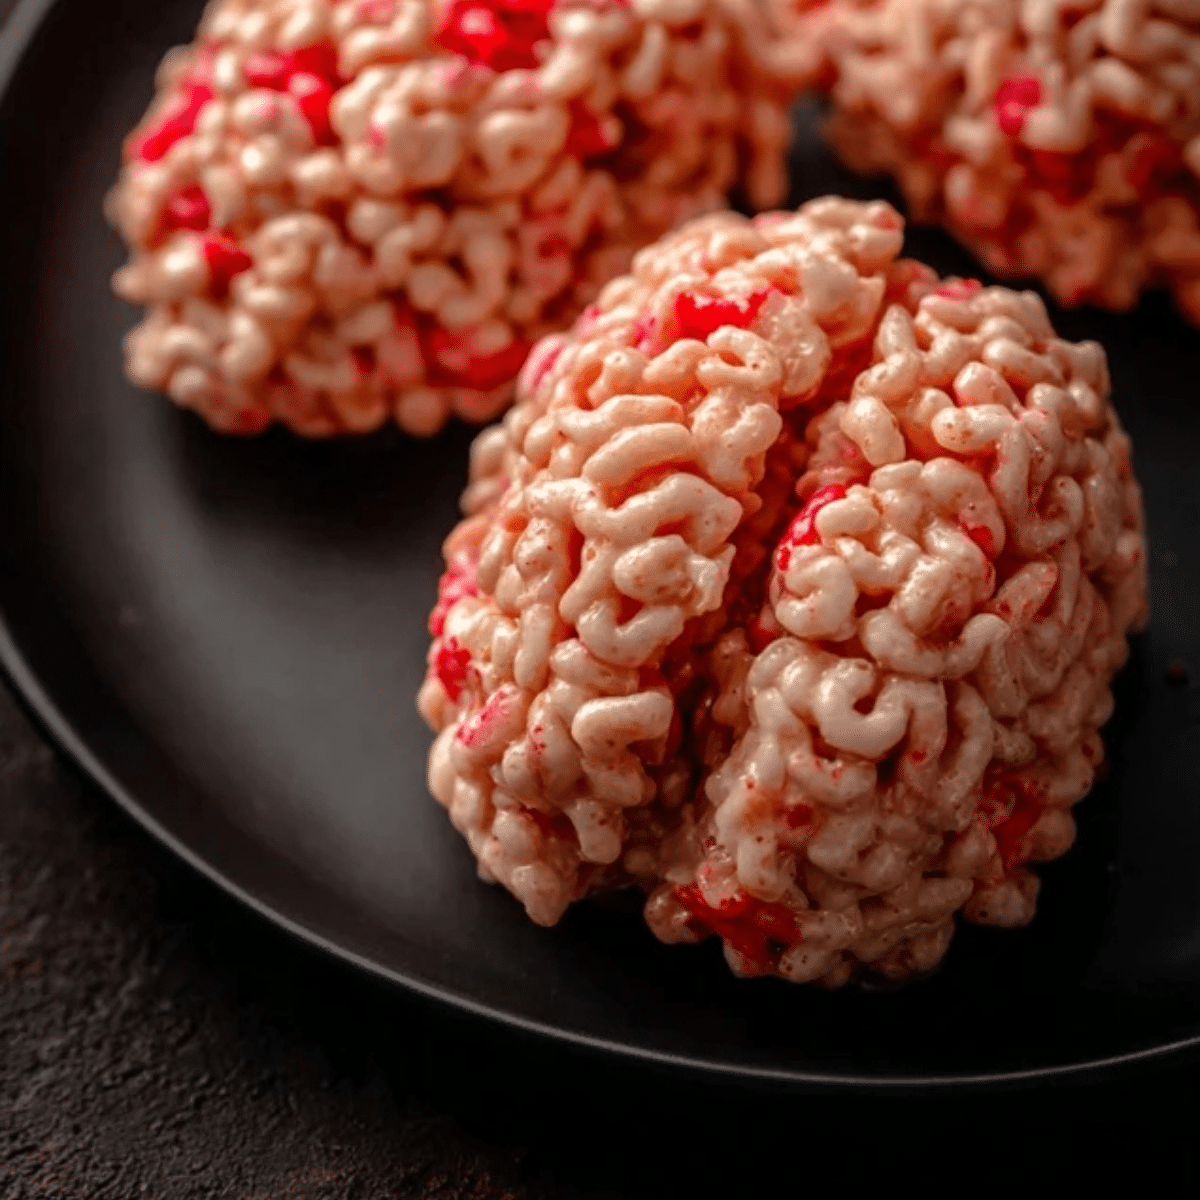
Turn classic marshmallow treats into spooky party-stoppers with these Rice Krispies Brains. With a delightfully creepy appearance and a chewy, gooey texture, this easy Halloween dessert is perfect for parties, classroom events, or themed gatherings. Made with just a few ingredients and no baking required, these pink-tinted, “bloody” Rice Krispies Brains are a delicious twist on a nostalgic snack.
Table of Contents
Spooky, Sweet, and Seriously Simple
One of the best things about Rice Krispies Brains is how quickly they come together. Whether you’re short on time or kitchen space, this no-bake recipe delivers maximum visual impact with minimal effort. They’re perfect for Halloween celebrations, especially when you’re already juggling costumes, décor, and party planning. Even better, you don’t need a special brain mold — just your hands and a little creativity.
Plus, the subtle marshmallow sweetness and crispy texture make these treats universally loved, especially by kids. Their gory “blood” details? Just red food coloring — no specialty items required. This is Halloween snack crafting at its finest.
What You’ll Need for These Creepy Treats
• Rice Krispies Cereal: Provides the iconic crispy texture that forms the base of the treat.
• Mini Marshmallows: Melts into a gooey binder that holds the cereal together while adding sweetness.
• Unsalted Butter: Adds richness and smooths out the marshmallow mixture for better shaping.
• Red Food Coloring: Tints the mixture to a brain-like pink and creates the “bloody” effect for extra creep factor.
Smart Ingredient Swaps and Variations
• Vegan Version: Use vegan marshmallows and plant-based butter to keep things dairy-free.
• Gluten-Free Option: Some store brands of crispy rice cereal are gluten-free — avoid the original Rice Krispies, which contain malt.
• Natural Coloring: Try beet juice or freeze-dried strawberry powder for a natural pink tint if avoiding artificial dyes.
• Add-ins for Flavor: A drop of vanilla or almond extract can enhance the marshmallow flavor if desired.
How to Make Rice Krispies Brains Step by Step
- Prep the Surface
Line a large baking sheet with parchment paper or a silicone mat. This will prevent sticking and make cleanup easy. - Melt Butter and Marshmallows
In a large saucepan over low heat, melt the butter. Once fully melted, add in the mini marshmallows and stir continuously until completely smooth and melted. - Add Color
Stir in 6–8 drops of red food coloring to achieve a light pink hue. Keep in mind the color will dull slightly once cereal is added. - Mix in the Cereal
Remove the pan from heat and quickly stir in the Rice Krispies cereal. Mix until every piece is evenly coated with the pink marshmallow mixture. - Portion the Brains
Use an ice cream scoop or a ¼ cup measuring cup sprayed with non-stick spray to portion out mounds of the cereal mixture. Drop onto the prepared baking sheet. - Shape the Brains
With lightly greased hands, mold each mound into an oblong brain shape. Use the handle of a butter knife to indent the center, then press each side gently to create the look of brain hemispheres. - Add the “Blood”
Optional but highly recommended: add a few drops of red food coloring to a small bowl. Use a clean paintbrush to streak the tops of each brain with “blood” for that extra gory touch. - Let Set
Allow the brains to cool and firm up at room temperature before serving. Store in an airtight container for up to one week.

Expert Tips for Halloween Success
• Use Gel Food Coloring: It gives more vibrant color with fewer drops and won’t thin out your marshmallow mixture.
• Grease Your Tools: Spray your scoop, hands, and knife with oil or non-stick spray to prevent sticking.
• Work Quickly: Once the cereal is mixed in, you need to move fast — the mixture sets up quickly as it cools.
• Don’t Worry About Perfection: The messier they look, the better. Brains aren’t symmetrical — your creepy creations shouldn’t be either.
Creative Pairings and Fun Twists
• Serve with Red Punch: Enhance the Halloween theme with a spooky red fruit punch or blood-orange soda.
• Use as Cupcake Toppers: Mini brains on cupcakes make for an eerie and edible garnish.
• Make-Ahead Friendly: You can shape and store them up to a week in advance, or even freeze them for up to a month.
• Giant Brain Option: Want to wow your guests? Form all the mixture into one massive brain centerpiece for slicing and sharing.
A Ghoulishly Good Halloween Tradition
These Rice Krispies Brains are more than just a cute holiday snack — they’re a creative, hands-on project that’s fun for kids and adults alike. With just a handful of pantry staples, you’ll have an unforgettable Halloween treat that’s both spooky and scrumptious. Keep the tradition going by experimenting with different shapes and themes every year. Whether you’re hosting a haunted house or packing party treats, these brains are bound to impress.
A Halloween Treat That’s Equal Parts Spooky and Sweet
Rice Krispies Brains bring together the best of festive fun and homemade simplicity. Whether you’re throwing a Halloween bash or just want a treat that turns heads, these marshmallow-filled bites deliver gory charm and delicious flavor. With minimal prep, no baking, and maximum creativity, they’re ideal for busy parents, teachers, or party hosts. Make a batch (or two), get creative with the shaping and “blood,” and let these eerie edible brains steal the show. They’re not just treats — they’re conversation starters.
FAQ About Rice Krispies Brains
How far in advance can I make Rice Krispies Brains?
You can make Rice Krispies Brains up to 7 days in advance. Store them in an airtight container at room temperature for best texture. For longer storage, freeze for up to 4–6 weeks, and let them come to room temp before serving.
Can I use regular marshmallows instead of mini?
Yes, regular marshmallows work just fine. You’ll need about 40 large marshmallows to substitute a 10-ounce bag of minis. Just be sure they’re fully melted for smooth mixing and shaping.
How do I keep the mixture from sticking to my hands?
Spray your hands with non-stick cooking spray or lightly coat them with oil or butter. This keeps the marshmallow mixture from sticking while shaping your spooky treats.
Can I add flavor or mix-ins to the brains?
Absolutely! Add a teaspoon of vanilla extract or a dash of cinnamon for extra flavor. You could even mix in crushed freeze-dried strawberries for a brain-like color and fruity twist.
More Relevant Recipes
- Halloween Oreo Brownies: A fudgy, chocolatey brownie base stuffed with festive Halloween Oreos makes this dessert a decadent and spooky addition to your Halloween dessert spread. Perfect for pairing with Rice Krispies Brains for a gory-good dessert table.
- Ghost Cookies (No-Bake Recipe): These adorable ghost cookies are a no-bake Halloween classic made with minimal ingredients, just like Rice Krispies Brains. Quick, easy, and kid-friendly — they’re hauntingly delicious!
- Ghost Marshmallow Popcorn Balls: Sticky, sweet, and shaped into cute ghost faces, these marshmallow popcorn balls are another no-bake Halloween hit. The marshmallow base and fun presentation echo the playful spirit of Rice Krispies Brains.

Rice Krispies Brains
- Total Time: 15 minutes
- Yield: 16 treats
- Diet: Vegetarian
Description
These Rice Krispies Brains are a spooky and delicious no-bake Halloween treat made with pink-tinted marshmallows, crispy rice cereal, and a touch of creepy ‘blood’ made from red food coloring. Perfect for parties, these treats are quick to make, fun to shape, and a gory-good addition to any Halloween dessert table.
Ingredients
- 5 cups (132g) Rice Krispies cereal: provides the classic crispy texture
- 1/4 cup (57g) unsalted butter: adds richness and smoothness
- 1 (10 oz or 283g) bag mini marshmallows (about 8 cups): melts into a gooey binder
- 6–8 drops red food coloring: tints the mixture pink and adds ‘blood’ decoration
Instructions
- Line a large baking sheet with parchment paper or a silicone baking mat. Set aside.
- Place the Rice Krispies cereal in a large mixing bowl and set aside.
- In a large saucepan over low heat, melt the butter.
- Add the mini marshmallows and stir until completely melted and smooth.
- Stir in 6–8 drops of red food coloring to achieve a brain-pink hue, keeping in mind it will lighten once mixed with cereal.
- Remove from heat and immediately pour the marshmallow mixture over the Rice Krispies. Stir until fully combined and evenly coated.
- Using a greased ice cream scoop or 1/4 cup measure, scoop mounds onto the prepared baking sheet.
- With greased hands, form each mound into an oblong brain shape.
- Use the handle of a butter knife to indent the top, then press the two sides slightly together to create a ‘brain’ crease.
- Optional: Mix a few more drops of red food coloring in a small bowl. Use a food-safe brush to paint ‘blood’ streaks onto the brains.
- Allow to cool and set completely before serving.
Notes
- Use gel food coloring for more vibrant color and less mess.
- Spray your hands and tools with non-stick spray to prevent sticking.
- You can make these up to 7 days in advance and store in an airtight container.
- To freeze, place in a freezer-safe container for up to 6 weeks.
- Prep Time: 15 minutes
- Cook Time: 0 minutes
- Category: Dessert
- Method: No-Bake
- Cuisine: American
Nutrition
- Serving Size: 1 Rice Krispies brain
- Calories: 59 kcal
- Sugar: 1 g
- Sodium: 47 mg
- Fat: 3 g
- Saturated Fat: 2 g
- Unsaturated Fat: 1.2 g
- Trans Fat: 0.1 g
- Carbohydrates: 7 g
- Fiber: 0.04 g
- Protein: 1 g
- Cholesterol: 8 mg

