
Growing up, s’mores were the highlight of every camping trip. The combination of toasted marshmallows, melted chocolate, and crunchy graham crackers was pure magic. But as much as I love traditional s’mores, they can be messy and require a campfire. That’s why I was thrilled to discover S’mores Cookie Bars—a way to enjoy the same flavors in a fuss-free, travel-friendly dessert.
Perfect for beginners, these cookie bars are incredibly easy to make. With a soft and chewy graham cracker base, gooey marshmallow crème, and pockets of melted chocolate, they bring the joy of s’mores straight to your kitchen. Whether you’re baking for a family gathering, a picnic, or just craving something sweet, this recipe is a foolproof way to satisfy your dessert cravings.

Why This Recipe is Special
S’mores Cookie Bars take everything you love about s’mores and transform it into a convenient, oven-baked treat. Here’s what makes them stand out:
- Beginner-Friendly – No special equipment or advanced baking skills needed.
- Mess-Free S’mores Experience – No fire or sticky fingers, just easy-to-slice bars.
- Texture Heaven – A balance of chewy, gooey, and slightly crisp layers.
- Customizable – Switch up the chocolate, add nuts, or try different cookie bases.
These bars are an instant hit at parties and bake sales, but they’re also perfect for an everyday treat.
Ingredients and Preparation
The Key Ingredients and Their Roles
- Butter – Creates a soft, rich base and helps bind the dough.
- Brown Sugar – Adds a hint of caramel flavor and keeps the bars moist.
- Egg – Provides structure and helps the cookie dough set properly.
- Vanilla Extract – Enhances the overall flavor.
- All-Purpose Flour – The main dry ingredient for structure.
- Graham Cracker Crumbs – Replaces some of the flour to give the bars a true s’mores taste.
- Baking Powder – Helps the bars rise slightly for a light texture.
- Salt – Balances the sweetness and enhances the flavors.
- Semi-Sweet Chocolate Chips – Melts beautifully for gooey chocolate pockets.
- Marshmallow Crème (Fluff) – Stays gooey even after baking, unlike regular marshmallows.
Ingredient Substitutions
- Butter Alternative – Use coconut oil or margarine for a dairy-free version.
- Sugar Swap – Coconut sugar or white sugar can be used instead of brown sugar.
- Gluten-Free Option – Substitute a gluten-free flour blend and use crushed gluten-free graham crackers.
- Chocolate Variations – Swap semi-sweet chips for dark chocolate, white chocolate, or peanut butter chips.
Step-by-Step Instructions
Step 1: Preheat your oven to 350°F (177°C) and line an 8-inch or 9-inch square baking pan with parchment paper. Leave some overhang to lift the bars out easily once they’re cooled.
Step 2: In a large mixing bowl, cream the softened butter and brown sugar together until light and fluffy. This takes about two minutes using a hand mixer or stand mixer.
Step 3: Add the egg and vanilla extract, then mix until fully incorporated. The mixture may look slightly curdled, but that’s normal.
Step 4: In a separate bowl, whisk together the flour, graham cracker crumbs, baking powder, and salt. Slowly add this dry mixture to the wet ingredients, mixing until just combined.
Step 5: Press about two-thirds of the dough into the prepared baking pan, spreading it evenly. Since the dough is sticky, use your hands or a piece of parchment paper to smooth it out.
Step 6: Spread the marshmallow crème evenly over the dough layer. This can be tricky since it’s sticky, but lightly greasing a spatula or spoon can help.
Step 7: Sprinkle the chocolate chips over the marshmallow crème layer.
Step 8: Take the remaining dough and flatten it into small pieces. Place these pieces on top of the chocolate chips, leaving some gaps so the marshmallow and chocolate peek through.
Step 9: Bake for 25-30 minutes, or until the top is golden brown. The marshmallow will puff up slightly but settle as it cools.
Step 10: Let the bars cool completely in the pan before slicing. This ensures clean cuts and prevents them from falling apart.
Beginner Tips and Notes
- Spreading the Marshmallow Crème – Lightly grease your hands or a spatula to prevent sticking.
- Check for Doneness – The bars should be golden brown on top and firm around the edges. If they seem too soft, let them cool completely before cutting.
- Cutting Clean Slices – Chill the bars in the fridge for 15 minutes before slicing for neater edges.
- Storage – Keep bars in an airtight container at room temperature for up to a week or freeze for up to three months.
Serving Suggestions
- Classic Pairing – Enjoy these bars with a cold glass of milk.
- Ice Cream Topping – Warm up a bar and serve with a scoop of vanilla or chocolate ice cream.
- Gourmet Twist – Drizzle melted chocolate or caramel over the top for an extra indulgence.
- Party Platter – Cut into bite-sized squares and arrange with other cookies and brownies.
Conclusion
S’mores Cookie Bars are a fantastic beginner-friendly dessert that delivers all the classic s’mores flavors in an easy-to-make, no-mess format. Whether you’re baking for a special occasion or just treating yourself, this recipe is guaranteed to become a favorite.
Have you tried making these bars? Let me know in the comments how they turned out, and feel free to share your own creative variations!
FAQ About S’mores Cookie Bars
No, regular marshmallows will melt and disappear into the dough, leaving empty pockets rather than a gooey layer. Marshmallow crème holds up better in the oven and keeps the bars soft and chewy.
Store the bars in an airtight container at room temperature for up to a week. If you need to keep them longer, freeze them for up to three months. Let frozen bars thaw at room temperature before serving.
Yes, you can double the recipe and bake it in a 9×13-inch pan. The bake time will increase to about 35-38 minutes. Keep an eye on the top, and remove the bars when they are golden brown.
Marshmallow crème is sticky, but you can make it easier to spread by lightly greasing a spoon or spatula with cooking spray. You can also wet your fingers with a little water to help smooth it out.
More Relevant Recipes
Print
S’mores Cookie Bars
- Total Time: 3 hours (includes cooling)
- Yield: 16 bars
Description
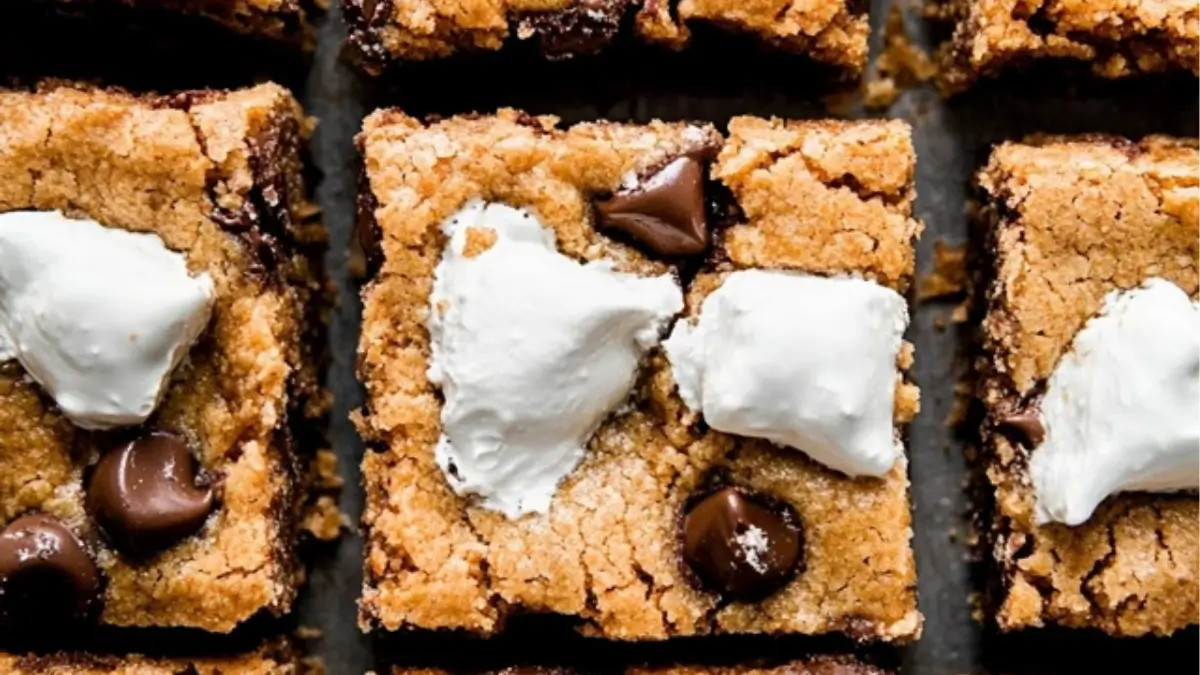
S’mores Cookie Bars combine all the flavors of classic s’mores into an easy, mess-free dessert. With a buttery graham cracker cookie base, layers of gooey marshmallow crème, and rich chocolate chips, these bars are soft, chewy, and irresistibly delicious. Perfect for summer gatherings, bake sales, or an anytime sweet treat, they offer the nostalgic taste of s’mores in a convenient bar form.
Ingredients
- ½ cup (8 Tbsp) unsalted butter, softened
- ¾ cup packed light or dark brown sugar
- 1 large egg, at room temperature
- 1 teaspoon pure vanilla extract
- 1 cup all-purpose flour (spooned & leveled)
- 1 cup graham cracker crumbs (about 8 full-sheet graham crackers)
- ½ teaspoon baking powder
- ¼ teaspoon salt
- 1 cup semi-sweet chocolate chips
- 1 heaping cup marshmallow crème (store-bought “Fluff” or homemade)
Instructions
- Preheat the oven and prepare the pan: Set the oven to 350°F (177°C). Line an 8-inch or 9-inch square baking pan with parchment paper, leaving enough overhang to lift the bars out easily once they’re cooled.
- Make the cookie dough: In a large bowl, use a hand or stand mixer to cream the butter and brown sugar together until light and fluffy. Add the egg and vanilla extract, mixing until combined. The mixture may appear slightly curdled, but this is normal.
- Combine the dry ingredients: In a separate bowl, whisk together the flour, graham cracker crumbs, baking powder, and salt. Slowly add this mixture to the wet ingredients, mixing until just combined.
- Assemble the first layer: Press about two-thirds of the cookie dough evenly into the prepared pan. The dough is sticky, so using your hands or a piece of parchment paper will help smooth it out.
- Add the marshmallow and chocolate layers: Spread the marshmallow crème evenly over the cookie dough base. Lightly greasing a spatula or spoon can help make this easier. Sprinkle the chocolate chips evenly on top of the marshmallow layer.
- Finish with the top cookie layer: Flatten small pieces of the remaining cookie dough and place them over the chocolate chips. Some gaps are fine—this allows the marshmallow and chocolate to peek through after baking.
- Bake and cool: Bake for 25-30 minutes, or until the top is golden brown. The marshmallow will puff up slightly but settle as it cools. Let the bars cool completely in the pan before slicing to ensure clean cuts.
Notes
- Spreading marshmallow crème – Lightly grease your hands or a spatula to prevent sticking.
- Cutting clean slices – Refrigerate the bars for 15 minutes before slicing for neater edges.
- Storage – Keep in an airtight container at room temperature for up to a week, or freeze for up to three months.
- Variations – Swap chocolate chips for chopped Hershey’s bars, white chocolate, or peanut butter chips for a fun twist.
- Prep Time: 15 minutes
- Cook Time: 25 minutes
- Category: Dessert
- Method: Baking
- Cuisine: American
Nutrition
- Serving Size: 1 bar
- Calories: 210
- Sugar: 18g
- Sodium: 90mg
- Fat: 10g
- Saturated Fat: 6g
- Unsaturated Fat: 3g
- Trans Fat: 0g
- Carbohydrates: 28g
- Fiber: 1g
- Protein: 2g
- Cholesterol: 20mg