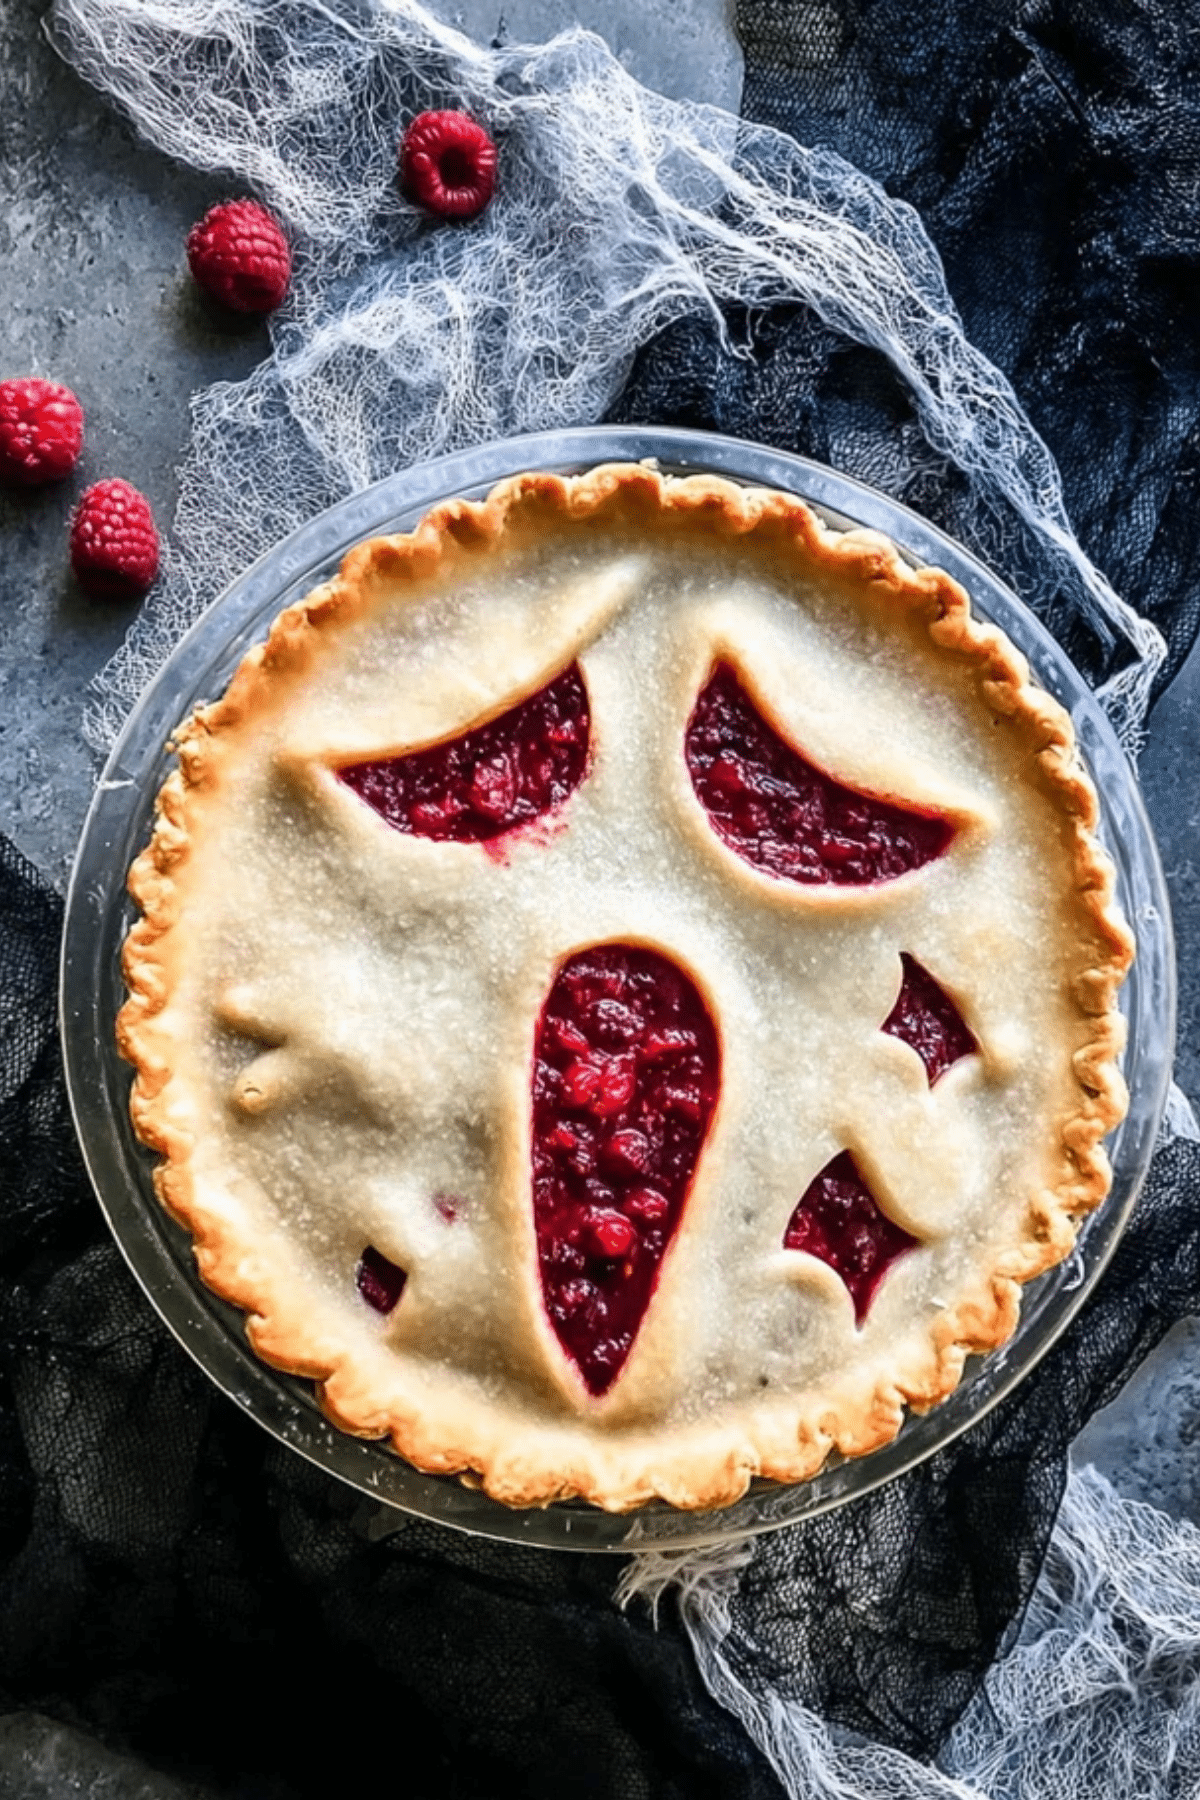
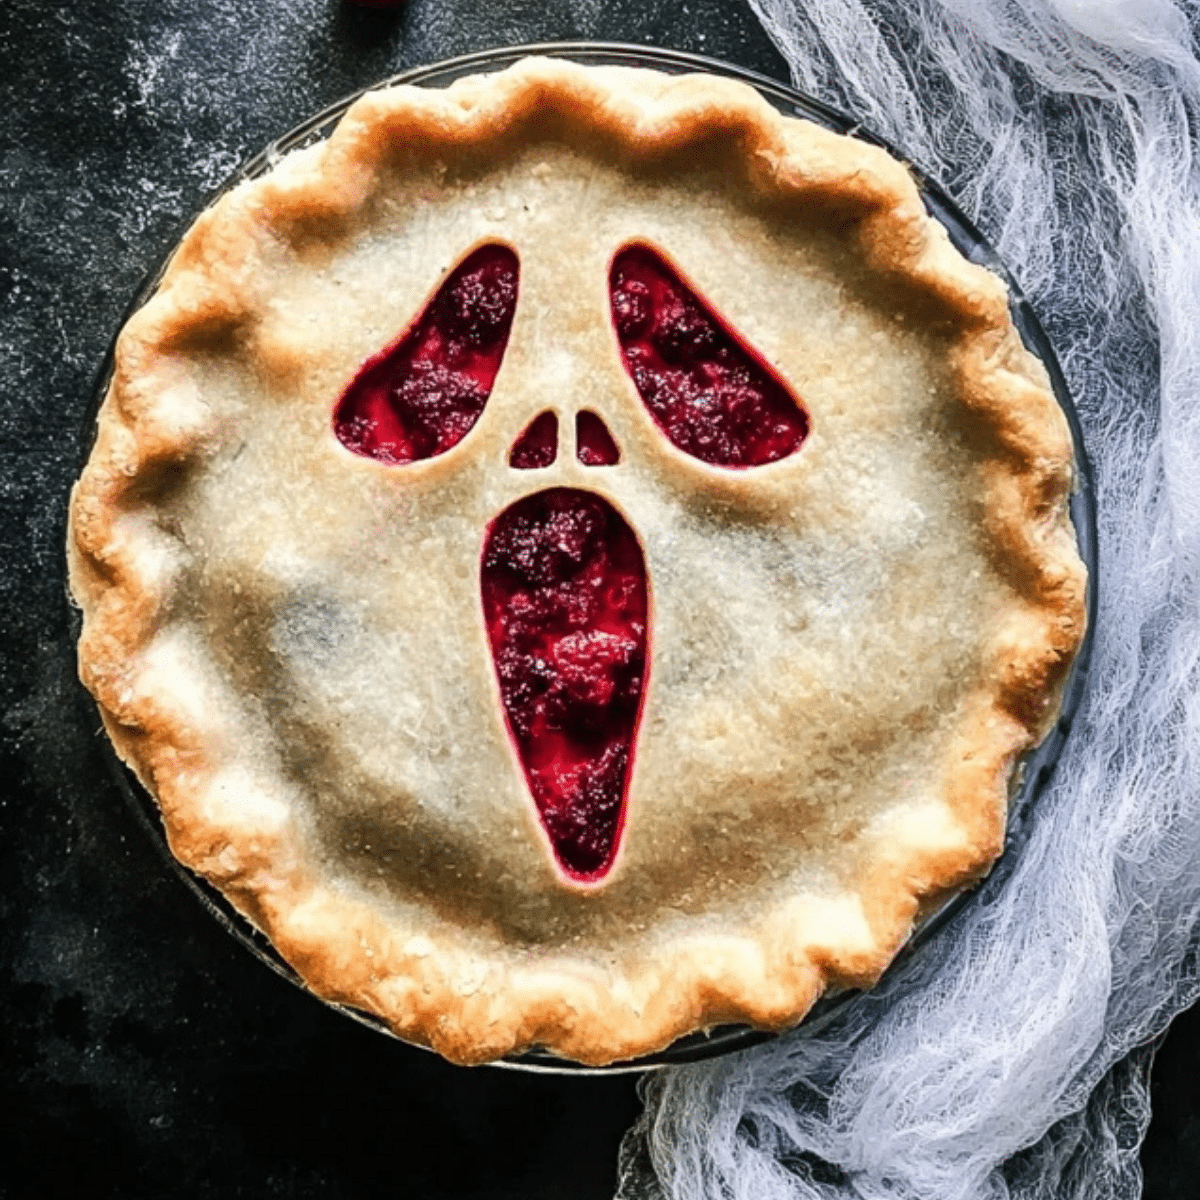
Prepare to send a chill down your spine with this Spooky Halloween Scream Raspberry Pie! This dessert not only delivers on flavor but also adds an extra layer of fun to your Halloween festivities. Featuring a vibrant raspberry filling topped with a spine-tingling ‘Scream’ face, it’s the perfect combination of spooky and sweet. Whether you’re hosting a Halloween party or treating the family, this pie will make the night even more memorable. Let’s dive into what makes this treat so irresistible!
Table of Contents
Why You’ll Love This Spooky Halloween Scream Raspberry Pie
This Halloween Scream Raspberry Pie isn’t just another dessert—it’s a statement! The combination of sweet, tart raspberry filling and a creepy, carved pie crust face is sure to impress. Not only is it a visual masterpiece, but it’s also quick and easy to make, so you can focus on other spooky activities. Plus, it’s an excellent choice for a Halloween dessert, being both kid-friendly and exciting for adults.
Ingredients You’ll Need
Creating this Spooky Halloween Scream Raspberry Pie is a breeze with the right ingredients. Here’s what you’ll need:
• Flour: The base for your pie crust, giving it the perfect texture.
• Salt: A key ingredient to balance the sweetness and enhance flavor.
• Shortening: Adds a flaky texture to your pie crust.
• Water: Helps bind the crust dough together.
• Raspberries: The star of the show—fresh or frozen—providing the perfect tart flavor for a Halloween twist.
• Sugar: Sweetens the raspberry filling for that mouthwatering contrast.
• Cornstarch: Thickens the raspberry filling and prevents it from being too runny.
Alternative Ingredient Suggestions
If you’re looking to switch things up or need substitutions, here are a few alternatives:
• Butter: If you prefer, swap shortening for butter in your crust for a richer flavor.
• Frozen Berries: Don’t have fresh raspberries? Frozen will work just fine—just make sure they don’t thaw before baking.
• Vegan Option: Use a plant-based shortening and dairy-free butter for a vegan-friendly pie.
• Sugar Alternatives: Swap out granulated sugar for coconut sugar or honey to reduce the sweetness, keeping the flavor intact.
Step-by-Step Instructions
Follow these easy steps to bring your spooky pie to life:
- Prepare the Pie Crust:
Start by sifting flour and salt into a large bowl. Cut in the shortening until it resembles coarse oatmeal. Slowly add water, mixing with a fork until the dough comes together. Divide the dough into two balls—one for the bottom crust and one for the top. - Roll Out the Bottom Crust:
Roll one ball of dough into a circle large enough to fit your pie plate. Press the dough into the plate and trim any excess edges. - Prepare the Raspberry Filling:
Mix fresh or frozen raspberries with sugar and cornstarch in a bowl. Stir gently until well combined. - Prepare the Scream Face Crust:
Roll out the second ball of dough on parchment paper. Use a template to carve out a ‘Scream’ face (or another spooky design). Carefully cut out the eyes, nose, and mouth. - Assemble the Pie:
Pour the raspberry filling into the pie crust. Place the ‘Scream’ face crust on top, aligning it with the filling. Press the edges together to seal, trimming off any excess crust. - Bake the Pie:
Preheat your oven to 425°F. Bake for 20 minutes to crisp the crust, then reduce the temperature to 350°F and bake for another 25-30 minutes, until the crust is golden and the filling is bubbly. - Let It Rest:
Allow the pie to cool for 3-5 hours before serving to let the filling set. This ensures it won’t be runny when you slice it.

Tips & Tricks for Perfect Pie
• Don’t Thaw Frozen Berries: If using frozen raspberries, keep them frozen until just before baking. Thawing them can cause excess moisture, making your pie filling runny.
• Prevent a Soggy Bottom: Bake the pie at a high temperature initially to set the bottom crust.
• Let It Set: Patience is key—let your pie rest for a few hours to avoid a messy slice.
• Seal the Edges Well: Press the edges of the crust tightly to prevent any raspberry filling from oozing out while baking.
Pairing Ideas and Variations
This Spooky Halloween Scream Raspberry Pie pairs perfectly with a scoop of vanilla ice cream or a dollop of whipped cream. The creamy texture balances the tart raspberry filling beautifully, making every bite even more satisfying.
For a more decadent treat, drizzle a little chocolate syrup over the top, or add a sprinkle of cinnamon to the crust before baking for an extra layer of flavor.
You can also try different fillings, such as apple or cherry, and use the same spooky face pie crust for an eerie twist on classic pies.
Spooky Halloween Fun with Pie
Not only is this Spooky Halloween Scream Raspberry Pie a fun treat to bake, but it also offers a chance to get creative with your Halloween celebrations. The pie’s visual appeal is perfect for themed parties or family gatherings. Plus, it’s a great way to engage the little ones in the kitchen while adding a dash of spooky fun to your festivities. The deep red raspberry filling also makes it ideal for a Halloween-themed dessert table, standing out against the orange and black decor.
Conclusion
In conclusion, this Spooky Halloween Scream Raspberry Pie is the perfect way to bring both spooky fun and delicious flavor to your Halloween celebrations. With its vibrant red raspberry filling and terrifyingly fun “Scream” face crust, it’s sure to be a hit with guests of all ages. Whether you’re hosting a Halloween party or enjoying a quiet night at home, this dessert adds a memorable, sweet touch to the festivities. Easy to prepare, visually striking, and absolutely delicious, it’s a must-try recipe this Halloween!
FAQs
1. Can I use frozen raspberries for this Spooky Halloween Scream Raspberry Pie?
Yes! You can definitely use frozen raspberries for this recipe. Just be sure not to thaw them before baking. Thawing the berries can release too much moisture, which may cause the pie to become runny. Keep them frozen until you’re ready to mix them with the other ingredients.
2. How do I make sure the raspberry filling doesn’t become too runny?
To avoid a runny filling, it’s important to prepare the raspberry filling just before adding it to the pie. Don’t let the filling sit for too long, as the juices will begin to release. After baking, let the pie cool for 3-5 hours to allow the filling to set properly.
3. Can I make the Spooky Halloween Scream Raspberry Pie ahead of time?
Absolutely! You can prepare the pie the day before your Halloween festivities. Just make sure to let it cool completely, and then store it in the fridge. The pie can last for up to 2-3 days if kept properly stored, making it an excellent make-ahead option for busy holiday schedules.
4. How do I decorate the pie crust to look like a “Scream” face?
To create the “Scream” face on the top of your pie, you can use a pumpkin carving template as a guide. Roll out the second ball of dough, lay the template over it, and carefully carve out the face. Once done, simply place the decorated crust over your pie and bake. It’s an easy and fun way to add a spooky touch to your dessert
More Relevant Recipes
- Whipped Pumpkin Dip: Easy Creamy Fall Snack: A smooth and creamy dip perfect for autumn gatherings. This dip combines the warm, comforting flavors of pumpkin and spices, making it an ideal treat for Halloween and beyond.
- Halloween Bean Dip: A savory, festive dip that brings both flavor and fun to your Halloween spread. Packed with creamy beans and spices, it’s a delightful appetizer that pairs perfectly with crunchy tortilla chips.
- Zombie Brain Cupcakes: Halloween Treats: These creepy cupcakes are as delicious as they are spooky. With vibrant red frosting and a gruesome brain design, these cupcakes make for an eerie and delicious Halloween dessert.

Spooky Halloween Scream Raspberry Pie
- Total Time: 1 hour 15 minutes
- Yield: 8 slices
- Diet: Vegetarian
Description
This Spooky Halloween Scream Raspberry Pie is a fun and spooky dessert perfect for Halloween! With a vibrant raspberry filling and a creepy ‘Scream’ face crust, it combines spooky flair with delicious taste.
Ingredients
- 2 cups all-purpose flour
- 1/2 tsp salt
- 2/3 cup shortening (or butter for a richer flavor)
- 1/4 cup cold water
- 5 cups fresh or frozen raspberries (do not thaw)
- 2/3 cup sugar
- 4 tbsp cornstarch
- Cinnamon and sugar mixture for sprinkling on top
Instructions
- Preheat the oven to 425°F (220°C).
- Prepare the pie crust: sift the flour and salt in a bowl. Cut in the shortening until it resembles coarse crumbs. Slowly add water, mixing until the dough comes together.
- Divide the dough into two balls—one for the bottom crust, and one for the top decorative crust.
- Roll out the first dough ball on parchment paper and fit it into a 9-inch pie plate, trimming the edges.
- For the top crust, roll out the second dough ball and use a ‘Scream’ face template to cut out a spooky design. Set aside.
- Prepare the raspberry filling by mixing the raspberries, sugar, and cornstarch in a bowl.
- Pour the raspberry filling into the pie crust. Place the cut-out pie crust over the top, aligning the ‘Scream’ face over the filling. Press the edges together to seal.
- Sprinkle the top crust with a cinnamon-sugar mixture.
- Bake at 425°F for 20 minutes, then reduce the temperature to 350°F and bake for an additional 25-30 minutes, or until the crust is golden brown and the filling is bubbling.
- Allow the pie to cool for 3-5 hours to let the filling set before serving.
Notes
- Do not thaw frozen raspberries before using them in the pie filling.
- To avoid a soggy bottom, bake the pie at a high temperature initially to set the bottom crust.
- Let the pie rest for at least 3-5 hours to ensure the filling has set properly and will not be runny.
- For a vegan version, use plant-based shortening and butter substitutes.
- Prep Time: 20 minutes
- Cook Time: 55 minutes
- Category: Dessert
- Method: Baking
- Cuisine: American
Nutrition
- Serving Size: 1 slice
- Calories: 350
- Sugar: 25g
- Sodium: 150mg
- Fat: 15g
- Saturated Fat: 7g
- Unsaturated Fat: 6g
- Trans Fat: 0g
- Carbohydrates: 45g
- Fiber: 3g
- Protein: 3g
- Cholesterol: 20mg

