
I remember the first time I made a tuna melt wrap—it was out of pure necessity. I had just started cooking for myself, and I needed something quick, nutritious, and filling. A tuna melt seemed like a no-fuss option, but instead of using bread, I wrapped it all up in a tortilla. What I didn’t expect was how flavorful, creamy, and satisfying it would be!
This easy tuna melt wrap is perfect for beginners because it requires minimal prep, cooks in under 10 minutes, and is packed with protein and healthy fats. Whether you’re looking for a simple lunch or a light dinner, this recipe delivers on taste, convenience, and nutrition.

Why This Tuna Melt Wrap is Special
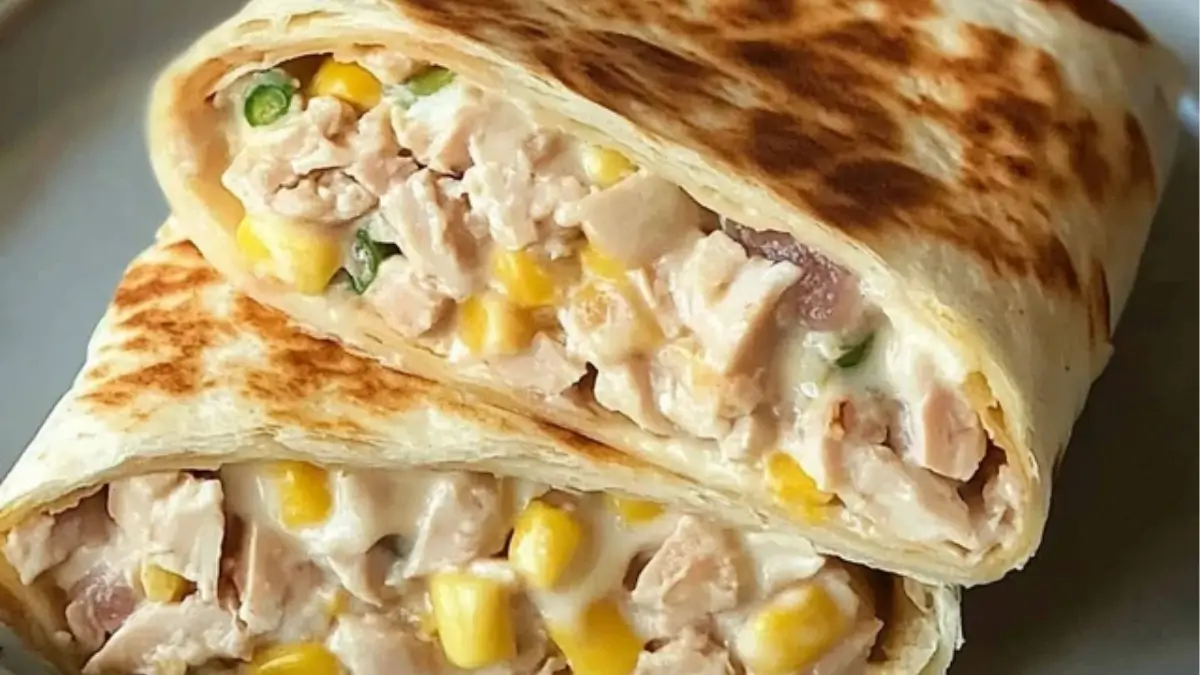
This isn’t your typical tuna melt. Instead of the usual bread-based sandwich, this recipe uses a tortilla wrap, which makes it easier to eat on the go while giving it a crispy, golden exterior when grilled. It also swaps out heavy mayonnaise for Greek yogurt, adding a creamy texture without extra saturated fat.
Here’s why you’ll love this recipe:
- Beginner-friendly – Requires only a few steps and basic kitchen tools.
- Nutritious – High in protein, packed with omega-3s, and lower in unhealthy fats.
- Versatile – Customize it with your favorite ingredients like veggies, spices, or even a different protein.
- Quick & Easy – Ready in 10 minutes, making it ideal for busy schedules.
Ingredients and Their Roles
Each ingredient in this wrap contributes to its deliciousness and nutrition. Here’s a breakdown:
- Canned Tuna – The star of the dish, providing lean protein and omega-3 fatty acids. Skipjack or yellowfin are great choices for their lower mercury content.
- Greek Yogurt – A healthier alternative to mayo, adding creaminess while boosting protein and probiotics.
- Dijon Mustard – Brings a slight tang and spice, enhancing the overall flavor. Regular mustard or honey mustard work as substitutes.
- Lemon Juice – Brightens the dish and balances the richness. Fresh lemon juice is best, but bottled can work in a pinch.
- Sweet Corn – Adds a pop of sweetness and fiber. Use fresh, frozen, or canned corn.
- Dill Relish or Capers – Introduces a briny, tangy contrast to the creamy tuna mixture. Pickles, banana peppers, or olives can also be used.
- Garlic Powder & Black Pepper – Simple yet essential seasonings to enhance flavor.
- Tortilla Wrap – A burrito-sized wrap works best for easy folding and grilling. Use whole wheat, gluten-free, or low-carb wraps based on your preference.
- Shredded Cheese (Optional) – Mozzarella melts beautifully, but cheddar or Swiss can add a stronger taste.
- Spinach or Other Greens (Optional) – A fresh, nutritious addition for extra texture and flavor.
Ingredient Substitutes
- Swap tuna for shredded chicken or chickpeas for a different protein option.
- Use vegan yogurt and plant-based cheese for a dairy-free version.
- Add hot sauce, jalapeños, or cayenne for a spicy twist.
Step-by-Step Instructions
Step 1 – Drain the canned tuna well. In a bowl, mix tuna with Greek yogurt, Dijon mustard, lemon juice, corn, relish (or capers), garlic powder, and black pepper. Stir until fully combined.
Step 2 – Warm the tortilla by placing it in the microwave for 10-20 seconds with a damp paper towel. This makes it easier to fold. Lay it on a clean surface.
Step 3 – Sprinkle shredded cheese on one side of the tortilla, leaving an inch of space from the edges. Spread the tuna mixture on top of the cheese.
Step 4 – Fold the sides of the tortilla inward, then roll it up tightly from the bottom, tucking as you go.
Step 5 – Heat a skillet or grill pan over medium heat with a small amount of olive oil. Place the wrap seam-side down and cook for 3-4 minutes, pressing gently with a spatula. Flip and cook for another 2-3 minutes until golden brown and crisp.
Step 6 – Remove from the heat, let it cool slightly, then slice in half and enjoy!
Pro Tip
If you want extra crispiness, use a panini press or air fryer instead of a skillet. Cook in an air fryer at 380°F for 3-4 minutes.
Beginner Tips and Common Mistakes
1. Prevent a Dry Filling – If the tuna mixture feels dry, add a little more Greek yogurt or lemon juice to maintain a creamy texture.
2. Avoid Overstuffing – Too much filling makes it hard to roll and may cause the wrap to burst open when cooking.
3. Choose the Right Cheese – Low-moisture mozzarella melts smoothly, but if you prefer a stronger flavor, go for sharp cheddar or Swiss.
4. Get the Perfect Golden Brown Exterior – A non-stick skillet or grill pan helps achieve an even crust without burning. Keep the heat medium-low if it’s browning too quickly.
Serving Suggestions
Pair your crispy tuna melt wrap with:
- Fresh Salad – A simple cucumber or mixed greens salad adds freshness.
- Soup – A warm bowl of tomato soup or vegetable broth complements the wrap perfectly.
- Smoothie or Fruit Bowl – Try an apple-cucumber smoothie for a refreshing drink.
Storing Leftovers
- Fridge: Wrap leftovers tightly in foil and refrigerate for up to 2 days.
- Reheating: Warm in a skillet, air fryer, or microwave to restore crispiness.
Try It and Share Your Thoughts
This easy sheet pan tuna melt wrap is a fantastic choice for a quick and healthy meal, whether you’re a beginner cook or just looking for a simple lunch idea. It’s satisfying, nutritious, and endlessly customizable.
Have you tried this recipe? Leave a comment below and share your experience! Let us know what variations you tried or if you have any questions. Happy cooking!
FAQ About Tuna Melt Wrap
Yes, you can swap canned tuna for canned salmon, shredded cooked chicken, or even mashed chickpeas for a vegetarian option.
Mozzarella melts well and has a mild flavor, but sharp cheddar, Swiss, or pepper jack will add a stronger, tangy taste.
Drain the tuna thoroughly and avoid overloading the wrap with too much filling. Also, grilling the wrap helps create a crispy texture.
The tuna mixture can be prepared and stored in the fridge for up to two days. Assemble and grill the wrap just before eating for the best texture.
More Relevant Recipes
Print
The Ultimate Tuna Melt Wrap
- Total Time: 9 minutes
- Yield: 1 wrap
Description
This crispy tuna melt wrap is a delicious, high-protein lunch that takes just 10 minutes to make. Swapping mayo for Greek yogurt keeps it light and nutritious, while melted cheese and a golden, grilled tortilla create the perfect bite. Ideal for quick lunches, meal prep, or an easy dinner.
Ingredients
- 1 (5 oz) can skipjack or yellowfin tuna, drained
- 2 tablespoons Greek yogurt
- ½ tablespoon Dijon mustard
- ½ lemon, juiced (about 1 tablespoon)
- ¼ cup sweet corn
- ¼ cup red onion, diced
- 1 tablespoon dill relish or capers
- ½ teaspoon garlic powder
- ¼ teaspoon black pepper
- ¼ cup shredded mozzarella cheese (or cheese of choice)
- 1 burrito-sized wrap (at least 10 inches)
- 1 teaspoon olive oil (for grilling)
Instructions
- Prepare the filling: In a bowl, combine drained tuna, Greek yogurt, Dijon mustard, lemon juice, corn, diced red onion, relish, garlic powder, and black pepper. Stir well until fully mixed.
- Warm the tortilla: Place the tortilla on a plate and cover it with a damp paper towel. Microwave for 10-20 seconds to make it more flexible for wrapping.
- Assemble the wrap: Lay the tortilla flat on a clean surface. Sprinkle shredded cheese on one side, leaving about an inch of space from the edges. Spoon the tuna mixture over the cheese in an even layer.
- Fold and roll: Fold in the sides of the tortilla, then roll it up tightly from the bottom, tucking as you go to ensure a secure wrap.
- Grill the wrap: Heat a skillet or grill pan over medium heat and add a teaspoon of olive oil. Place the wrap seam-side down and press gently with a spatula. Cook for 3-4 minutes until golden brown, then flip and cook for another 2-3 minutes. If it’s browning too quickly, lower the heat to medium-low.
- Serve and enjoy: Remove the wrap from the skillet and let it cool slightly before slicing in half. Serve with a fresh salad or soup for a complete meal.
Notes
- For extra crispiness, cook the wrap in an air fryer at 380°F for 3-4 minutes instead of using a skillet.
- Customize your wrap by adding sliced avocado, baby spinach, or hot sauce for extra flavor.
- Store leftover filling in the fridge for up to 2 days, but assemble and grill fresh for the best texture.
- Prep Time: 2 minutes
- Cook Time: 7 minutes
- Category: Lunch
- Method: Stovetop
- Cuisine: American
Nutrition
- Serving Size: 1 wrap
- Calories: 500 kcal
- Sugar: 4g
- Sodium: 1170mg
- Fat: 11g
- Saturated Fat: 5g
- Unsaturated Fat: 5g
- Trans Fat: 0g
- Carbohydrates: 48g
- Fiber: 3g
- Protein: 52g
- Cholesterol: 77mg