
There is something undeniably delightful about a Starbucks cake pop. That tiny, bite-sized piece of cake coated in a sweet candy shell is the perfect companion to a cup of coffee or a quick afternoon pick-me-up. I remember the first time my kids begged for one at the drive-thru, their excitement contagious as they unwrapped the pink-coated treat. That moment made me realize—why not recreate these at home? Not only would it be a fun baking project, but it would also save money and allow for creative variations.
This homemade Starbucks cake pop recipe is ideal for beginners. It requires simple ingredients, minimal baking skills, and allows for customization with different flavors and decorations. Plus, making them yourself means you can enjoy these treats anytime, without waiting in line.

Why This Recipe is Special
Cake pops are more than just a dessert—they’re a fun experience! This recipe is perfect for anyone new to baking because it doesn’t require any special equipment beyond a mixing bowl and a microwave. You’ll learn essential baking skills like crumbling cake, mixing frosting, and working with candy melts. Plus, you can experiment with flavors beyond vanilla—chocolate, red velvet, and even lemon work wonderfully.
Another great thing about cake pops is their versatility. Whether you’re making them for a birthday party, a holiday treat, or just because, you can customize them with different colors, sprinkles, and designs. And because they’re individually portioned, they’re great for sharing or gifting.
Ingredients and Preparation
Here’s what you’ll need to make these copycat Starbucks cake pops at home.
- Cake: A basic vanilla cake mix works great, but you can swap it for chocolate, red velvet, or even lemon cake for variety.
- Frosting: Vanilla frosting helps bind the cake together. You can use store-bought or homemade frosting. If you prefer a different flavor, cream cheese or chocolate frosting are great options.
- Cake pop sticks: Also called lollipop sticks, these are essential for giving your cake pops that signature Starbucks look.
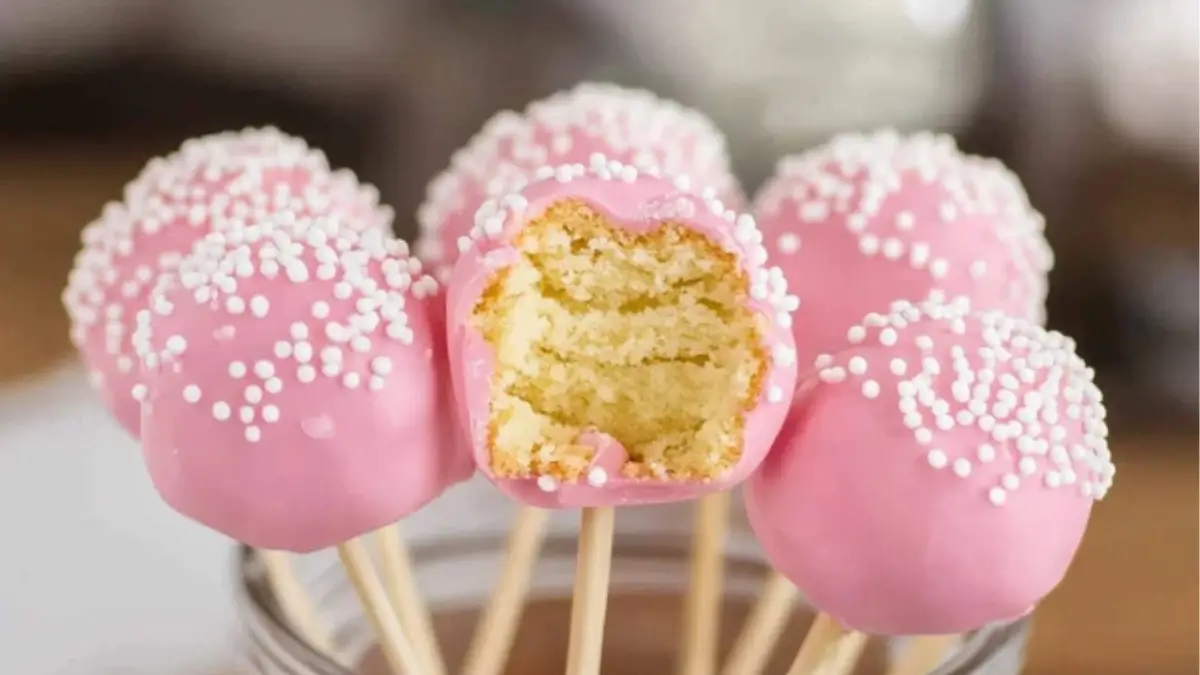
- Candy melts: The pink candy melts give the classic Starbucks appearance, but you can switch it up with white, dark, or colorful candy melts.
- Sprinkles: White sprinkles add a decorative touch, but feel free to use different shapes and colors to fit any theme.
Alternative Ingredient Suggestions:
- Healthier version: Use a sugar-free cake mix and low-sugar frosting.
- Dairy-free option: Choose dairy-free cake mix and frosting, and use dairy-free white chocolate for coating.
- Nutty variation: Add crushed almonds or coconut flakes to the cake mixture for added texture.
Step-by-Step Instructions
Step 1: Prepare the cake batter and bake it according to the instructions on the cake mix box. Allow the cake to cool completely at room temperature before handling it.
Step 2: Once cooled, remove the cake from the pan. Carefully cut away the brown outer layer to get a uniform, soft cake texture.
Step 3: Crumble the cake into a large mixing bowl. The goal is to create fine crumbs with no large chunks.
Step 4: Add the vanilla frosting to the crumbled cake. Start with a small amount and mix well. The mixture should be moist enough to hold its shape when pressed together but not too sticky.
Step 5: Roll the cake mixture into evenly sized balls (about 1 to 1.5 inches in diameter). A cookie scoop can help ensure uniformity. Place the cake balls on a baking sheet lined with parchment paper.
Step 6: Melt the pink candy melts in a microwave-safe bowl. Heat in 30-second intervals, stirring in between until fully melted and smooth.
Step 7: Dip each cake pop stick about ½ inch into the melted candy melts, then insert it halfway into each cake ball. This helps secure the stick. Place the cake pops in the freezer for 10–15 minutes to firm up.
Step 8: After chilling, dip each cake pop into the melted candy, ensuring full coverage. Gently tap off excess coating.
Step 9: While the coating is still wet, quickly add sprinkles. Then, place the cake pops upright in a block of Styrofoam or a cardboard box to dry completely.
Step 10: Once the candy coating is fully set, your cake pops are ready to enjoy!
Beginner Tips and Notes
- How to fix thick candy melts: If your melted candy is too thick, add a teaspoon of vegetable oil or coconut oil to thin it out.
- Preventing cake pops from falling off the stick: Be sure to chill them before dipping. Also, inserting the stick into melted candy first creates a stronger hold.
- How to get smooth cake pops: Stir the candy melts thoroughly before dipping and allow excess to drip off naturally for an even coating.
- Troubleshooting cracks: If cracks appear after dipping, it’s likely because the cake balls were too cold. Let them sit at room temperature for a minute before dipping.
Serving Suggestions
Cake pops are a fun addition to any dessert spread. Here are some great ways to enjoy them:
- With coffee or tea: Just like at Starbucks, these cake pops pair perfectly with a latte, cappuccino, or tea.
- As a party treat: Customize them with themed decorations for birthdays, baby showers, or holidays.
- Gift idea: Wrap them individually in treat bags and tie them with a ribbon for a homemade gift.
Storage Tips
- Room temperature: Store cake pops in an airtight container for up to 3 days.
- Refrigerator: Keep them in the fridge for up to a week.
- Freezer: Freeze undipped cake balls for up to a month. Thaw before dipping in candy melts.
Try This Recipe and Share Your Thoughts!
Now that you know how to make Starbucks-style cake pops at home, give this recipe a try! Whether you stick to the classic vanilla or get creative with flavors and decorations, I’d love to hear how yours turned out. Leave a comment below and share your experience. What flavors did you try? Did you find any fun variations? Let’s chat in the comments!
FAQ About Starbucks Cake Pops
Make sure the cake balls are properly chilled before dipping. Also, dip the stick into melted candy before inserting it into the cake ball—this helps secure it.
If your candy melts are too thick, add a teaspoon of vegetable oil or coconut oil to thin them out. Stir well and heat in short intervals to avoid overheating.
Yes! If using homemade cake, ensure it has a soft, moist texture. If it’s too dry, you may need to add extra frosting to help the cake balls hold together.
Cake pops can be stored at room temperature for up to 3 days, in the fridge for up to a week, or in the freezer (before dipping) for up to a month.
More Relevant Recipes
- Brown Sugar Pop Tart Cookies
- Garlic Parmesan Chicken Past
- Pumpkin Spice Cake with Cream Cheese Frosting

Starbucks Cake Pops
- Total Time: 55 minutes
- Yield: 24-36 cake pops
Description
These Starbucks-style cake pops are an easy, fun, and delicious treat featuring moist vanilla cake mixed with frosting, dipped in a pink candy shell, and topped with sprinkles. Perfect for parties, gifts, or a sweet snack, they’re a beginner-friendly recipe that looks and tastes just like the coffee shop favorite.
Ingredients
- 1 box classic vanilla cake mix (plus ingredients needed to prepare it)
- 3 tablespoons vanilla frosting
- 24-36 cake pop sticks
- 12 ounces pink candy melts
- 2 tablespoons white sprinkles
Instructions
- Bake the cake: Prepare the vanilla cake according to the package instructions. Once baked, let it cool completely at room temperature before handling.
- Prepare the cake crumbs: Remove the cake from the pan and cut off the browned outer layer. Crumble the remaining cake into fine crumbs in a large mixing bowl.
- Combine with frosting: Add the vanilla frosting to the cake crumbs and mix until fully incorporated. The mixture should be moist enough to hold its shape when pressed together but not sticky.
- Shape the cake balls: Roll the mixture into evenly sized balls, about 1 to 1.5 inches in diameter. Use a cookie scoop for uniformity. Place them on a lined baking sheet.
- Chill the cake balls: Transfer the baking sheet to the freezer and chill the cake balls for 10–15 minutes to firm up before inserting sticks.
- Prepare the candy melts: Melt the pink candy melts in a microwave-safe bowl, heating in 30-second intervals and stirring between each until smooth and fully melted.
- Insert the sticks: Dip the tip of each cake pop stick into the melted candy, then insert it halfway into a cake ball. This creates a secure hold and prevents slipping.
- Dip the cake pops: Once the cake pops are firm, dip each one into the melted candy, ensuring full coverage. Gently tap off excess coating to create a smooth finish.
- Decorate and dry: Immediately add sprinkles while the coating is still wet. Place the cake pops upright in a block of Styrofoam or a box with holes to dry completely.
- Serve and enjoy: Once the candy coating has fully set, your cake pops are ready to enjoy!
Notes
- If the cake pops crack after dipping, let them sit at room temperature for a minute before coating to prevent temperature shock.
- If the candy melts harden during dipping, reheat them in 10-second bursts, stirring in between.
- For chocolate lovers, swap pink candy melts for dark or white chocolate.
- Prep Time: 10 minutes
- Cook Time: 30 minutes
- Category: Dessert
- Method: No-bake (after initial baking)
- Cuisine: American
Nutrition
- Serving Size: 1 cake pop
- Calories: 111
- Sugar: 14g
- Sodium: 126mg
- Fat: 3g
- Saturated Fat: 2g
- Unsaturated Fat: 1g
- Trans Fat: 0g
- Carbohydrates: 19g
- Fiber: 1g
- Protein: 1g
- Cholesterol: 0mg