
There’s something magical about the smell of freshly baked bread wafting through the kitchen. It brings back memories of my grandmother’s tiny kitchen, where the warmth of the oven and the scent of garlic meant something special was about to come out of it. These garlic swirl rolls remind me of those moments—simple, comforting, and made with love.
This recipe is a fantastic entry point for beginner bakers. It’s forgiving, requires basic ingredients, and delivers impressive results. The rolls are soft and pillowy, swirled with a rich garlic butter that’s both aromatic and savory. They’re not just a side dish; they can easily be the star of the meal. Plus, the recipe offers a balance of health and indulgence—using whole ingredients without any overly processed additions. Whether you’re baking for a weekday dinner or a holiday table, these garlic swirl rolls are guaranteed to win hearts.

Why This Recipe is Special
Garlic swirl rolls combine the ease of a basic bread dough with the vibrant flavor of a garlic herb filling. They’re visually appealing, richly flavorful, and surprisingly easy to make. What sets this recipe apart is its adaptability—you can switch out herbs, use dairy-free alternatives, or even turn them into mini sandwiches. For a beginner, this is a low-risk, high-reward dish that builds foundational kitchen confidence.
Ingredients and Preparation
Flour – The base of the dough, providing structure and softness. All-purpose flour works well, but you can substitute with bread flour for more chewiness or a mix with whole wheat flour for added nutrition.
Active Dry Yeast – The leavening agent that gives the rolls their fluffy rise. Instant yeast can be used too—just skip the proofing step.
Milk – Adds moisture and tenderness. Use warm milk to activate the yeast; plant-based milk like almond or oat can be substituted.
Sugar – Feeds the yeast and balances the garlic flavor with a hint of sweetness. Honey or maple syrup can be used instead.
Butter – Brings richness and moisture. Unsalted butter is best so you can control the salt levels. Use vegan butter for a dairy-free option.
Eggs – Provide structure, color, and tenderness. If avoiding eggs, substitute with a flax egg or applesauce.
Salt – Enhances flavor throughout the dough and filling.
Garlic – The star of the show. Use fresh garlic for the best aroma and flavor.
Parsley – Adds color and a fresh herbaceous touch. Try basil, oregano, or chives as substitutes.
Black Pepper – Adds a gentle kick to balance the richness.
Parmesan Cheese (optional) – A final flourish for extra savory depth. Skip or use a plant-based parmesan if desired.
Step-by-Step Instructions
Step 1 Start by activating your yeast. In a large mixing bowl, stir warm milk and sugar together, then sprinkle the yeast over top. Let it sit for 5 to 10 minutes, until foamy and fragrant. This means your yeast is alive and ready to help the dough rise.
Step 2 Add melted butter, eggs, and salt into the foamy yeast mixture. Mix everything together until smooth.
Step 3 Slowly stir in the flour one cup at a time. Use a spoon or your hands until a soft dough forms—it should be tacky but not sticky. Once ready, transfer it to a floured surface and knead for about 6 minutes until it’s smooth and elastic.
Step 4 Lightly grease a large bowl, place the dough inside, and cover it with a towel or plastic wrap. Let it rise in a warm spot for about 1 to 1.5 hours until it doubles in size.
Step 5 Meanwhile, prepare the filling. Mix softened butter with minced garlic, parsley, salt, and pepper until it becomes a flavorful paste.
Step 6 Once the dough has risen, punch it down gently and roll it out on a floured surface into a rectangle (about 12×18 inches). Spread the garlic butter filling evenly across the surface, getting right up to the edges.
Step 7 Starting from the long side, roll the dough into a tight log. Seal the edge and cut the log into 12 even pieces using a sharp knife or pizza cutter.
Step 8 Place the rolls, cut side up, in a greased baking dish or on a lined baking sheet with space between each one. Cover them again and let rise for 30 to 45 minutes until puffy.
Step 9 Preheat your oven to 350°F (175°C). Once the rolls are risen, sprinkle with parmesan if using, then bake for 20 to 25 minutes, or until golden brown.
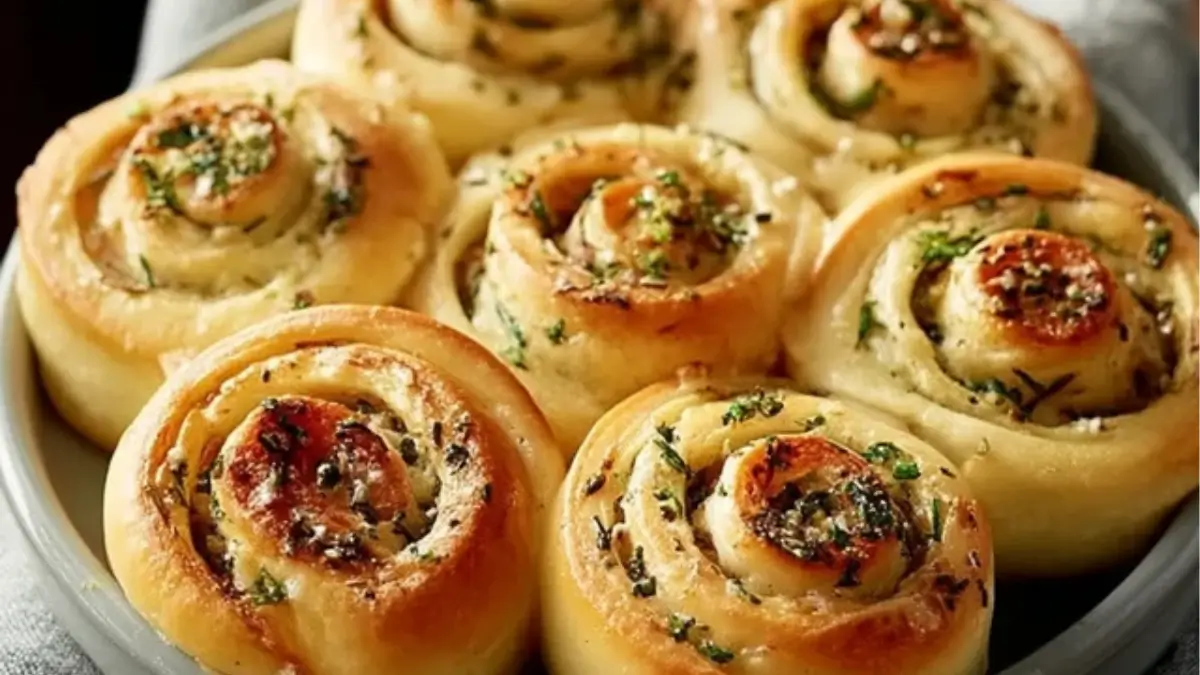
Step 10 Let them cool slightly before serving warm. The rolls should be fluffy with golden swirls of buttery garlic.
Beginner Tips and Notes
- Dough Not Rising? Make sure your milk is warm—not hot. Hot milk can kill yeast, while cold milk won’t activate it.
- Too Sticky? Add a small amount of flour at a time until the dough is workable, but don’t overdo it.
- No Rolling Pin? Use a wine bottle or smooth water bottle to roll out your dough.
- Short on Time? Let the dough rise in the oven (turned off) with the light on. It creates a warm, draft-free space.
- Garlic Too Strong? Roast the garlic first for a milder, sweeter flavor.
- Rolls Too Dense? Make sure you knead long enough and allow full rise times—don’t rush it.
Serving Suggestions
Garlic swirl rolls shine best when warm, fresh from the oven. Pair them with:
- Tomato Basil Soup or Minestrone for dipping.
- Pasta dishes like spaghetti, lasagna, or creamy fettuccine.
- Salads, especially Caesar or Greek, for a satisfying balance.
- Dips like marinara, garlic aioli, or herbed cream cheese.
For storage, keep them in an airtight container at room temperature for up to two days. Reheat in the oven at 300°F for about 5-7 minutes. For longer storage, freeze them individually wrapped, then reheat as needed.
Conclusion
Garlic swirl rolls are a joy to make and even more fun to eat. Their soft texture, golden edges, and savory swirl make them irresistible. If you’ve never baked bread before, this is the perfect place to start. With each roll you shape and bake, you’re building skills that will carry into future recipes—and creating delicious memories along the way.
Give these a try, and let me know how they turn out in the comments below. Share your flavor twists, baking tips, or who you shared them with. Your feedback helps others and turns cooking into a real community experience. Happy baking!
FAQ About Garlic Swirl Rolls
Yes! You can prepare the dough the night before and store it in the refrigerator. Let it come to room temperature and rise before baking.
The best method is to warm them in a 300°F oven for 5-7 minutes. You can also microwave them for 10-15 seconds, but they may become softer.
Absolutely. After baking, let the rolls cool completely, wrap them tightly, and freeze for up to 3 months. Thaw at room temperature and reheat before serving.
Swap the butter for plant-based alternatives and use non-dairy milk like almond, oat, or soy milk. The taste and texture remain delicious.
More Relevant Recipes
Print
Garlic Swirl Rolls
- Total Time: 1 hour 45 minutes (including rising time)
- Yield: 12 rolls
Description
Soft, fluffy, and packed with garlic flavor, these garlic swirl rolls are the perfect beginner-friendly bake for cozy dinners or impressive party snacks.
Ingredients
For the Dough:
- 4 cups all-purpose flour
- 2 ¼ teaspoons active dry yeast (1 packet)
- 1 cup warm milk (about 110°F)
- ¼ cup granulated sugar
- ½ cup unsalted butter, melted
- 2 large eggs
- 1 teaspoon salt
For the Filling:
- ½ cup unsalted butter, softened
- 6 cloves garlic, minced
- 2 tablespoons fresh parsley, chopped (or 1 tablespoon dried)
- ½ teaspoon salt
- ¼ teaspoon black pepper
For the Topping:
- 2 tablespoons grated Parmesan cheese (optional)
- Extra parsley for garnish
Instructions
- Activate the Yeast: In a large bowl, stir together warm milk and sugar, then sprinkle yeast over the top. Let it sit for 5–10 minutes until foamy, which confirms the yeast is active.
- Mix the Wet Ingredients: Once the yeast is bubbly, add melted butter, eggs, and salt. Whisk everything together until smooth and well blended.
- Form the Dough: Gradually mix in the flour, one cup at a time, using a spoon or your hands. The dough should come together into a soft but not sticky ball.
- Knead the Dough: Turn it out onto a lightly floured surface and knead for about 5 to 7 minutes until smooth and elastic. You’ll know it’s ready when the dough bounces back after a gentle poke.
- Let It Rise: Transfer the dough to a greased bowl, cover with a towel or plastic wrap, and let it rise in a warm place for about 1 to 1.5 hours or until doubled in size.
- Prepare the Garlic Butter: While the dough is rising, mix the softened butter with minced garlic, chopped parsley, salt, and pepper to form a smooth, spreadable paste.
- Roll and Fill the Dough: Punch down the risen dough and roll it out on a floured surface into a rectangle about 12×18 inches. Spread the garlic butter evenly over the surface.
- Shape the Rolls: Starting from the long edge, roll the dough into a tight log and pinch the edge to seal. Cut the log into 12 equal pieces using a sharp knife or pizza cutter.
- Second Rise: Place the rolls cut-side up on a greased baking sheet or in a baking dish. Cover and let them rise again for 30–45 minutes until they puff up.
- Bake the Rolls: Preheat the oven to 350°F (175°C). Sprinkle Parmesan cheese over the top if using, then bake the rolls for 20–25 minutes until golden brown.
- Cool and Serve: Let the rolls cool slightly before serving warm. For extra freshness, sprinkle with chopped parsley before serving.
Notes
- Add shredded mozzarella or cheddar to the filling for cheesy garlic rolls. To make the rolls ahead of time, refrigerate them overnight before the second rise. Always ensure your yeast is fresh and your dough rises in a warm, draft-free spot for the best texture.
- Prep Time: 20 minutes
- Cook Time: 25 minutes
- Category: Bread/Rolls
- Method: Baking
- Cuisine: American
Nutrition
- Serving Size: 1 roll
- Calories: 180
- Sugar: 2g
- Sodium: 240mg
- Fat: 8g
- Saturated Fat: 5g
- Unsaturated Fat: 2g
- Trans Fat: 0g
- Carbohydrates: 25g
- Fiber: 1g
- Protein: 3g
- Cholesterol: 35mg