
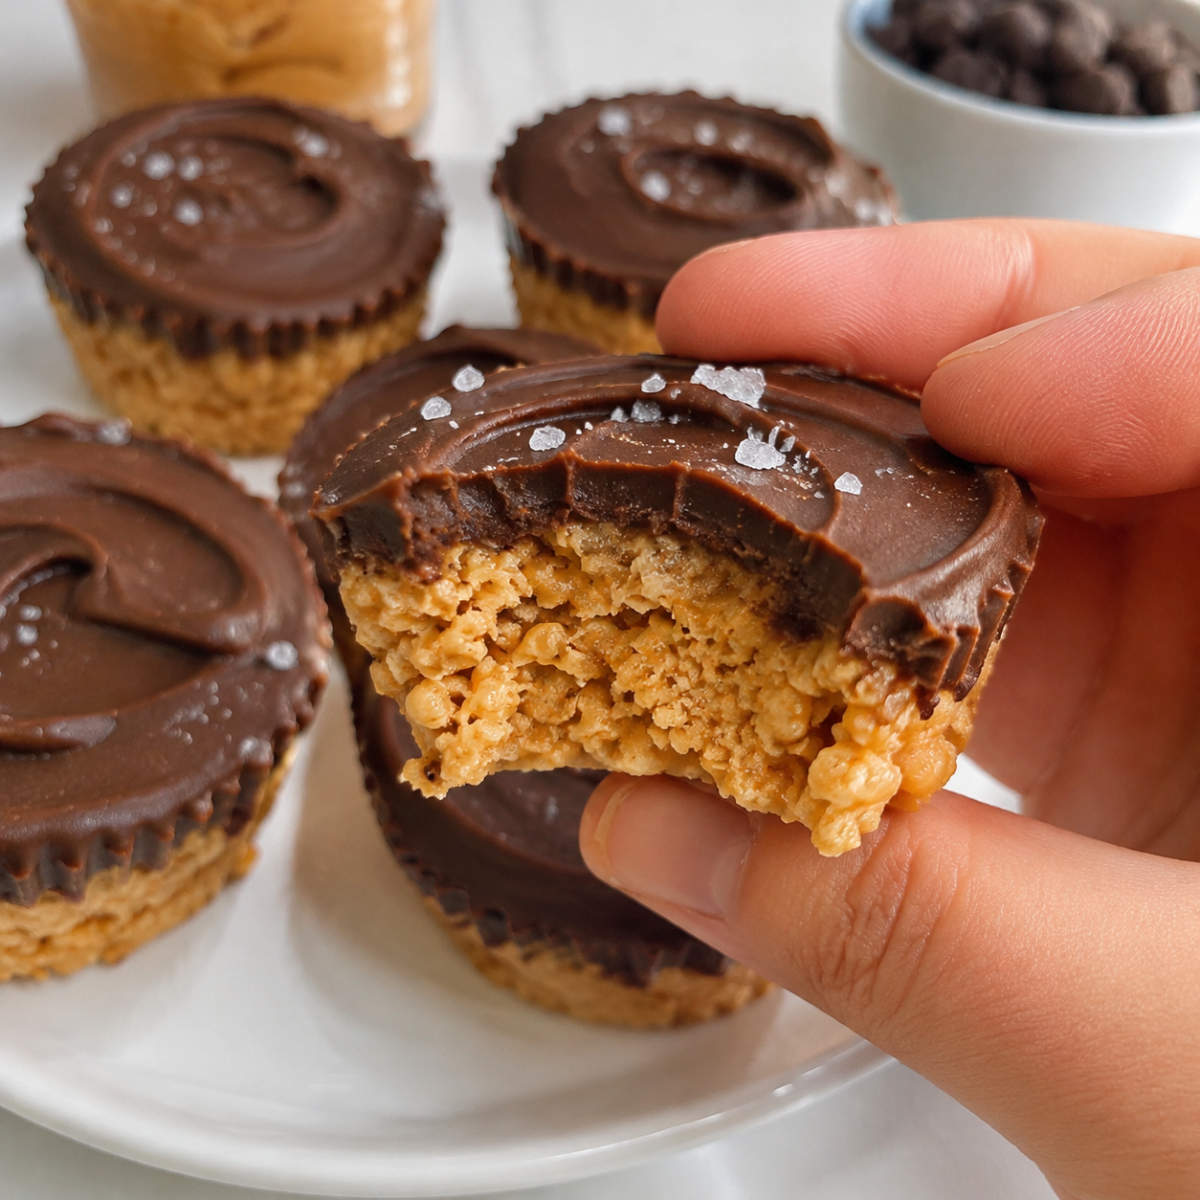
Chocolate Peanut Butter Rice Krispie Cups are the perfect combination of crispy cereal, creamy peanut butter, and rich melted chocolate. These easy no-bake treats bring together three classic ingredients to create a crunchy, sweet, and slightly salty dessert that tastes just like homemade peanut butter cups with an extra crispy twist. Best of all, you don’t need an oven, complicated equipment, or hours in the kitchen to make them.
Whether you’re preparing a dessert for a holiday gathering, looking for a quick afternoon snack, or making something special for the kids, these Chocolate Peanut Butter Rice Krispie Cups are always a delicious choice. Each little cup has a crunchy peanut butter cereal base topped with a smooth chocolate layer that becomes perfectly firm after chilling.
With only five simple ingredients and about 15 minutes of hands-on preparation, this recipe is ideal for beginner bakers and busy families. Make a batch ahead of time, keep them in the refrigerator, and enjoy a homemade chocolate peanut butter treat whenever a sweet craving strikes!
Table of Contents
What Makes These Chocolate Peanut Butter Rice Krispie Cups So Good?
There are plenty of reasons to love these easy chocolate peanut butter treats. Their simple preparation, familiar flavors, and satisfying texture make them a dessert worth keeping in your regular rotation.
- No baking required: Everything comes together on the stovetop and in the microwave. Simply assemble the cups and let the refrigerator do the rest.
- Only five ingredients: You need peanut butter, honey, salt, crispy rice cereal, and chocolate chips. No complicated shopping list!
- Perfect crunchy texture: The crispy rice cereal adds a light crunch that contrasts beautifully with the smooth peanut butter mixture and chocolate topping.
- Sweet and salty flavor: Peanut butter and chocolate create a classic combination, while a small pinch of salt balances the sweetness.
- Great for making ahead: These treats keep well in the refrigerator or freezer, making them convenient for parties and busy weeks.
- Easy to customize: You can add chopped nuts, sprinkles, sea salt, or a drizzle of extra peanut butter to make every batch your own.
If you enjoy traditional peanut butter cups but want something with more crunch, these homemade treats are a wonderful alternative.
Ingredients for Chocolate Peanut Butter Rice Krispie Cups
One of the best things about Chocolate Peanut Butter Rice Krispie Cups is that they use everyday pantry ingredients. Each ingredient has an important role in creating the right balance of flavor and texture.
- Creamy peanut butter: This is the main ingredient in the cereal base. It provides a rich, nutty flavor and helps hold the crispy rice cereal together. Creamy peanut butter creates the smoothest consistency, although chunky peanut butter works too.
- Honey: Honey adds sweetness and acts as a natural binder, helping the cereal mixture stick together when pressed into the muffin cups. Corn syrup can also be used as an alternative.
- Salt: A small pinch enhances the peanut butter flavor and balances the sweetness of the honey and chocolate.
- Rice Krispies cereal: Crispy rice cereal gives these dessert cups their signature light, crunchy texture. You can use another brand of crispy rice cereal if preferred.
- Chocolate chips: Melted chocolate creates the delicious topping. Semi-sweet chocolate offers a balanced flavor, while milk chocolate makes the cups sweeter. Dark chocolate is another excellent option for a richer finish.
Easy Ingredient Substitutions
You can easily adapt this recipe depending on what you have available.
- Almond butter: Replace peanut butter with almond butter for a different nutty flavor.
- Chunky peanut butter: Use it instead of creamy peanut butter if you enjoy additional texture.
- Corn syrup: Substitute corn syrup for honey if needed.
- Chocolate melts: Use chocolate melting wafers instead of regular chocolate chips for a smooth topping.
- Gluten-free crispy rice cereal: Choose a certified gluten-free cereal to make the recipe suitable for a gluten-free diet. Always check the ingredient labels.
- Sugar-free chocolate: Use sugar-free chocolate chips or melting chocolate if you prefer a lower-sugar topping.
Keep in mind that natural peanut butter can be softer and oilier than conventional peanut butter. Stir it thoroughly before measuring, and allow the finished cups enough time to chill.
How to Make Chocolate Peanut Butter Rice Krispie Cups
Making these homemade chocolate peanut butter cups is incredibly simple. Follow these steps for a firm, crunchy cereal base and a smooth chocolate topping.
Step 1: Prepare the Muffin Pan
Start by lining a standard muffin tin with paper liners. You can also lightly coat the cups with nonstick cooking spray if you prefer not to use liners.
Having the pan ready before mixing the ingredients makes assembly much easier because the peanut butter mixture begins to firm up as it cools.
Step 2: Melt the Peanut Butter Mixture
Add the peanut butter, honey, and a pinch of salt to a small saucepan.
Place the saucepan over medium-low heat and stir gently until everything melts together into a smooth, creamy mixture.
Avoid using high heat. Peanut butter can become overly thick or dry if heated too aggressively. You only need enough heat to soften the ingredients and combine them evenly.
Step 3: Combine with the Crispy Rice Cereal
Place the Rice Krispies cereal in a large mixing bowl.
Pour the warm peanut butter mixture over the cereal. Using a spatula or large spoon, gently stir until the cereal is evenly coated.
Make sure there are no large dry patches. The peanut butter mixture should cling to the cereal pieces without crushing them.
Step 4: Fill the Muffin Cups
Spoon the coated cereal mixture into the prepared muffin cups, filling each one approximately two-thirds full.
Use the back of a spoon or lightly greased fingers to press the mixture firmly into each cup. This step is particularly important because tightly packed cereal helps the finished Chocolate Peanut Butter Rice Krispie Cups maintain their shape.
Try to distribute the mixture evenly so all the cups have a similar size and thickness.
Step 5: Melt the Chocolate Chips
Place the chocolate chips in a microwave-safe bowl.
Microwave in 20–30-second intervals, stirring between each interval. Continue until the chocolate is completely melted and smooth.
Do not overheat the chocolate. Short heating intervals help prevent scorching and keep the chocolate easy to spread.
Step 6: Add the Chocolate Topping
Spoon the melted chocolate over each peanut butter cereal cup.
Spread the chocolate gently with the back of a spoon to create an even layer that covers the surface.
For a more decorative finish, you can sprinkle a little chopped peanut or flaky sea salt over the chocolate before it sets.
Step 7: Refrigerate Until Firm
Transfer the muffin tin to the refrigerator and chill for approximately 30 minutes, or until the chocolate topping has completely hardened.
The chilling process helps the peanut butter cereal mixture hold together and gives the chocolate a firm, satisfying snap.
Step 8: Serve and Enjoy
Once the chocolate has set, remove the cups from the muffin tin and peel away the paper liners if using them.
Serve the Chocolate Peanut Butter Rice Krispie Cups chilled for the best texture. Each bite delivers crispy cereal, creamy peanut butter, and a delicious chocolate finish!
Tips for Perfect Chocolate Peanut Butter Rice Krispie Cups
A few simple techniques can make a big difference in the final result.
- Use medium-low heat: Gently warm the peanut butter and honey rather than boiling the mixture. Overheating can make the cereal base dry and crumbly.
- Work while the mixture is warm: Pour the peanut butter mixture over the cereal while it is still warm and easy to distribute.
- Press the cereal firmly: This is one of the most important steps. If the mixture is loosely packed, the cups may fall apart when removed from the liners.
- Don’t crush the cereal: Stir gently to preserve the crispy texture of the rice cereal.
- Melt chocolate slowly: Microwave in short intervals and stir frequently to achieve a smooth consistency.
- Use a silicone muffin pan: Silicone makes it particularly easy to remove the finished cups without damaging their shape.
- Allow enough chilling time: Make sure the chocolate topping is completely firm before removing the cups from the pan.
If your mixture seems too crumbly, it may have been overheated or contain too much cereal for the amount of peanut butter mixture. A little additional peanut butter can help bring everything together.
Fun Variations to Try
One of the best features of these no-bake chocolate peanut butter treats is how easy they are to customize.
Make Mini Chocolate Peanut Butter Cups
Use a mini muffin pan instead of a standard muffin tin to create bite-sized desserts. These smaller portions are ideal for holiday dessert trays, birthday parties, and potlucks.
Keep an eye on the filling level so the cereal mixture is evenly distributed between the smaller cups.
Add a Crunchy Topping
Sprinkle chopped peanuts, toasted almonds, or crushed pretzels over the melted chocolate before refrigerating. These additions create extra crunch and complement the peanut butter flavor.
Try Different Chocolate Flavors
Experiment with semi-sweet, milk, or dark chocolate chips. You can even combine two types of chocolate to create a layered topping with contrasting flavors.
Make Chocolate Peanut Butter Rice Krispie Bars
If you don’t want to prepare individual cups, turn this recipe into easy dessert bars.
Instead of using a muffin tin, press the peanut butter cereal mixture firmly into a greased or parchment-lined 8-by-8-inch baking pan. Spread the melted chocolate evenly over the top and refrigerate until set.
For cleaner slices, allow the chocolate to begin firming before scoring it into squares. Return the pan to the refrigerator until completely firm, then cut and serve.
Add a Decorative Chocolate Drizzle
After the chocolate topping has set, drizzle a little melted peanut butter or contrasting chocolate over each cup. This simple finishing touch makes the treats look especially attractive on a dessert platter.
How to Store Chocolate Peanut Butter Rice Krispie Cups
Proper storage helps maintain the crunchy cereal texture and prevents the chocolate topping from becoming too soft.
At room temperature: Store the cups in an airtight container for up to five days in a cool environment. If your kitchen is warm, refrigeration is a better option because the chocolate can soften.
In the refrigerator: Keep Chocolate Peanut Butter Rice Krispie Cups in an airtight container for up to two weeks. Separate layers with parchment paper to prevent them from sticking together.
In the freezer: These treats freeze beautifully for up to three months. Arrange them in a freezer-safe container, separating the layers with parchment paper. Thaw them in the refrigerator before serving.
Can You Make Them Ahead?
Absolutely! These no-bake dessert cups are excellent for preparing in advance.
Make a batch a day or two before a party, allow the chocolate to set completely, and store the cups in an airtight container in the refrigerator.
You can also freeze them well ahead of time and thaw only the amount you need.
What to Serve with These Chocolate Peanut Butter Treats
Chocolate Peanut Butter Rice Krispie Cups are delicious on their own, but they also make a wonderful addition to a larger dessert spread.
Here are a few serving ideas:
- Fresh strawberries: Their slightly tart flavor balances the sweetness of the chocolate and peanut butter.
- Vanilla ice cream: Serve a cup alongside a scoop of vanilla ice cream for an easy dessert combination.
- Chocolate brownies: Add them to a chocolate-themed dessert platter with fudgy brownies and chocolate chip cookies.
- Fresh fruit platter: Pair them with grapes, apple slices, and berries for a colorful party spread.
- Coffee or hot chocolate: Enjoy one with your favorite warm drink for a simple afternoon treat.
For holidays, arrange the cups in decorative paper liners and serve them alongside cookies, fudge, and other homemade sweets.
A Simple No-Bake Dessert Everyone Will Love
These Chocolate Peanut Butter Rice Krispie Cups are proof that delicious homemade desserts don’t need complicated ingredients or hours of preparation. With their crispy cereal base, creamy peanut butter flavor, and smooth chocolate topping, they make an irresistible treat for everyday snacking, family gatherings, and special occasions.
Prepare a batch ahead of time, keep them chilled, and enjoy a little chocolate peanut butter goodness whenever you like. Once you try these easy no-bake cups, they’ll quickly become a favorite addition to your homemade dessert collection!
Frequently Asked Questions
Do Chocolate Peanut Butter Rice Krispie Cups Need to Be Refrigerated?
They do not have to be refrigerated immediately if your kitchen is cool, but refrigeration is recommended. It helps the chocolate topping stay firm and keeps the cups in their best shape. They are especially delicious served chilled.
Why Are My Rice Krispie Peanut Butter Cups Falling Apart?
The most common reason is that the cereal mixture was not pressed firmly enough into the muffin cups. Make sure to pack the mixture tightly so the peanut butter and honey can hold the cereal pieces together.
Overheating the peanut butter mixture can also make the base dry and crumbly. Warm it gently and avoid cooking it for too long.
Can I Use Natural Peanut Butter?
Yes! Natural peanut butter works, but make sure to stir it thoroughly before using it. Since natural varieties can have a thinner consistency, the finished cups may need additional chilling time to firm up properly.
More Relevant Recipes
- Easy Rainbow Sherbet Punch Recipe for Parties
- Old-Fashioned Brown Sugar Fudge (Creamy Penuche)
- Easy Grinch Christmas Crack – A Festive Holiday Treat

Chocolate Peanut Butter Rice Krispie Cups
- Total Time: 45 minutes
- Yield: 16 cups
- Diet: Vegetarian
Description
Chocolate Peanut Butter Rice Krispie Cups are easy no-bake treats made with creamy peanut butter, honey, crispy rice cereal, and a smooth chocolate topping. These crunchy, sweet, and salty dessert cups are perfect for parties, holidays, lunchboxes, or an everyday sweet snack.
Ingredients
- 1 cup creamy peanut butter (chunky peanut butter also works)
- 6 tablespoons honey
- 1 pinch salt
- 3 cups Rice Krispies cereal (or any crispy rice cereal)
- 2 cups chocolate chips (semi-sweet, milk, or dark chocolate), melted
Instructions
- Line a standard muffin tin with paper liners or lightly coat it with nonstick cooking spray.
- In a small saucepan over medium-low heat, combine the peanut butter, honey, and salt. Stir gently until the mixture is melted, smooth, and creamy.
- Place the Rice Krispies cereal in a large mixing bowl. Pour the warm peanut butter mixture over the cereal.
- Gently stir until the cereal is evenly coated with the peanut butter mixture.
- Spoon the mixture into the prepared muffin cups, filling each about two-thirds full. Press firmly with the back of a spoon to help the cups hold together.
- Place the chocolate chips in a microwave-safe bowl. Microwave in 20–30-second intervals, stirring between each interval until completely melted and smooth.
- Spoon the melted chocolate over each cereal cup and spread evenly to cover the tops.
- Refrigerate for approximately 30 minutes, or until the chocolate is completely firm. Remove from the muffin tin and serve chilled.
Notes
- Use creamy peanut butter for the smoothest texture, or chunky peanut butter for extra crunch.
- Heat the peanut butter and honey gently over medium-low heat to prevent the mixture from becoming dry or crumbly.
- Press the cereal mixture firmly into the muffin cups so the finished treats hold their shape.
- Use a mini muffin pan to make bite-sized chocolate peanut butter cups.
- For peanut butter Rice Krispie bars, press the mixture into an 8-by-8-inch pan, add the melted chocolate, refrigerate until firm, and slice into squares.
- Semi-sweet, milk, and dark chocolate chips all work well.
- Store in an airtight container at room temperature for up to 5 days, or refrigerate for up to 2 weeks.
- Freeze in an airtight container for up to 3 months. Thaw in the refrigerator before serving.
- Prep Time: 15 minutes
- Cook Time: 0 minutes
- Category: Dessert, Snack
- Method: No-Bake
- Cuisine: American
Nutrition
- Serving Size: 1 cup
- Calories: 310 kcal
- Sugar: 19 g
- Sodium: 107 mg
- Fat: 20 g
- Saturated Fat: 8 g
- Unsaturated Fat: undefined
- Trans Fat: undefined
- Carbohydrates: 30 g
- Fiber: 3 g
- Protein: 6 g
- Cholesterol: 2 mg